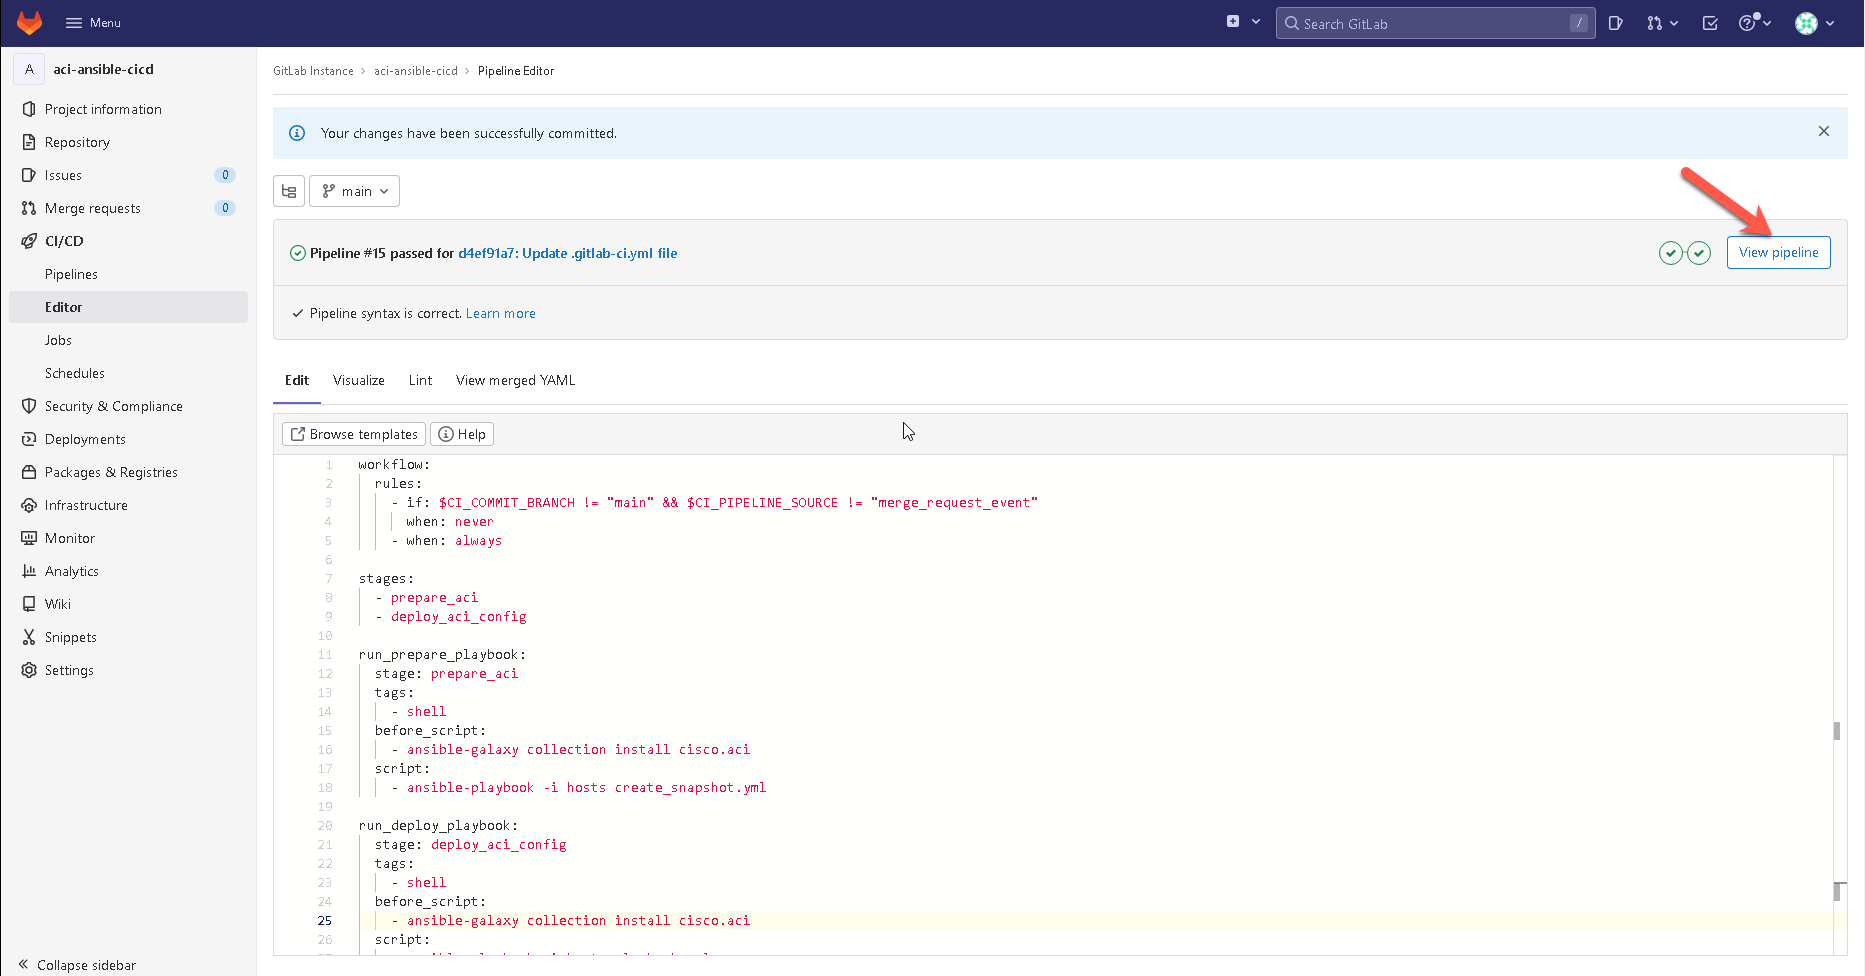
workflow:
rules:
- if: $CI_COMMIT_BRANCH != "main" && $CI_PIPELINE_SOURCE != "merge_request_event"
when: never
- when: always
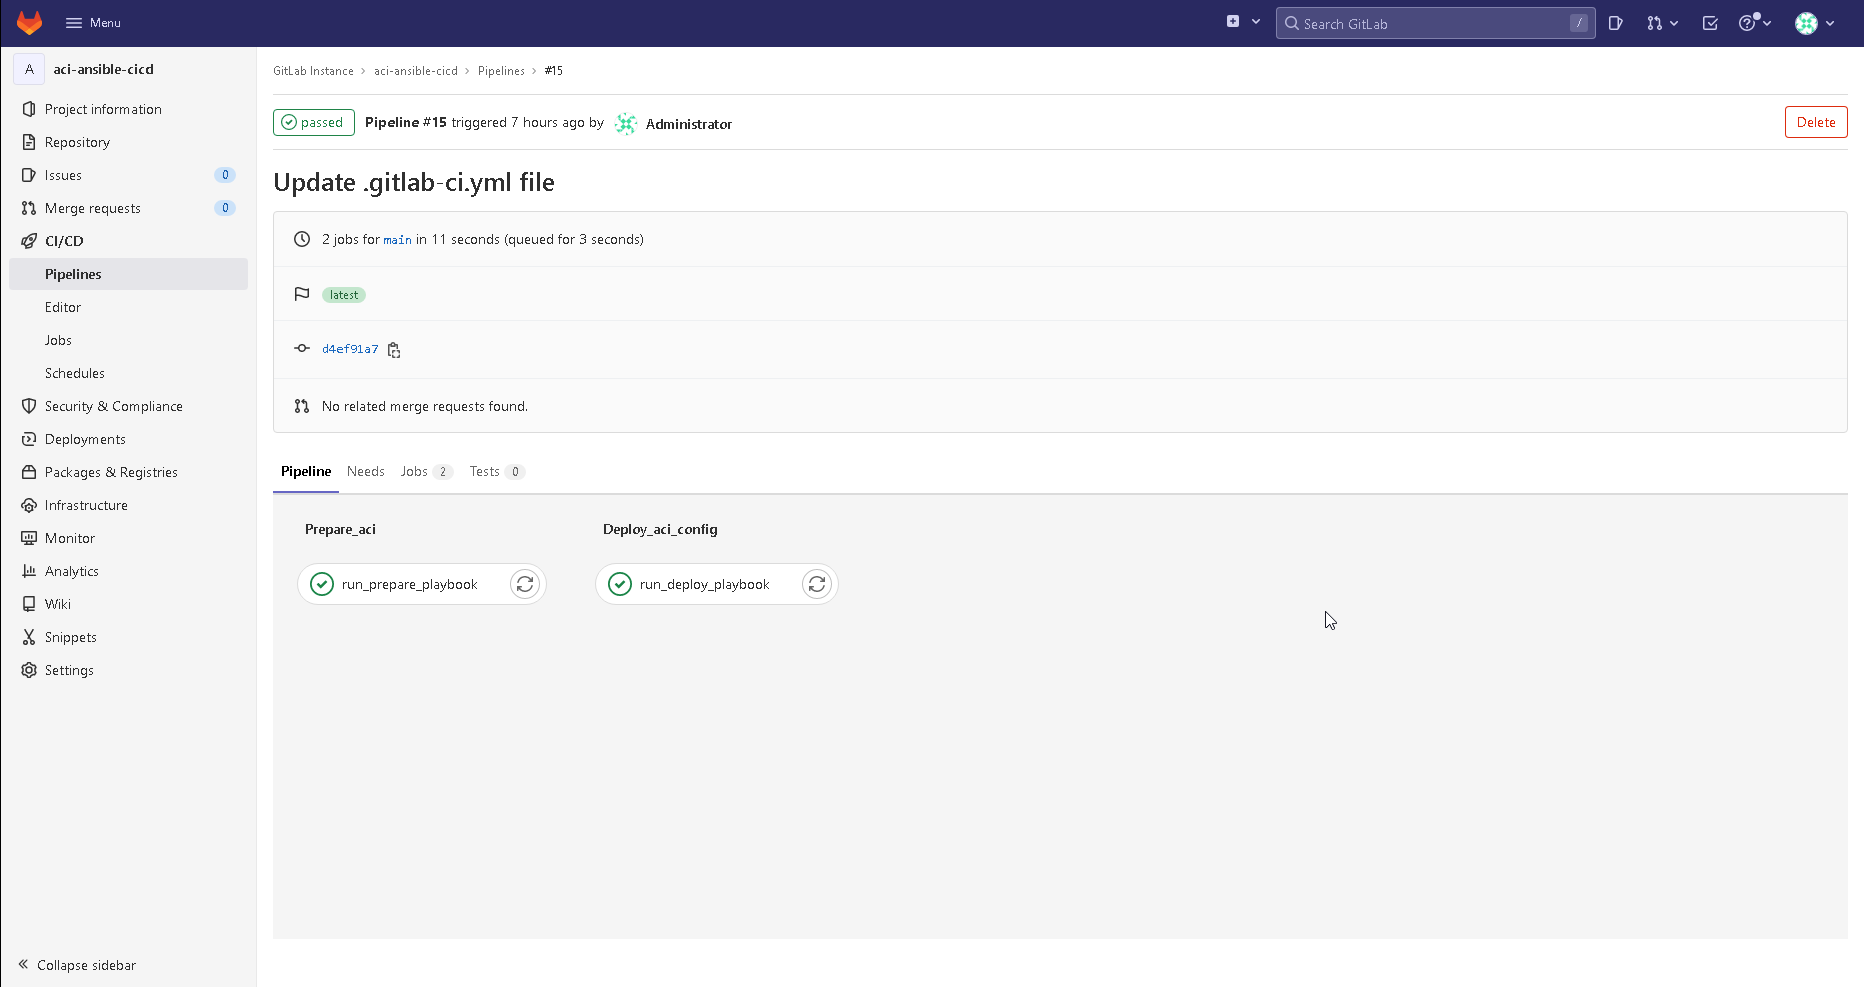
stages:
- prepare_aci
- deploy_aci_config
run_prepare_playbook:
stage: prepare_aci
tags:
- shell
before_script:
- ansible-galaxy collection install cisco.aci
script:
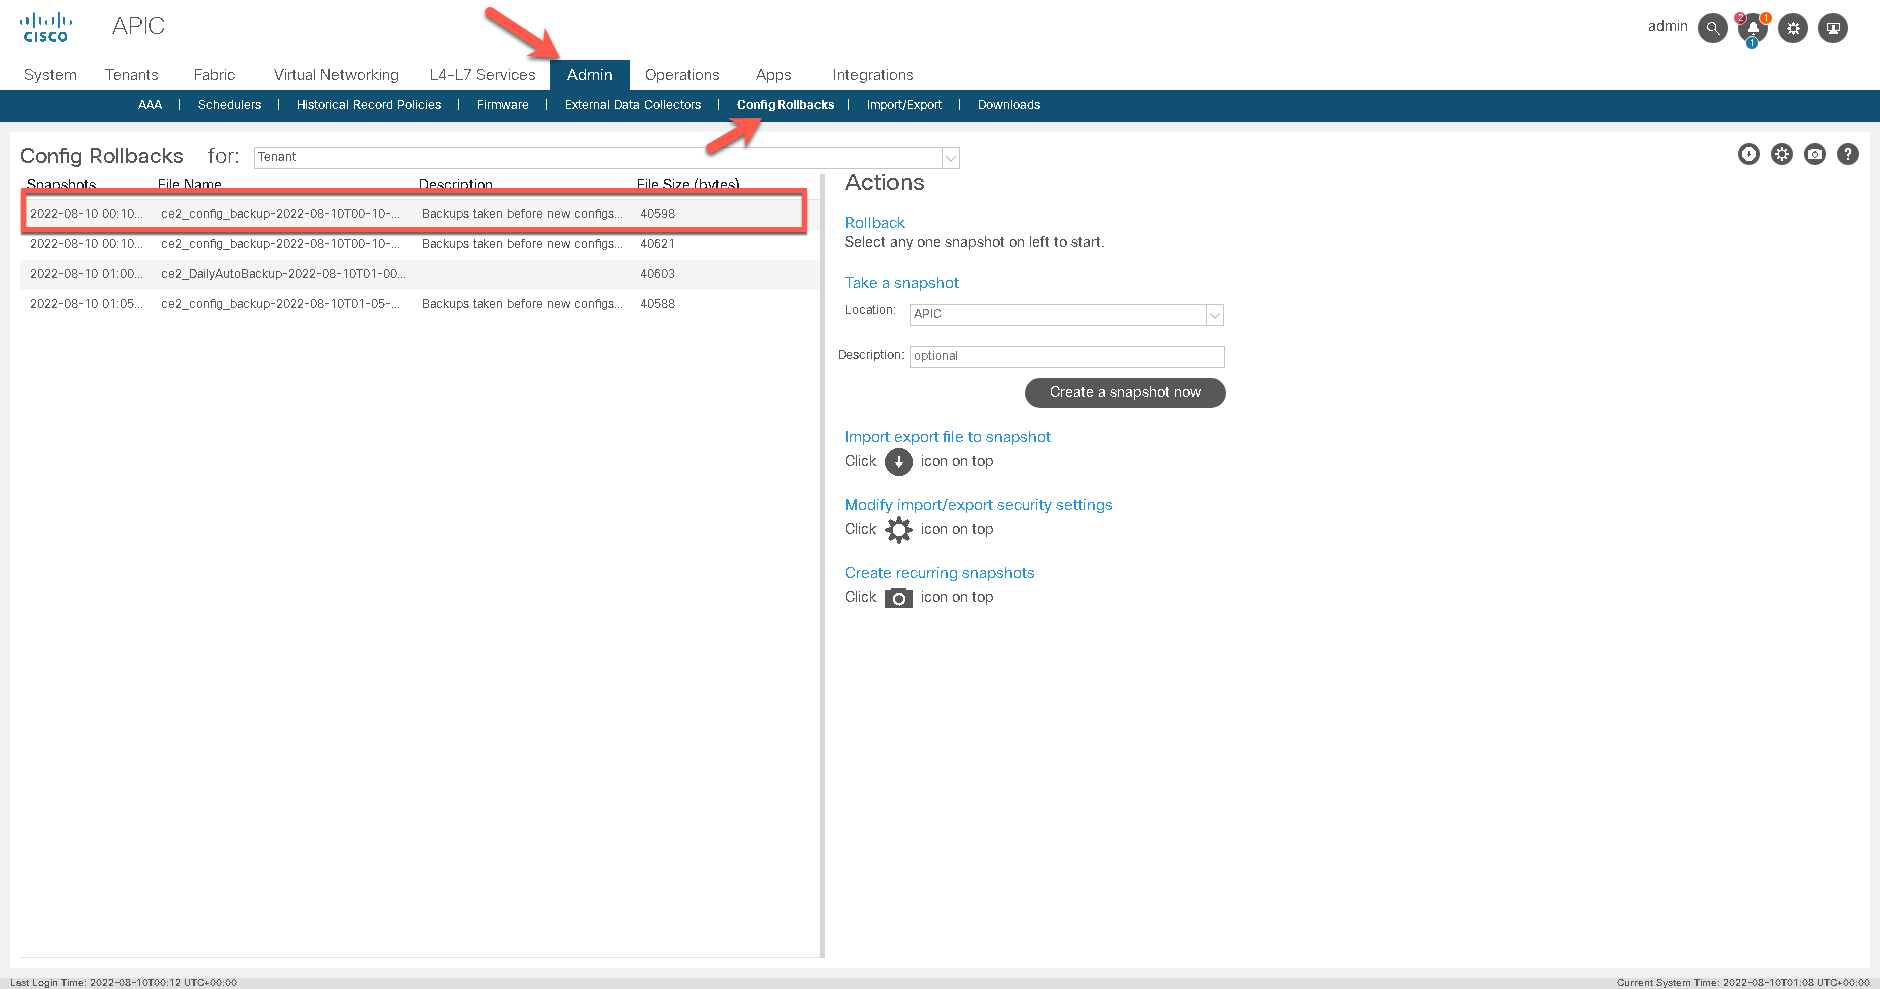
- ansible-playbook -i hosts create_snapshot.yml
run_deploy_playbook:
stage: deploy_aci_config
tags:
- shell
before_script:
- ansible-galaxy collection install cisco.aci
script:
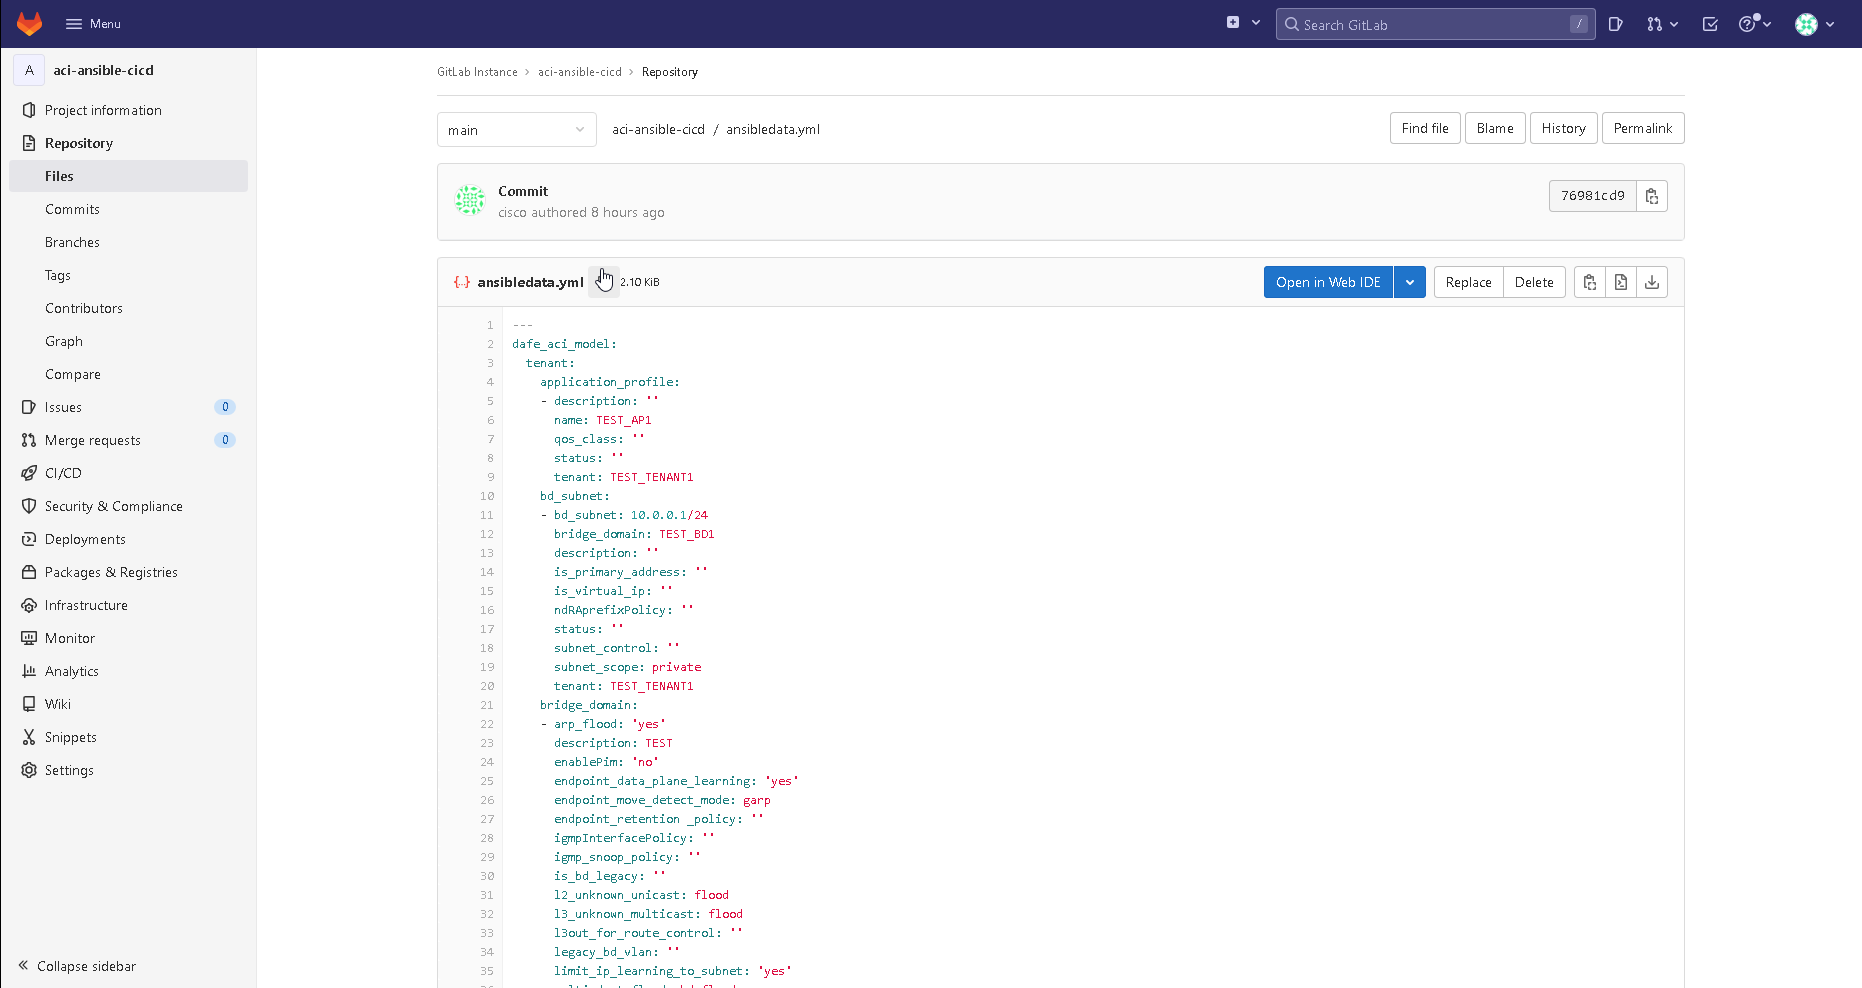
- ansible-playbook -i hosts playbook.yml