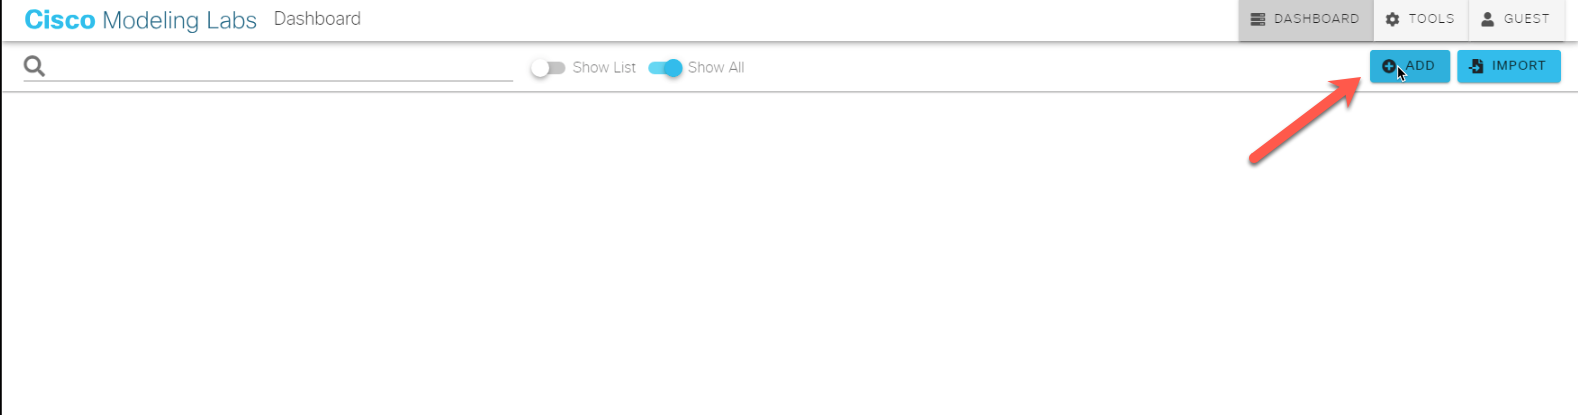
Once you are logged it, create a lab via the ADD button located at the top right:
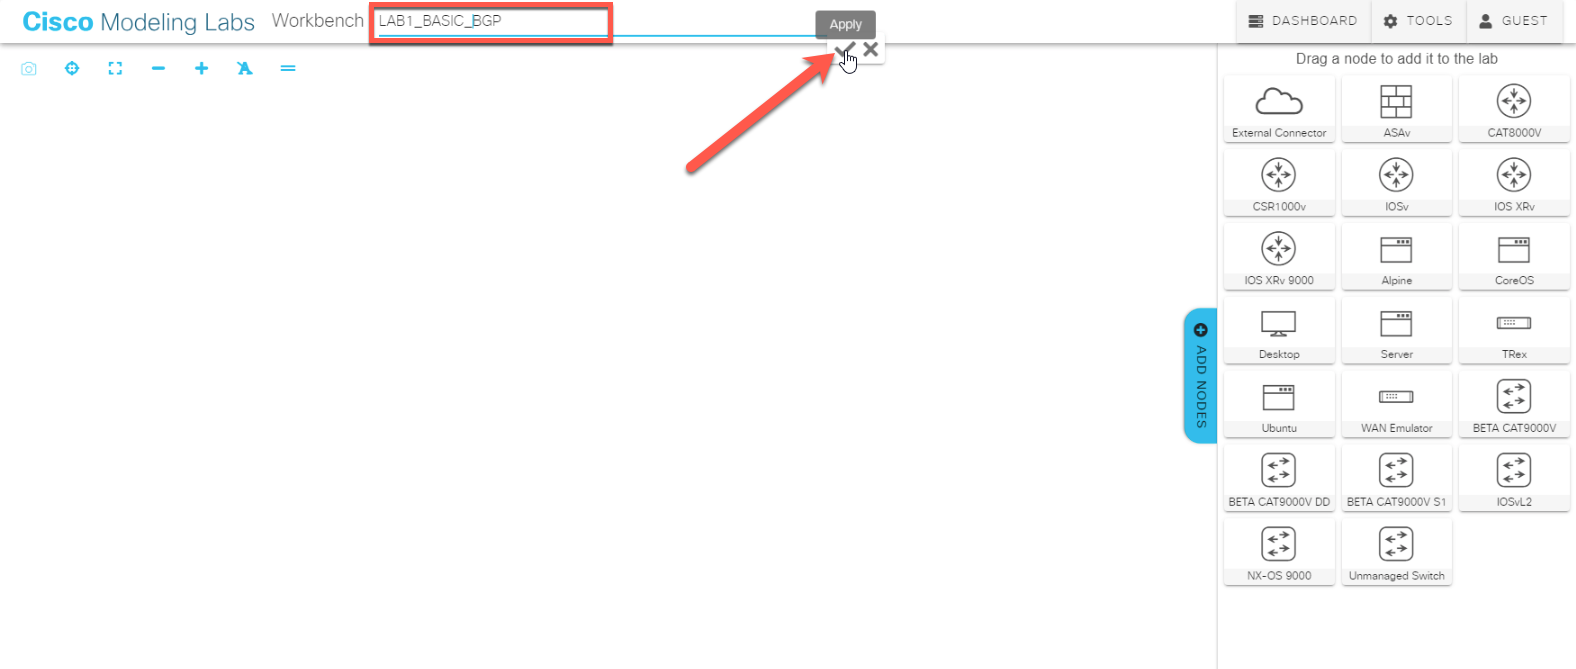
Rename the lab to: LAB1_BASIC_BGP
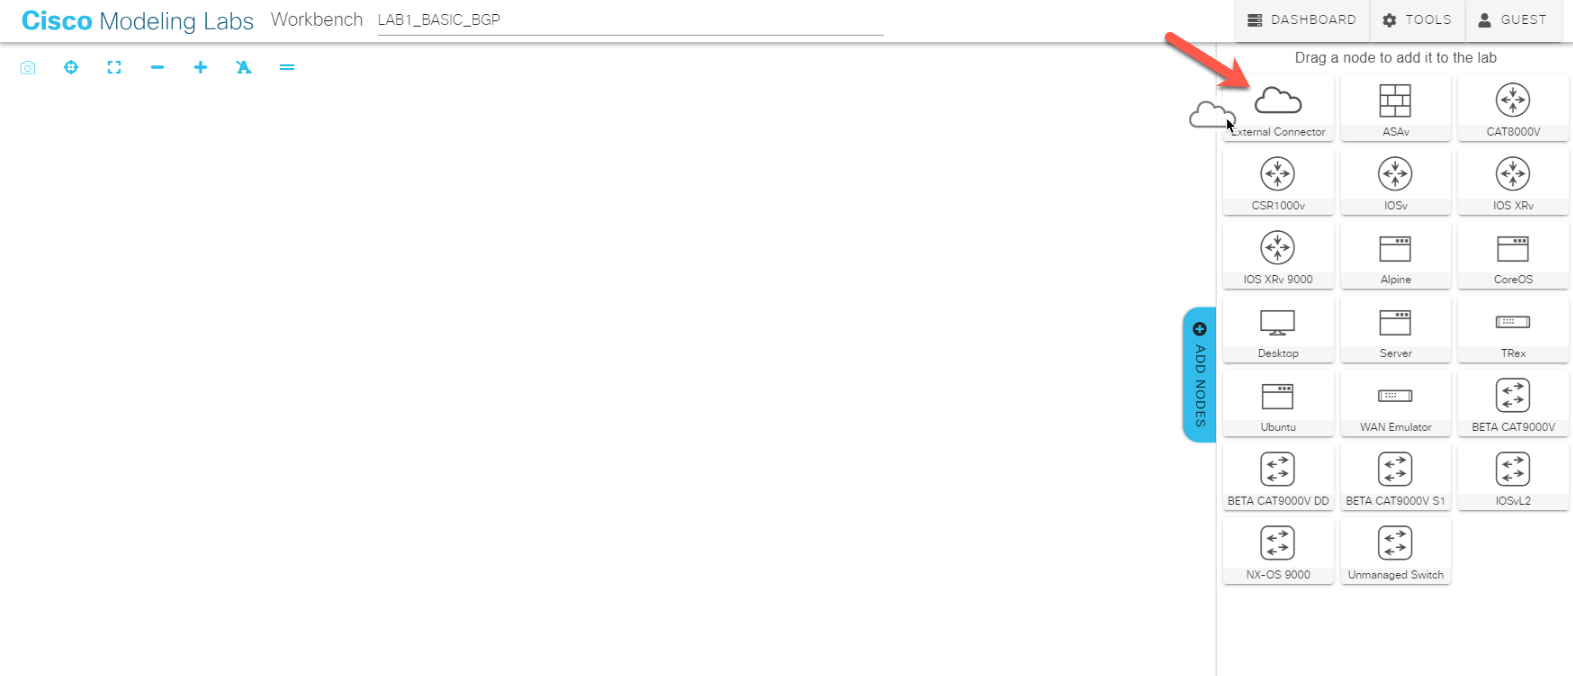
Now start building by dragging the nodes from the left to the middle of the workspace. Start with the External Connector.
Also, add:
1x Unmanaged Switch
2x CAT8000V
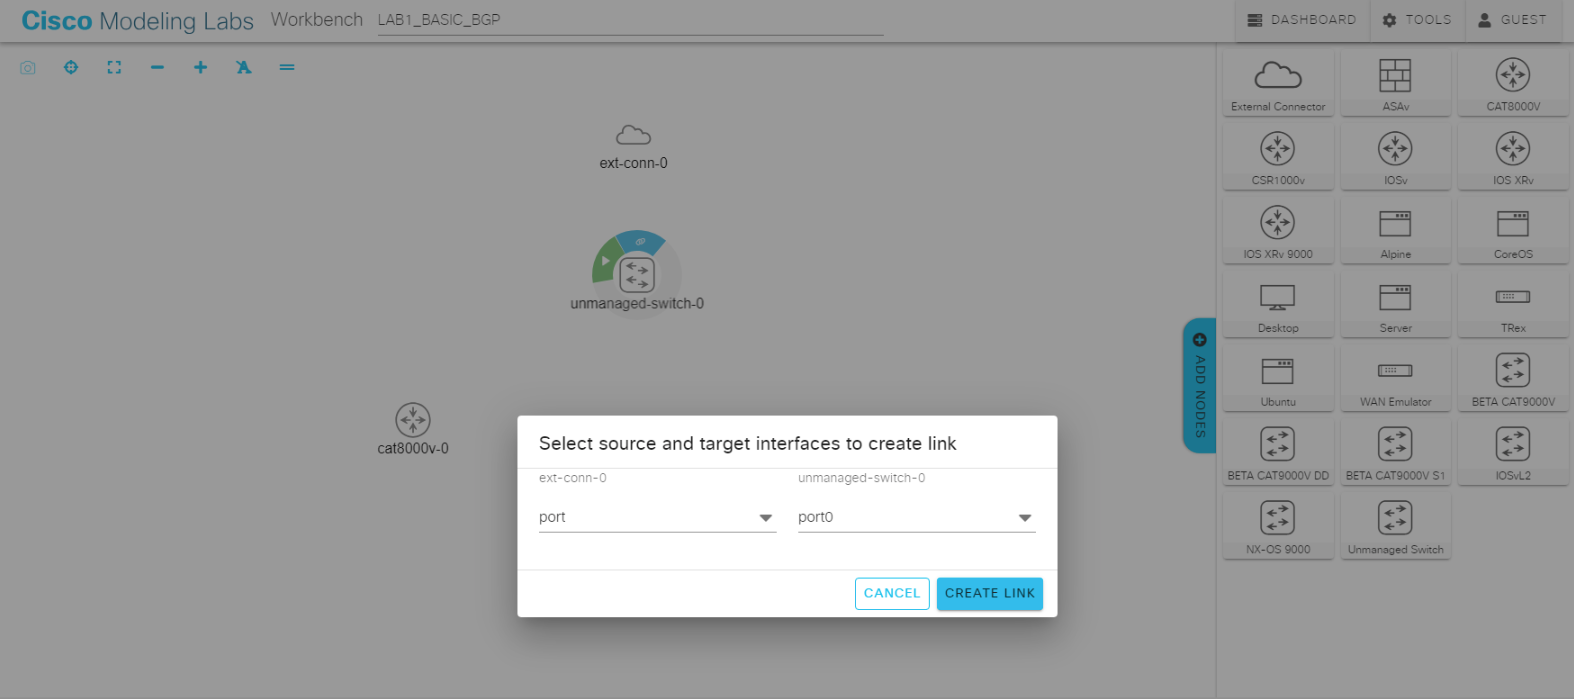
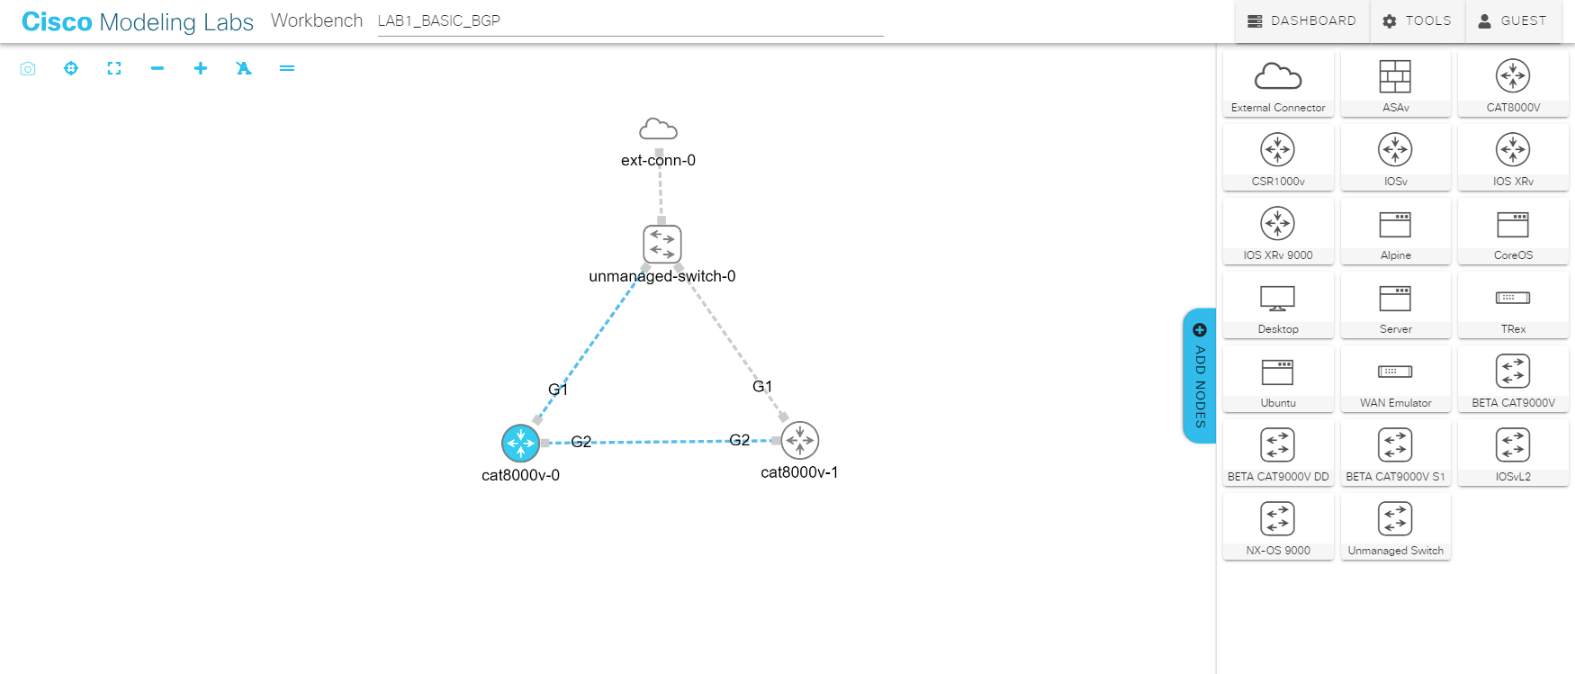
Place the nodes like in the picture below and connect the nodes starting from the ext-conn-0 by clicking on the blue connect button while you hover over the node.
While holding down your mouse button drag the connection line to the unmanaged-switch-0 icon.
Once the Select source and target interfaces to create link window pops up, click CREATE LINK
Now two nodes are connected.
Continue with rest of connections.
Make sure Gigabit1 on both Catalyst8000 is connected to the unmanaged-switch-0 and Gigabit2 connects both Catalyst8000 devices.
The end result should look like this:
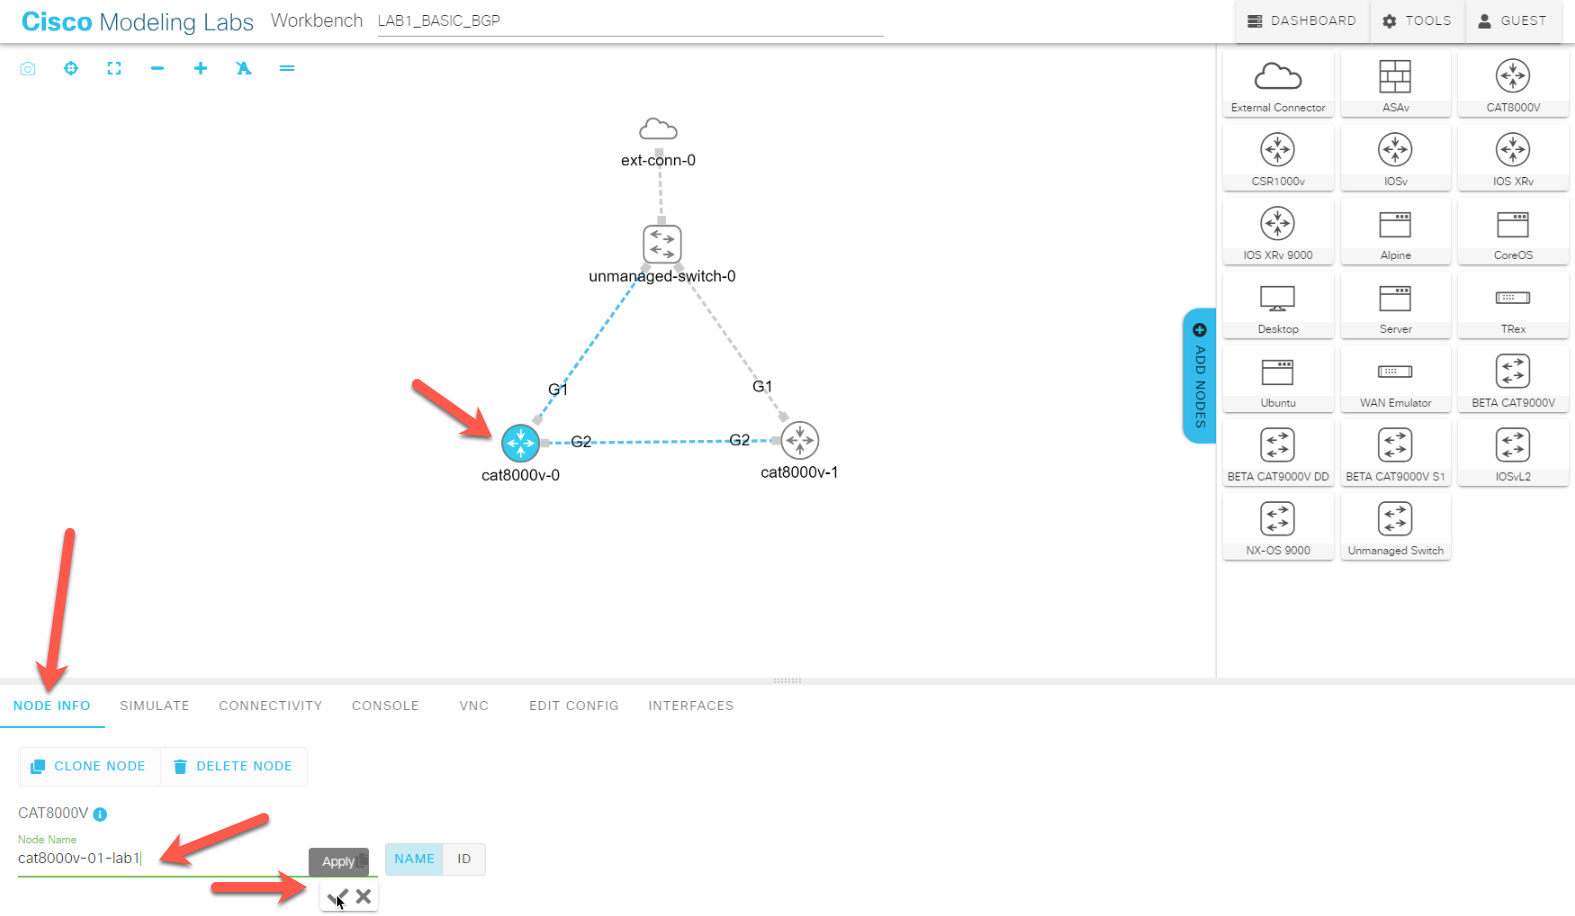
Rename the Catalyst8000 devices accordingly to cat8000v-01-lab1 and cat8000v-02-lab1 as shown in the screenshot. Click on the node and change the name under node info.
Edit the ext-conn-0 node to bridge the virtual network to your network using a bridge.
Change the Custom Bridge Name value from virbr0 to bridge1 (no spaces). This will bridge this topology into the CML VM’s eth1 interface that currently sits in the 198.18.1.0/24 network.
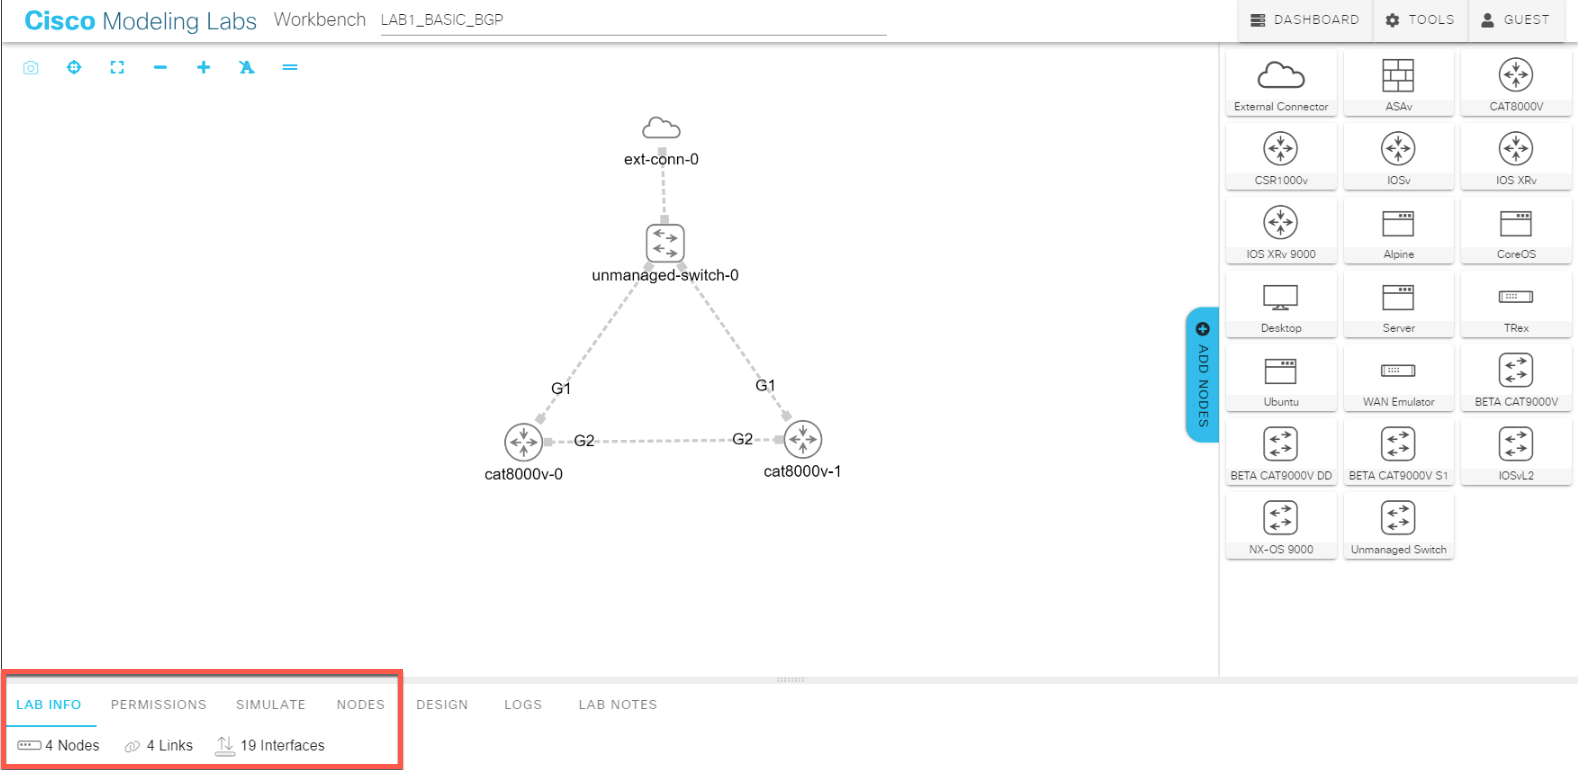
You should now have: 4 nodes, 4 links and 19 interfaces
Click on a white space on the workspace and click on Lab Info to see the information.
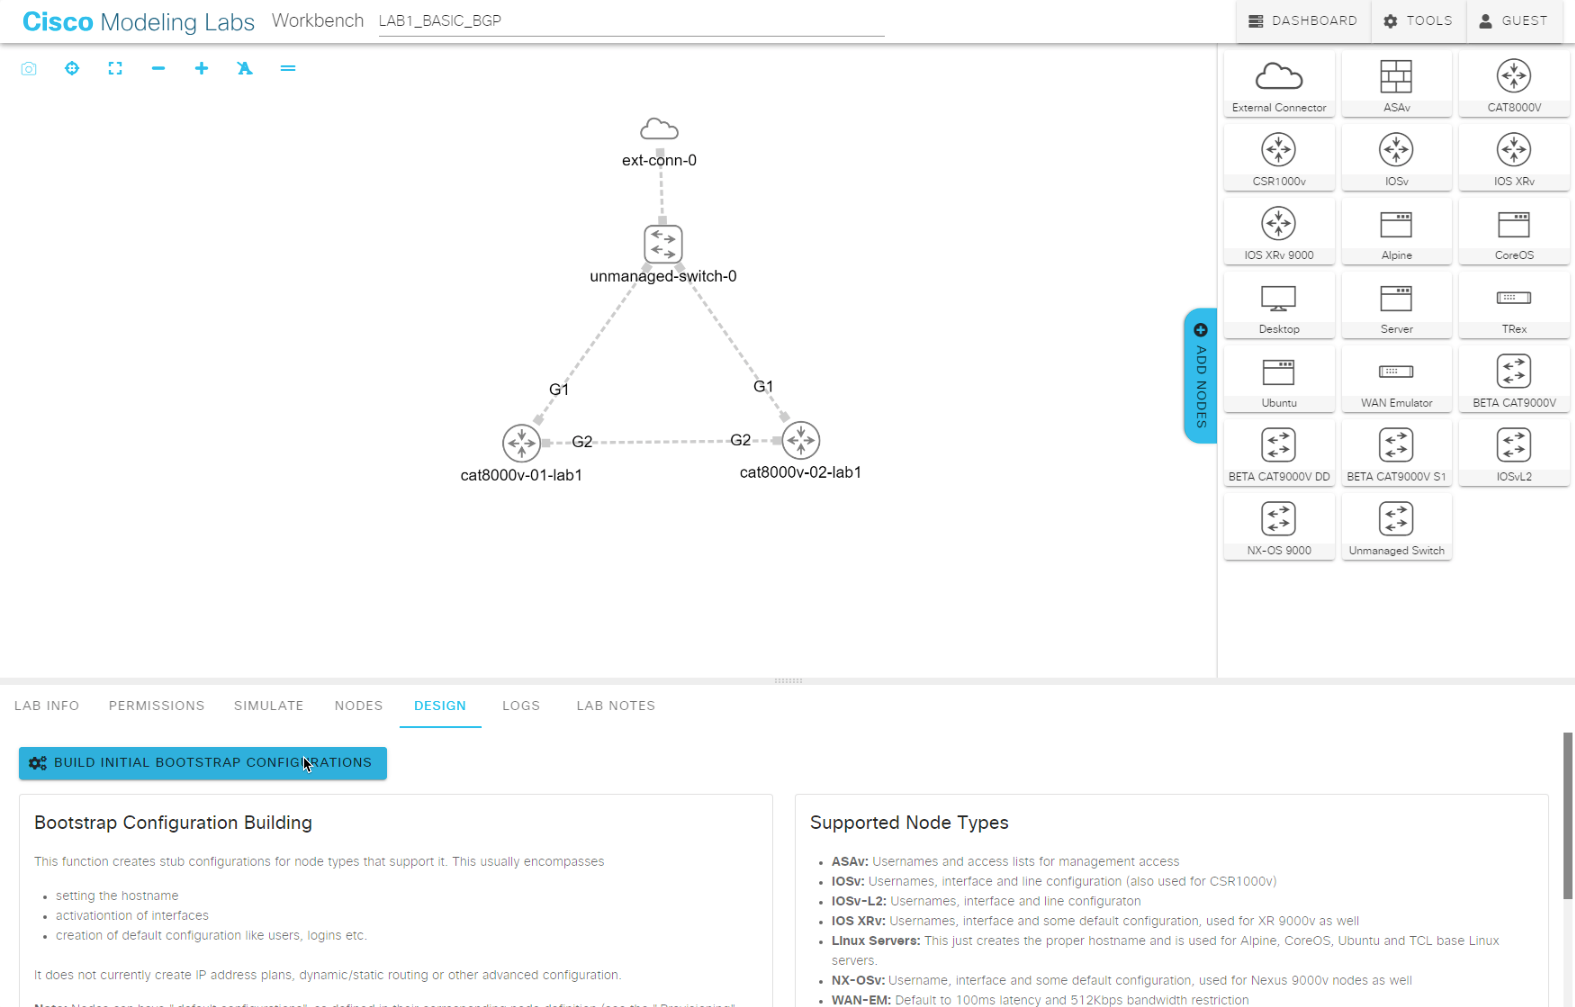
Now it is time to generate the bootstrap configuration for the devices. Click on: Design and Build Initial Bootstrap Configuration.
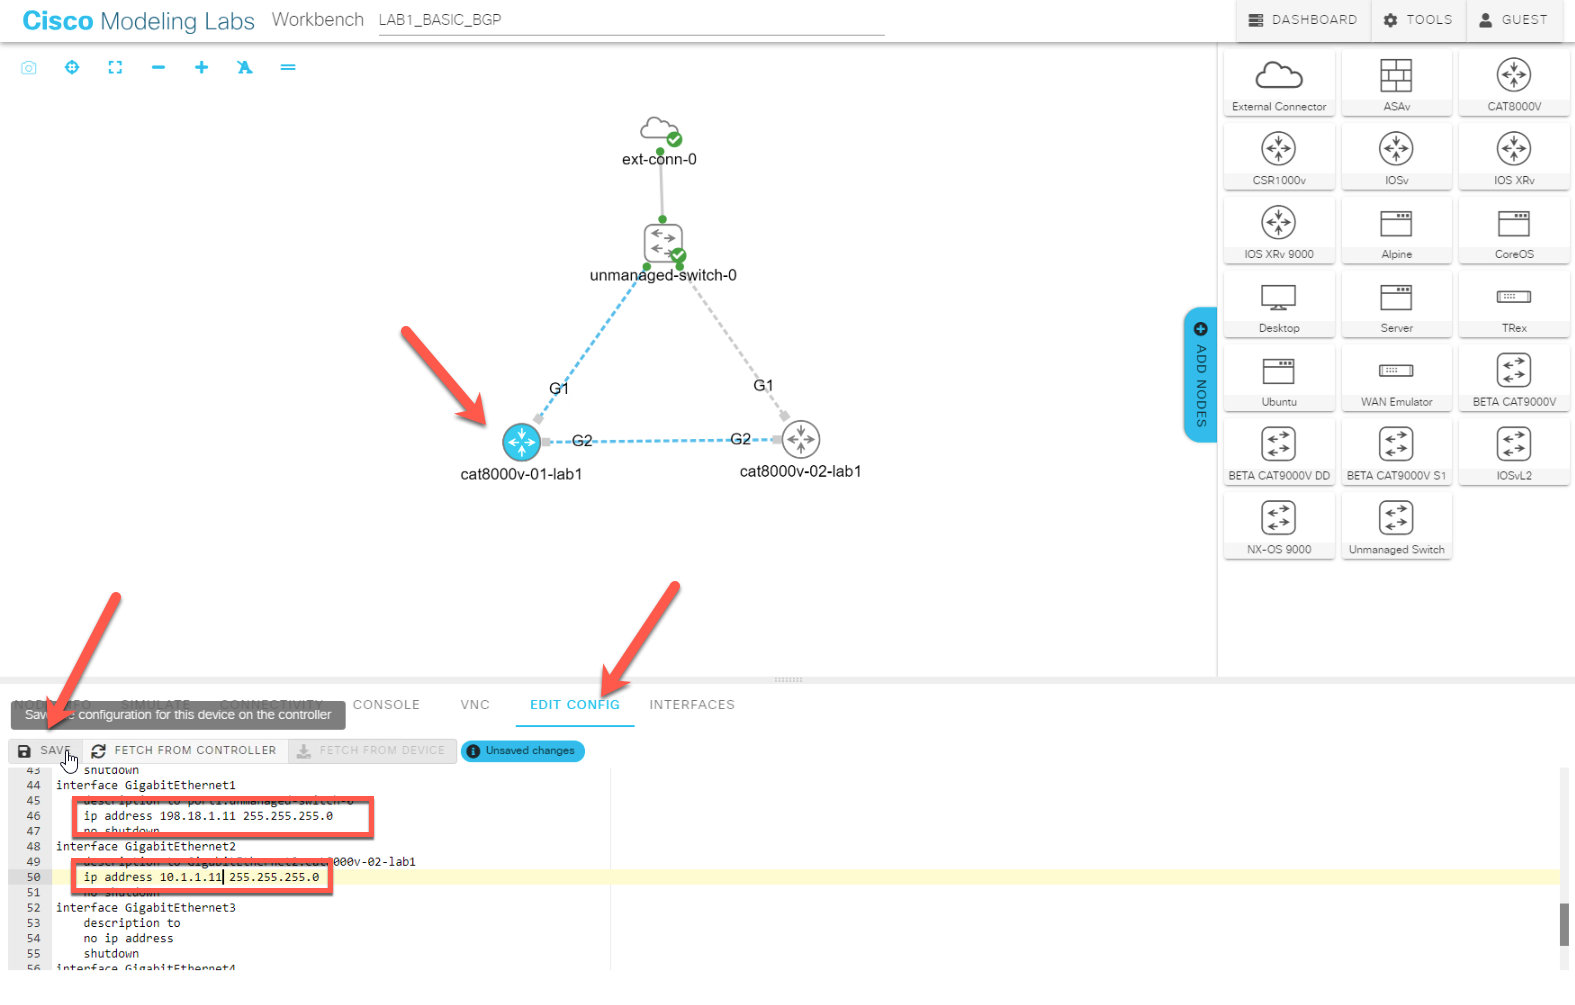
Check the generated config under each node. Click on the cat8000v-01-lab1 and edit config.
To be able to connect to the node directly after it is booted change the interface config of both devices by removing the no ip address statement and adding the IP addresses and default route like in the code example below:
					!cat8000v-01-lab1
!
interface GigabitEthernet1
 ip address 198.18.1.11 255.255.255.0
!
interface GigabitEthernet2
 ip address 10.1.1.11 255.255.255.0
!
ip route 0.0.0.0 0.0.0.0 198.18.1.1
					!cat8000v-02-lab1
!
interface GigabitEthernet1
 ip address 198.18.1.12 255.255.255.0
!
interface GigabitEthernet2
 ip address 10.1.1.12 255.255.255.0
!
ip route 0.0.0.0 0.0.0.0 198.18.1.1
ATTENTIONClick on the save button!
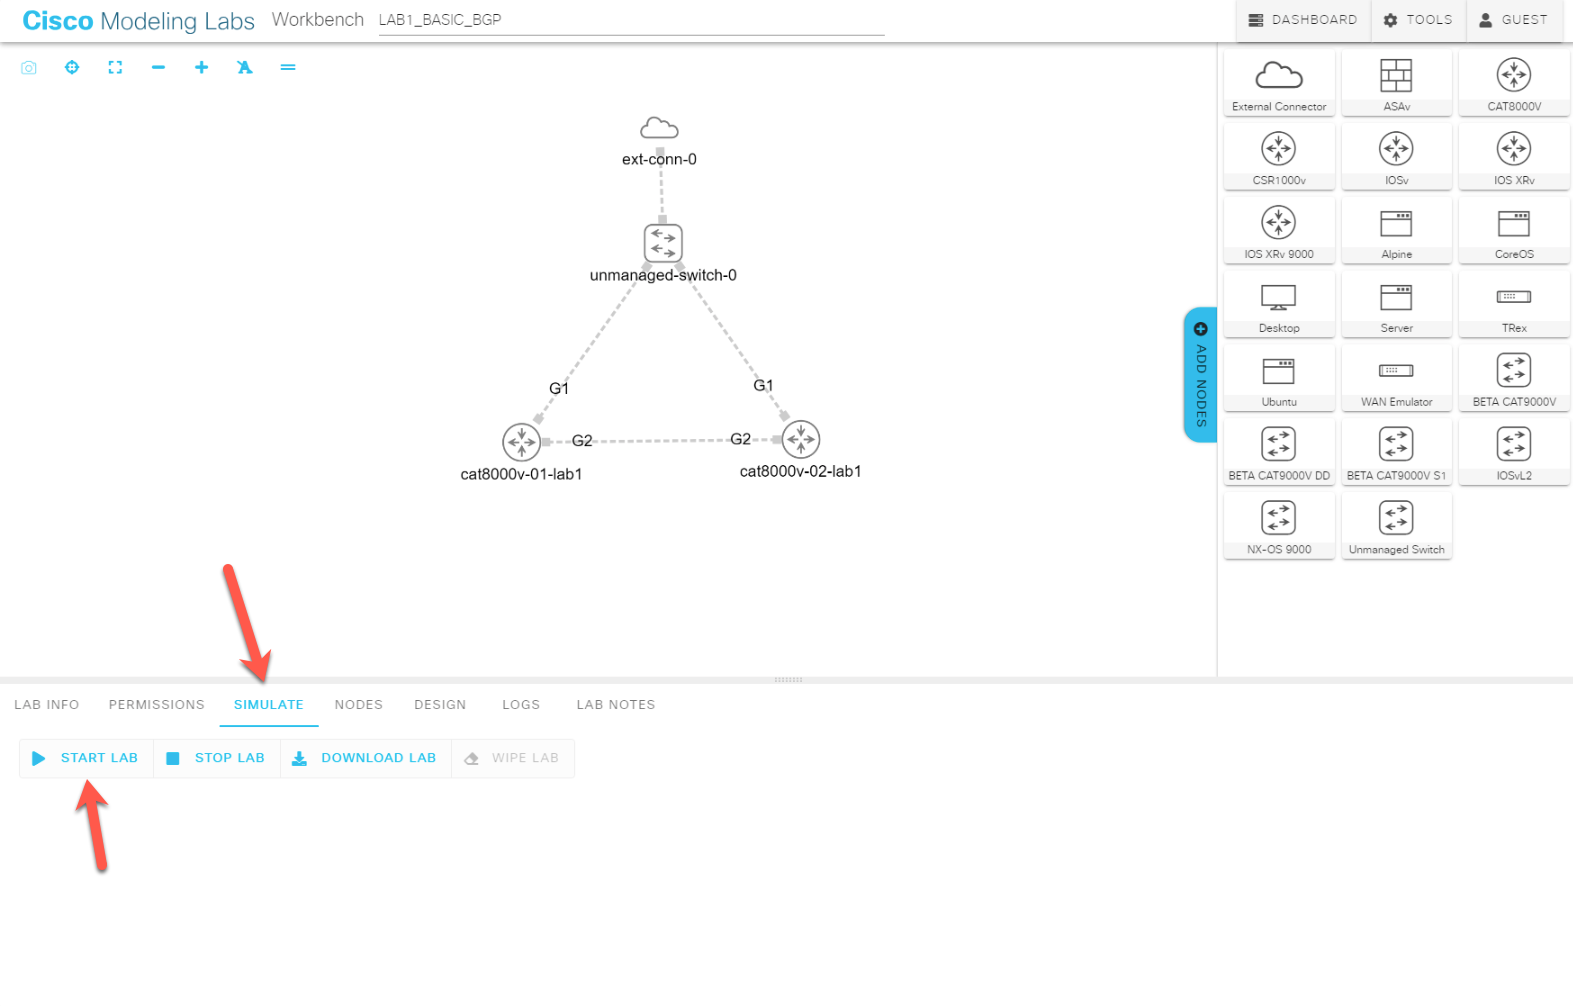
Now it is time to start the lab. Click on a blank spot and on Simulate and Start Lab
It will take some time until the lab is available and accessible.
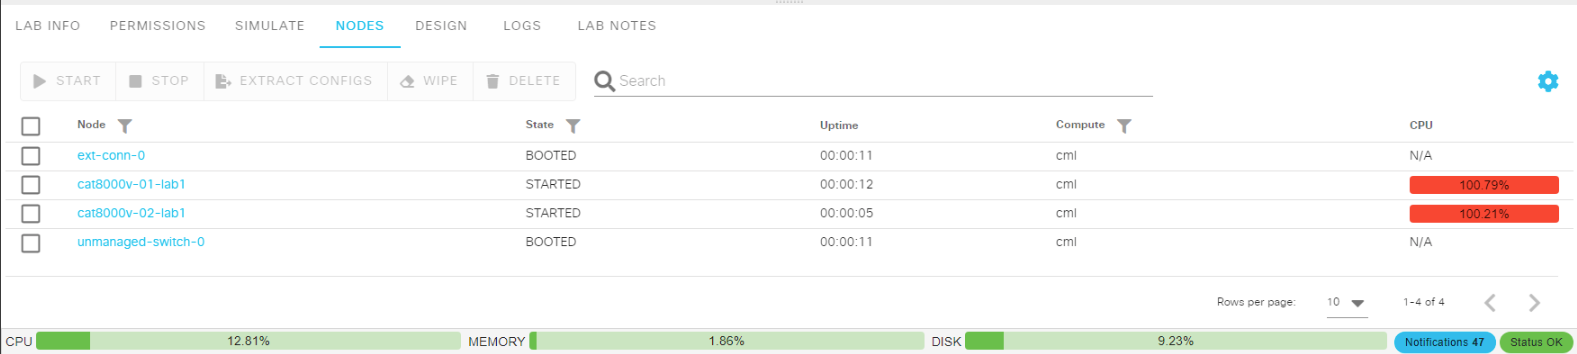
You see that the nodes are starting to consume resources and the status of the node:
You can connect to the console by clicking on the terminal icon, which will show the booting process like connected to a console cable:
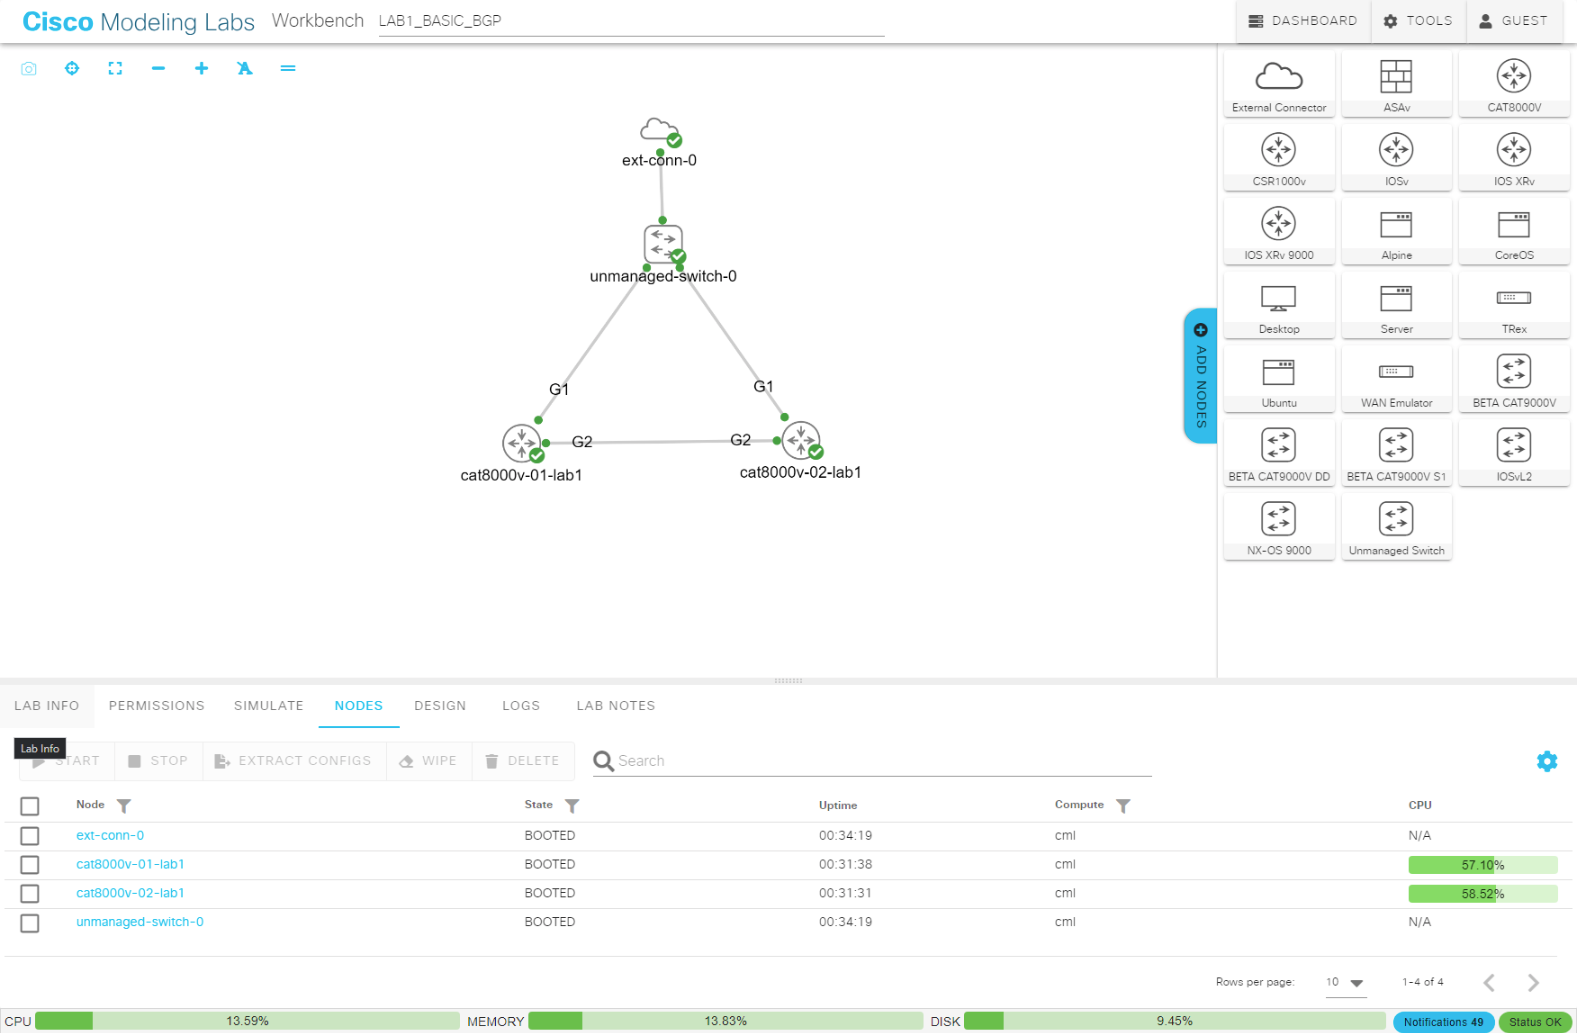
Once everything is booted you can see a green checkmark next to the node and the status changed to booted:
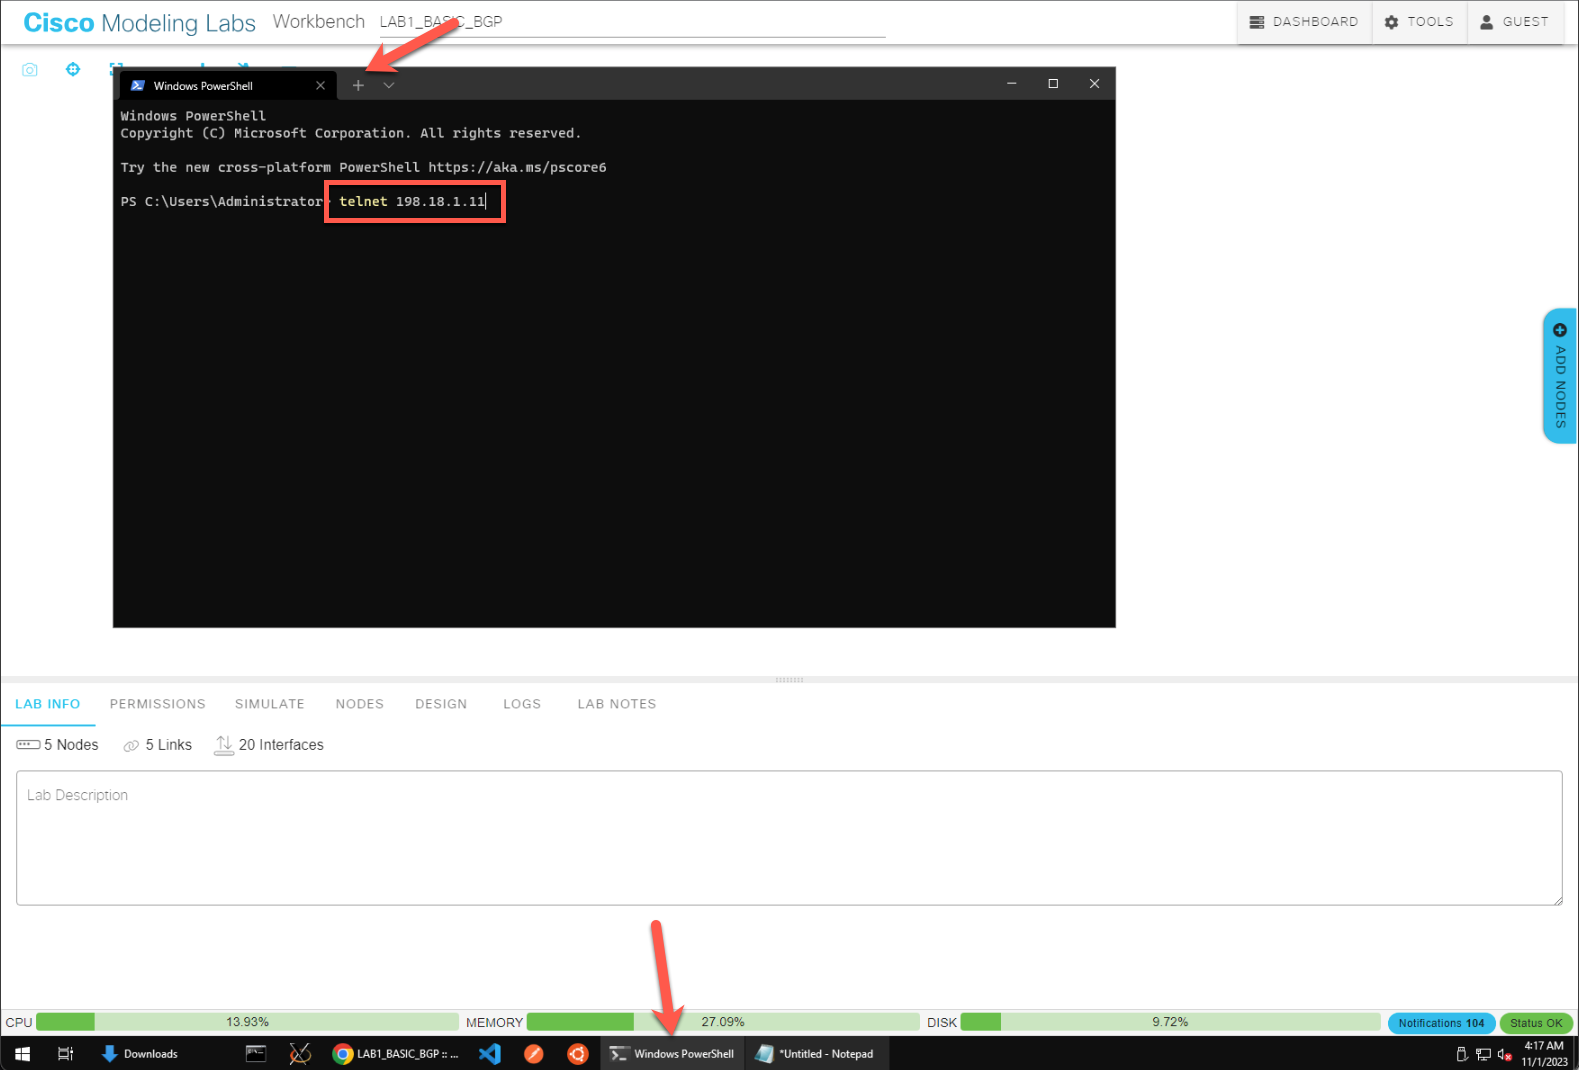
Connect to the devices via telnet with the Windows Powershell located in the taskbar. Open a second tab for the second device:
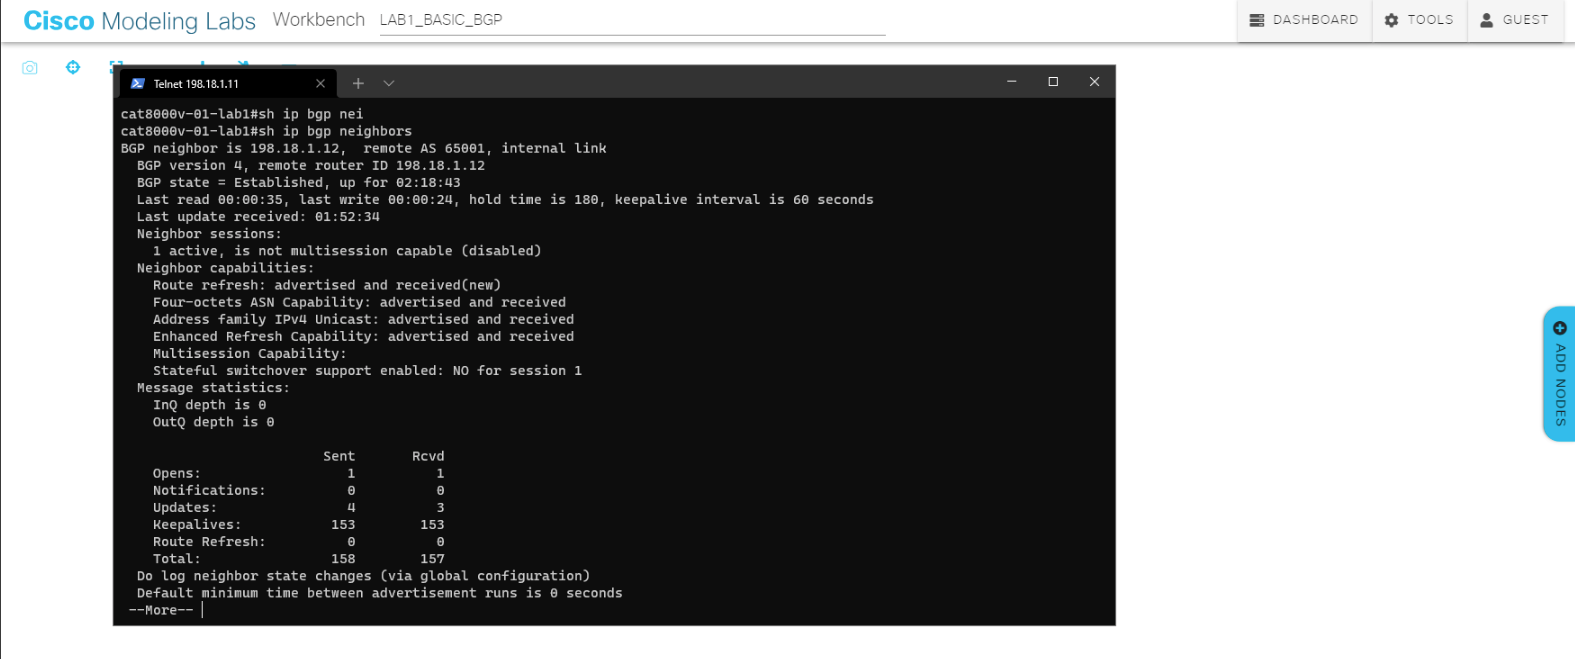
Verify if the BGP session is up with sh ip bgp neighbors
Configure the Gigabit3 interface on cat8000v-01-lab1 for a client:
					!cat8000v-01-lab1
!
interface GigabitEthernet3
 ip address 192.168.100.1 255.255.255.0
 negotiation auto
 no shutdown
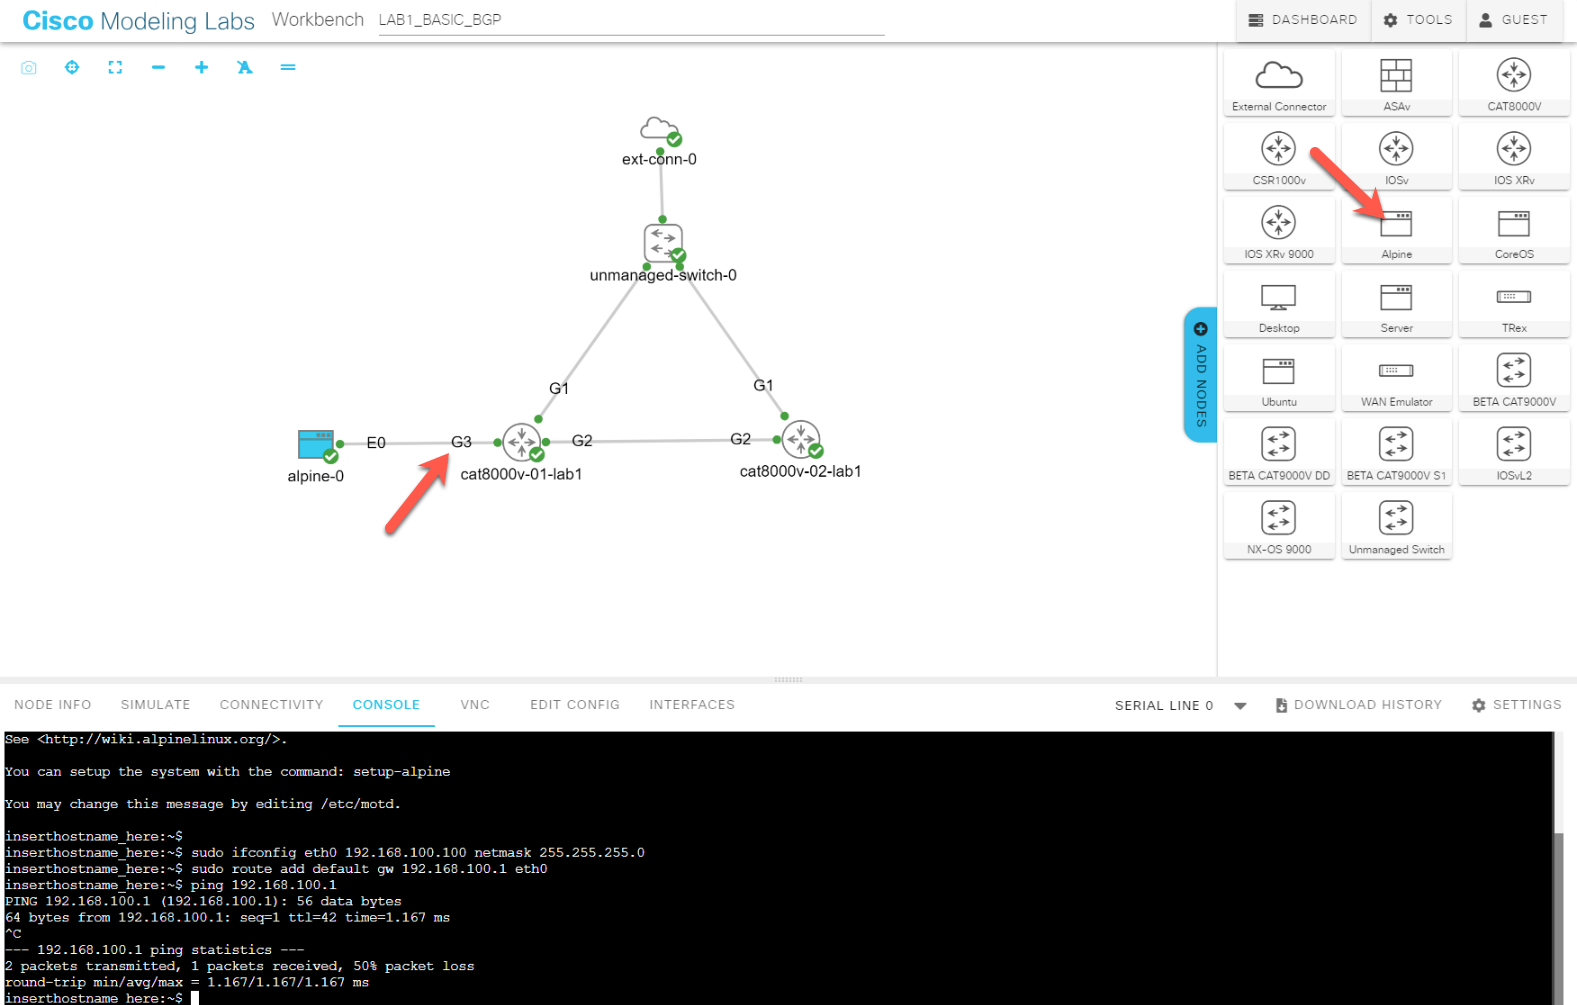
Add an Alpine node and connect it to cat8000v-01-lab1, configure the interface on the Linux apline, and ping the gateway 192.168.100.1 from the client.
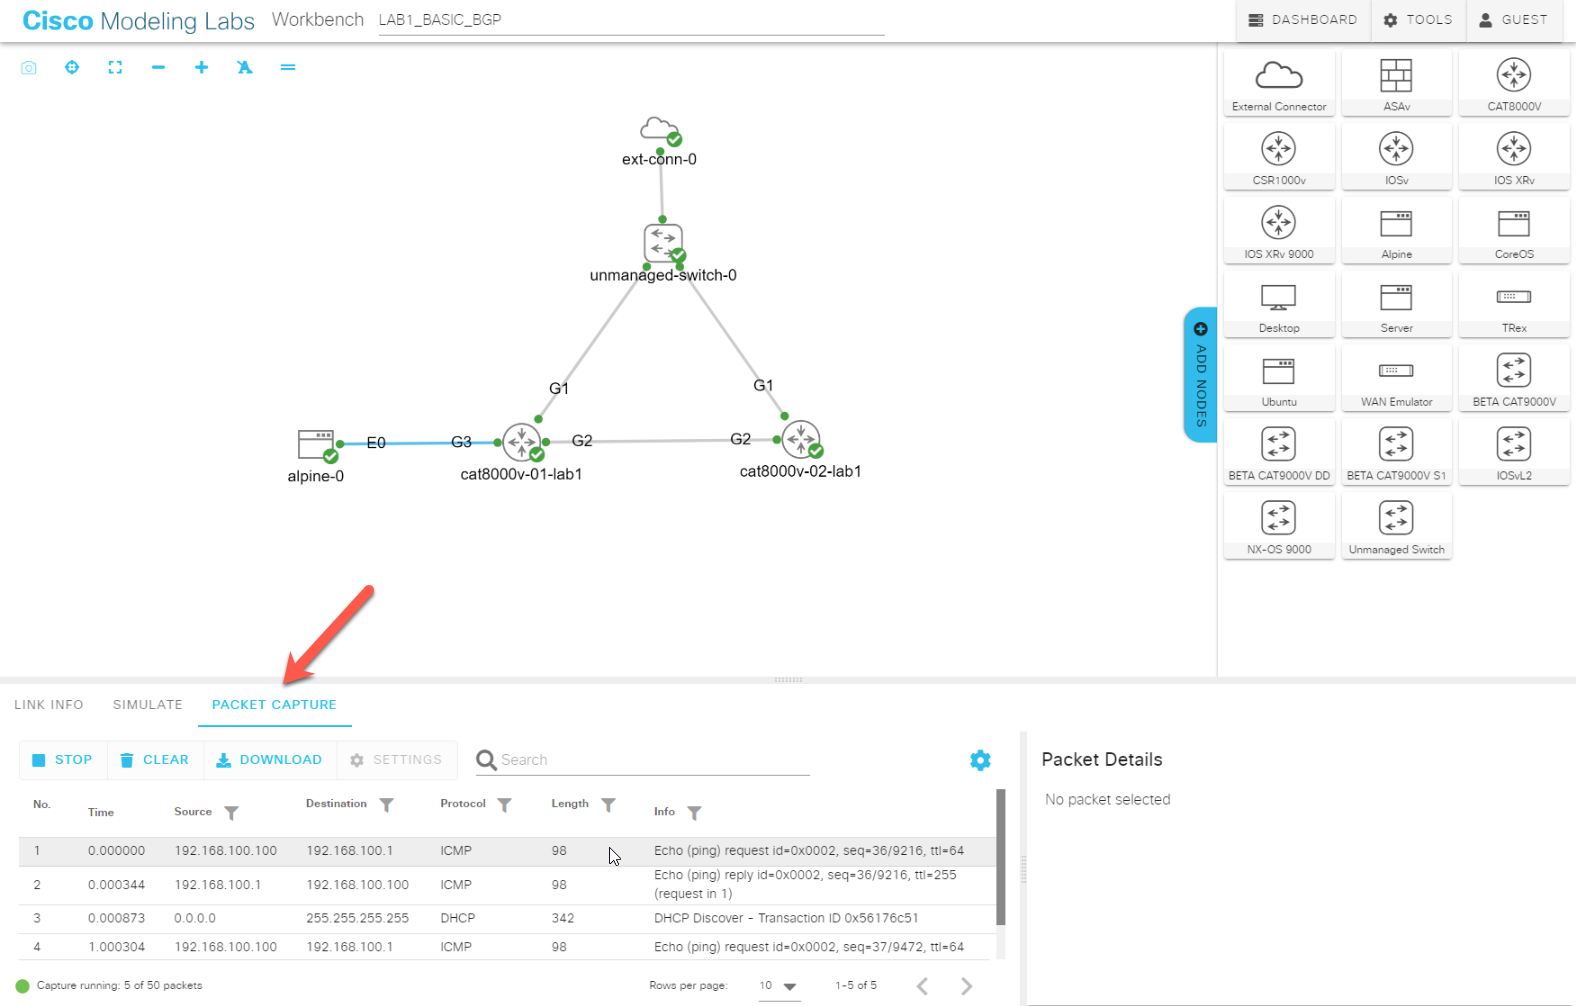
Start the ping on the alpine and let it run. Click on the link between the alpine-0 and cat8000v-01-lab1. Click on Packet Capture and Start to capture the traffic on the link.
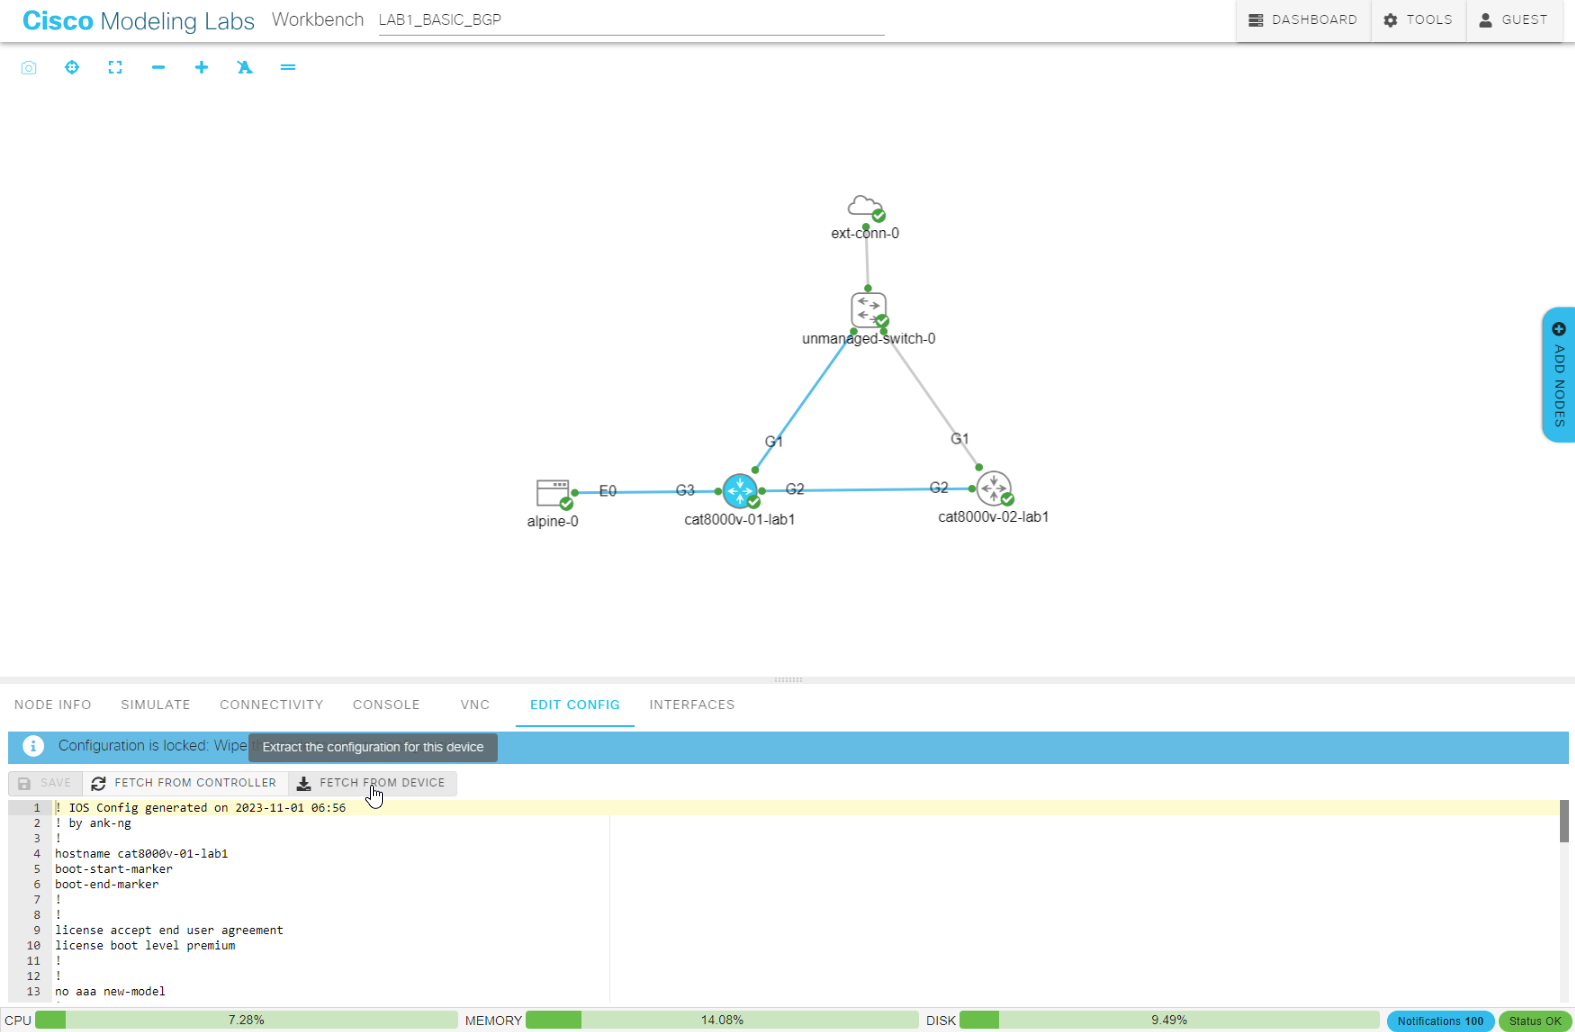
Great you have a running lab. Now, it is time to save the config and export the lab. Click on both Catalyst8000v devices, on Edit Config and Fetch from device.
You should see, that the config from the devices gets updated: