Table of Contents
Introduction
If you want to build BGP EVPN based Datacenter fabrics, Cisco’s answer is NDFC (Nexus Dashboard Fabric Controller).
Cisco Nexus Dashboard Fabric Controller (NDFC) is a network automation and management solution offered by Cisco. NDFC provides a single dashboard for managing and automating network operations across multi-cloud, on-premises, and edge environments.
In this article, I am describing how to build a BGP EPVN fabric and provision Spine and Leaf switches using POAP (PowerOn auto-provisioning) with Ansible modules.
POAP is being used to configure and update devices once they are booted and come up without any configuration. It is a very convenient way to configure the fabric, add the devices and then just turn on the devices in the data center and everything gets configured automatically!
Lab setup
My entire environment is fully virtualized. I am running a virtual Nexus Dashboard and CML (Cisco Modelling Labs) to simulate my Nexus devices.
If you want to replicate this setup as well, make sure to allocate enough resources for the Nexus Dashboard (16x vCPUs and 64GB RAM).
https://www.cisco.com/c/en/us/td/docs/dcn/nd/2x/deployment/cisco-nexus-dashboard-deployment-guide-221/nd-deploy-esx-22x.html
As always I run the code in a GitLab CI/CD pipeline and it is executed within a Docker container. The Docker container is stored in my own GitLab Docker registry. If you don’t know how to set up the GitLab server with a Docker registry, check out my previous article:
Docker container
For this use case I am using a very basic Docker container with:
- Ansible
- Ansible lint
- Ansible Galaxy collection dcnm (the name of the previous version of NDFC)
Cisco is a master in renaming products 😉
					FROM ubuntu:22.04

RUN apt-get update && \
  apt-get install -y gcc python3.11 git python3-pip ssh && \
  pip3 install --upgrade pip && \
  pip3 install ansible requests && \
  pip3 install jmespath && \
  pip3 install ansible-lint && \
  ansible-galaxy collection install cisco.dcnm
Building the container in a pipeline
					variables:
  IMAGE_NAME: $CI_REGISTRY_IMAGE/ndfc-automation
  IMAGE_TAG: "1.0"

stages:
  - build

build_image:
  stage: build
  tags:
    - shell-runner
  script:
    - docker build -t $IMAGE_NAME:$IMAGE_TAG .

push_image:
  stage: build
  needs:
    - build_image
  tags:
    - shell-runner
  before_script:
    - docker login -u $CI_REGISTRY_USER -p $CI_REGISTRY_PASSWORD $CI_REGISTRY
  script:
    - docker push $IMAGE_NAME:$IMAGE_TAG
Building the data model
As the base is set now, it is time to build the data model. If you create a BGP EVPN fabric there are a lot of variables you need to deal with. That’s why I created the following data model which I will load later into my Ansible playbook:
fabric_settings.yaml:
To create the fabric I am using the Easy_Fabric template and left pretty much everything as a default value. The only values I changed are:
- Fabric name
- BGP AS
- Bootstrap settings (DHCP,Gateway)
					---
fabricName: BGP_EVPN_POAP
templateName: Easy_Fabric
nvPairs:
  FABRIC_NAME: BGP_EVPN_POAP
  BGP_AS: '65001'
  UNDERLAY_IS_V6: 'false'
  USE_LINK_LOCAL: false
  V6_SUBNET_TARGET_MASK: ''
  LINK_STATE_ROUTING: ospf
  RR_COUNT: '2'
  ANYCAST_GW_MAC: 2020.0000.00aa
  PM_ENABLE: 'false'
  BGP_AS_PREV: ''
  PM_ENABLE_PREV: 'false'
  ENABLE_FABRIC_VPC_DOMAIN_ID_PREV: ''
  FABRIC_VPC_DOMAIN_ID_PREV: ''
  LINK_STATE_ROUTING_TAG_PREV: ''
  OVERLAY_MODE_PREV: ''
  ENABLE_PVLAN_PREV: ''
  FABRIC_MTU_PREV: '9216'
  L2_HOST_INTF_MTU_PREV: '9216'
  DEPLOYMENT_FREEZE: 'false'
  INBAND_MGMT_PREV: 'false'
  BOOTSTRAP_ENABLE_PREV: 'false'
  MGMT_V6PREFIX: '64'
  ENABLE_NETFLOW_PREV: ''
  VPC_DELAY_RESTORE_TIME: '60'
  FABRIC_TYPE: Switch_Fabric
  ENABLE_AGENT: 'false'
  AGENT_INTF: eth0
  SSPINE_ADD_DEL_DEBUG_FLAG: Disable
  BRFIELD_DEBUG_FLAG: Disable
  ACTIVE_MIGRATION: 'false'
  FF: Easy_Fabric
  MSO_SITE_ID: ''
  MSO_CONTROLER_ID: ''
  MSO_SITE_GROUP_NAME: ''
  PREMSO_PARENT_FABRIC: ''
  MSO_CONNECTIVITY_DEPLOYED: ''
  ANYCAST_RP_IP_RANGE_INTERNAL: ''
  DHCP_START_INTERNAL: ''
  DHCP_END_INTERNAL: ''
  MGMT_GW_INTERNAL: ''
  MGMT_PREFIX_INTERNAL: ''
  BOOTSTRAP_MULTISUBNET_INTERNAL: ''
  MGMT_V6PREFIX_INTERNAL: ''
  DHCP_IPV6_ENABLE_INTERNAL: ''
  UNNUM_DHCP_START_INTERNAL: ''
  UNNUM_DHCP_END_INTERNAL: ''
  ENABLE_EVPN: 'true'
  FEATURE_PTP_INTERNAL: 'false'
  SSPINE_COUNT: '0'
  SPINE_COUNT: '0'
  abstract_feature_leaf: base_feature_leaf_upg
  abstract_feature_spine: base_feature_spine_upg
  abstract_dhcp: base_dhcp
  abstract_multicast: base_multicast_11_1
  abstract_anycast_rp: anycast_rp
  abstract_loopback_interface: int_fabric_loopback_11_1
  abstract_isis: base_isis_level2
  abstract_ospf: base_ospf
  abstract_vpc_domain: base_vpc_domain_11_1
  abstract_vlan_interface: int_fabric_vlan_11_1
  abstract_isis_interface: isis_interface
  abstract_ospf_interface: ospf_interface_11_1
  abstract_pim_interface: pim_interface
  abstract_route_map: route_map
  abstract_bgp: base_bgp
  abstract_bgp_rr: evpn_bgp_rr
  abstract_bgp_neighbor: evpn_bgp_rr_neighbor
  abstract_extra_config_leaf: extra_config_leaf
  abstract_extra_config_spine: extra_config_spine
  abstract_extra_config_tor: extra_config_tor
  abstract_extra_config_bootstrap: extra_config_bootstrap_11_1
  temp_anycast_gateway: anycast_gateway
  temp_vpc_domain_mgmt: vpc_domain_mgmt
  temp_vpc_peer_link: int_vpc_peer_link_po
  abstract_routed_host: int_routed_host
  abstract_trunk_host: int_trunk_host
  L3VNI_MCAST_GROUP: ''
  PHANTOM_RP_LB_ID1: ''
  PHANTOM_RP_LB_ID2: ''
  PHANTOM_RP_LB_ID3: ''
  PHANTOM_RP_LB_ID4: ''
  VPC_PEER_LINK_VLAN: '3600'
  ENABLE_VPC_PEER_LINK_NATIVE_VLAN: 'false'
  VPC_PEER_KEEP_ALIVE_OPTION: management
  VPC_AUTO_RECOVERY_TIME: '360'
  VPC_DELAY_RESTORE: '150'
  VPC_PEER_LINK_PO: '500'
  VPC_ENABLE_IPv6_ND_SYNC: 'true'
  ADVERTISE_PIP_BGP: 'false'
  ENABLE_FABRIC_VPC_DOMAIN_ID: 'false'
  FABRIC_VPC_DOMAIN_ID: ''
  FABRIC_VPC_QOS_POLICY_NAME: ''
  BGP_LB_ID: '0'
  NVE_LB_ID: '1'
  ANYCAST_LB_ID: ''
  LINK_STATE_ROUTING_TAG: UNDERLAY
  OSPF_AUTH_KEY_ID: ''
  OSPF_AUTH_KEY: ''
  ISIS_LEVEL: ''
  ISIS_P2P_ENABLE: false
  ISIS_AUTH_ENABLE: false
  ISIS_AUTH_KEYCHAIN_NAME: ''
  ISIS_AUTH_KEYCHAIN_KEY_ID: ''
  ISIS_AUTH_KEY: ''
  ISIS_OVERLOAD_ENABLE: false
  ISIS_OVERLOAD_ELAPSE_TIME: ''
  BGP_AUTH_KEY_TYPE: ''
  BGP_AUTH_KEY: ''
  PIM_HELLO_AUTH_KEY: ''
  BFD_IBGP_ENABLE: false
  BFD_OSPF_ENABLE: false
  BFD_ISIS_ENABLE: false
  BFD_PIM_ENABLE: false
  BFD_AUTH_ENABLE: false
  BFD_AUTH_KEY_ID: ''
  BFD_AUTH_KEY: ''
  IBGP_PEER_TEMPLATE: ''
  IBGP_PEER_TEMPLATE_LEAF: ''
  default_vrf: Default_VRF_Universal
  default_network: Default_Network_Universal
  vrf_extension_template: Default_VRF_Extension_Universal
  network_extension_template: Default_Network_Extension_Universal
  OVERLAY_MODE: config-profile
  ENABLE_PVLAN: 'false'
  default_pvlan_sec_network: ''
  FABRIC_MTU: '9216'
  L2_HOST_INTF_MTU: '9216'
  HOST_INTF_ADMIN_STATE: 'true'
  POWER_REDUNDANCY_MODE: ps-redundant
  COPP_POLICY: strict
  HD_TIME: '180'
  BROWNFIELD_NETWORK_NAME_FORMAT: Auto_Net_VNI$$VNI$$_VLAN$$VLAN_ID$$
  BROWNFIELD_SKIP_OVERLAY_NETWORK_ATTACHMENTS: 'false'
  CDP_ENABLE: 'false'
  ENABLE_NGOAM: 'true'
  ENABLE_TENANT_DHCP: 'true'
  ENABLE_NXAPI: 'true'
  ENABLE_PBR: 'false'
  STRICT_CC_MODE: 'false'
  AAA_REMOTE_IP_ENABLED: 'false'
  SNMP_SERVER_HOST_TRAP: 'true'
  ANYCAST_BGW_ADVERTISE_PIP: 'false'
  PTP_LB_ID: ''
  PTP_DOMAIN_ID: ''
  MPLS_LB_ID: ''
  TCAM_ALLOCATION: 'true'
  DEAFULT_QUEUING_POLICY_CLOUDSCALE: ''
  DEAFULT_QUEUING_POLICY_R_SERIES: ''
  DEAFULT_QUEUING_POLICY_OTHER: ''
  ENABLE_MACSEC: 'false'
  MACSEC_KEY_STRING: ''
  MACSEC_ALGORITHM: ''
  MACSEC_FALLBACK_KEY_STRING: ''
  MACSEC_FALLBACK_ALGORITHM: ''
  MACSEC_CIPHER_SUITE: ''
  MACSEC_REPORT_TIMER: ''
  STP_ROOT_OPTION: unmanaged
  STP_VLAN_RANGE: ''
  MST_INSTANCE_RANGE: ''
  STP_BRIDGE_PRIORITY: ''
  EXTRA_CONF_LEAF: ''
  EXTRA_CONF_SPINE: ''
  EXTRA_CONF_TOR: ''
  EXTRA_CONF_INTRA_LINKS: ''
  STATIC_UNDERLAY_IP_ALLOC: 'false'
  MPLS_LOOPBACK_IP_RANGE: ''
  LOOPBACK0_IPV6_RANGE: ''
  LOOPBACK1_IPV6_RANGE: ''
  V6_SUBNET_RANGE: ''
  ROUTER_ID_RANGE: ''
  L2_SEGMENT_ID_RANGE: 30000-49000
  L3_PARTITION_ID_RANGE: 50000-59000
  NETWORK_VLAN_RANGE: 2300-2999
  VRF_VLAN_RANGE: 2000-2299
  SUBINTERFACE_RANGE: 2-511
  VRF_LITE_AUTOCONFIG: Manual
  AUTO_SYMMETRIC_VRF_LITE: false
  AUTO_VRFLITE_IFC_DEFAULT_VRF: false
  AUTO_SYMMETRIC_DEFAULT_VRF: false
  DEFAULT_VRF_REDIS_BGP_RMAP: ''
  DCI_SUBNET_RANGE: 10.33.0.0/16
  DCI_SUBNET_TARGET_MASK: '30'
  SERVICE_NETWORK_VLAN_RANGE: 3000-3199
  ROUTE_MAP_SEQUENCE_NUMBER_RANGE: 1-65534
  DNS_SERVER_IP_LIST: ''
  DNS_SERVER_VRF: ''
  NTP_SERVER_IP_LIST: ''
  NTP_SERVER_VRF: ''
  SYSLOG_SERVER_IP_LIST: ''
  SYSLOG_SEV: ''
  SYSLOG_SERVER_VRF: ''
  AAA_SERVER_CONF: ''
  BOOTSTRAP_ENABLE: true
  DHCP_START: 198.18.1.200
  DHCP_END: 198.18.1.250
  MGMT_GW: 198.18.1.1
  SEED_SWITCH_CORE_INTERFACES: ''
  SPINE_SWITCH_CORE_INTERFACES: ''
  INBAND_DHCP_SERVERS: ''
  UNNUM_BOOTSTRAP_LB_ID: ''
  UNNUM_DHCP_START: ''
  UNNUM_DHCP_END: ''
  BOOTSTRAP_CONF: ''
  enableRealTimeBackup: ''
  enableScheduledBackup: ''
  scheduledTime: ''
  ENABLE_NETFLOW: 'false'
  NETFLOW_EXPORTER_LIST: ''
  NETFLOW_RECORD_LIST: ''
  NETFLOW_MONITOR_LIST: ''
  FABRIC_INTERFACE_TYPE: p2p
  SUBNET_TARGET_MASK: '30'
  REPLICATION_MODE: Multicast
  VPC_DOMAIN_ID_RANGE: 1-1000
  FABRIC_VPC_QOS: 'false'
  OSPF_AREA_ID: 0.0.0.0
  OSPF_AUTH_ENABLE: 'false'
  BGP_AUTH_ENABLE: 'false'
  BFD_ENABLE: 'false'
  ENABLE_NXAPI_HTTP: 'true'
  GRFIELD_DEBUG_FLAG: Disable
  FEATURE_PTP: 'false'
  MPLS_HANDOFF: 'false'
  ENABLE_DEFAULT_QUEUING_POLICY: 'false'
  LOOPBACK0_IP_RANGE: 10.2.0.0/22
  LOOPBACK1_IP_RANGE: 10.3.0.0/22
  SUBNET_RANGE: 10.4.0.0/16
  INBAND_MGMT: 'false'
  MULTICAST_GROUP_SUBNET: 239.1.1.0/25
  ENABLE_TRM: 'false'
  RP_COUNT: '2'
  RP_MODE: asm
  RP_LB_ID: '254'
  PIM_HELLO_AUTH_ENABLE: 'false'
  ANYCAST_RP_IP_RANGE: 10.254.254.0/24
  DHCP_ENABLE: true
  ENABLE_AAA: 'false'
  SITE_ID: '65001'
  DHCP_IPV6_ENABLE: DHCPv4
  BOOTSTRAP_MULTISUBNET: "#Scope_Start_IP, Scope_End_IP, Scope_Default_Gateway, Scope_Subnet_Prefix"
  MGMT_PREFIX: '24'
fabric_inventory.yaml:
It also makes sense to create a separate file for the switch inventory details. The most important information is the serial number of the device as we need to map the correct role to each switch (Spine, Leaf, Border-Leaf etc.).
Make sure to have that information handy before starting with POAP!
					---
inventory_data:
  switches:
    - seed_ip: 198.18.1.151
      user_name: admin
      password: C1sco12345
      role: spine
      poap:
        - serial_number: 9YW0T2HLH4A
          model: 'N9K-C9300v'
          version: '9.3(11)'
          hostname: 'POAP-SPINE01'
          config_data:
            modulesModel: [N9K-X9364v, N9K-vSUP]
            gateway: 198.18.1.1/24
    - seed_ip: 198.18.1.152
      user_name: admin
      password: C1sco12345
      role: leaf
      poap:
        - serial_number: 9BH06YFWE60
          model: 'N9K-C9300v'
          version: '9.3(11)'
          hostname: 'POAP-LEAF01'
          config_data:
            modulesModel: [N9K-X9364v, N9K-vSUP]
            gateway: 198.18.1.1/24
    - seed_ip: 198.18.1.153
      user_name: admin
      password: C1sco12345
      role: leaf
      poap:
        - serial_number: 9TPC3FV5ITL
          model: 'N9K-C9300v'
          version: '9.3(11)'
          hostname: 'POAP-LEAF02'
          config_data:
            modulesModel: [N9K-X9364v, N9K-vSUP]
            gateway: 198.18.1.1/24
Building the playbok
For the Ansible playbook, it just needs four different modules:
-
ansible.builtin.include_vars:
Both defined yaml files needs to be loaded for the fabric and inventory data -
cisco.dcnm.dcnm_rest:
This module is used to create the fabric using the fabric_settings by converting it into JSON payload -
ansible.builtin.pause:
Once the fabric is created it will take some time in order to get the IP address from the DHCP server (in my case the NDFC controller) and the switches are visible in the POAP inventory. -
cisco.dcnm.dcnm_inventory:
The inventory module is used to add and provision the devices into the created fabric
Make sure that the following parameters are set in the ansible.cfg:
					---

- name: Create fabric and pre-provision switches # Create fabric and pre-provision switches
  hosts: ndfc_controller # ndfc_controller
  gather_facts: false

  tasks:
    - name: Load fabric data # Load fabric data
      ansible.builtin.include_vars:
        file: data/fabric_settings.yaml
        name: fabric_settings

    - name: Load inventory data # Load inventory data
      ansible.builtin.include_vars:
        file: data/fabric_inventory.yaml
        name: fabric_inventory

    - name: Create template policy using Ansible # Create template policy using Ansible
      cisco.dcnm.dcnm_rest:
        method: POST
        path: /appcenter/cisco/ndfc/api/v1/lan-fabric/rest/control/fabrics
        json_data: '{{ fabric_settings | to_json }}'

    - name: Sleep # Sleep
      ansible.builtin.pause:
        seconds: 300

    - name: Provision of switch Configuration # Provision switch configuration
      cisco.dcnm.dcnm_inventory:
        fabric: '{{ fabric_settings.fabricName }}'
        state: merged
        config: '{{ fabric_inventory.inventory_data.switches }}'
Building the pipeline
The pipeline itself is very simple and consists of three stages:
-
BUILD
The Docker container will be created and uploaded to the GitLab Docker registry -
LINTING
Ansible playbook syntax will be checked against linting rules -
DEPLOY
Ansible playbook will be executed
					variables:
  IMAGE_NAME: $CI_REGISTRY_IMAGE/ndfc-automation
  IMAGE_TAG: "1.0"

stages:
  - build
  - linting
  - deploy

build_image:
  stage: build
  tags:
    - shell-runner
  script:
    - docker build -t $IMAGE_NAME:$IMAGE_TAG .

push_image:
  stage: build
  needs:
    - build_image
  tags:
    - shell-runner
  before_script:
    - docker login -u $CI_REGISTRY_USER -p $CI_REGISTRY_PASSWORD $CI_REGISTRY
  script:
    - docker push $IMAGE_NAME:$IMAGE_TAG

ansible_linting:
  stage: linting
  needs:
    - push_image
  image: $IMAGE_NAME:$IMAGE_TAG
  tags:
    - docker-runner
  before_script:
    - cd ansible
  script:
    - ansible-lint deploy_provision_fabric.yaml

ansible_deploy:
  stage: deploy
  needs:
    - ansible_linting
  image: $IMAGE_NAME:$IMAGE_TAG
  tags:
    - docker-runner
  before_script:
    - cd ansible
  script:
    - ansible-playbook deploy_provision_fabric.yaml
Run the pipeline
Let’s run the pipeline and validate the process:
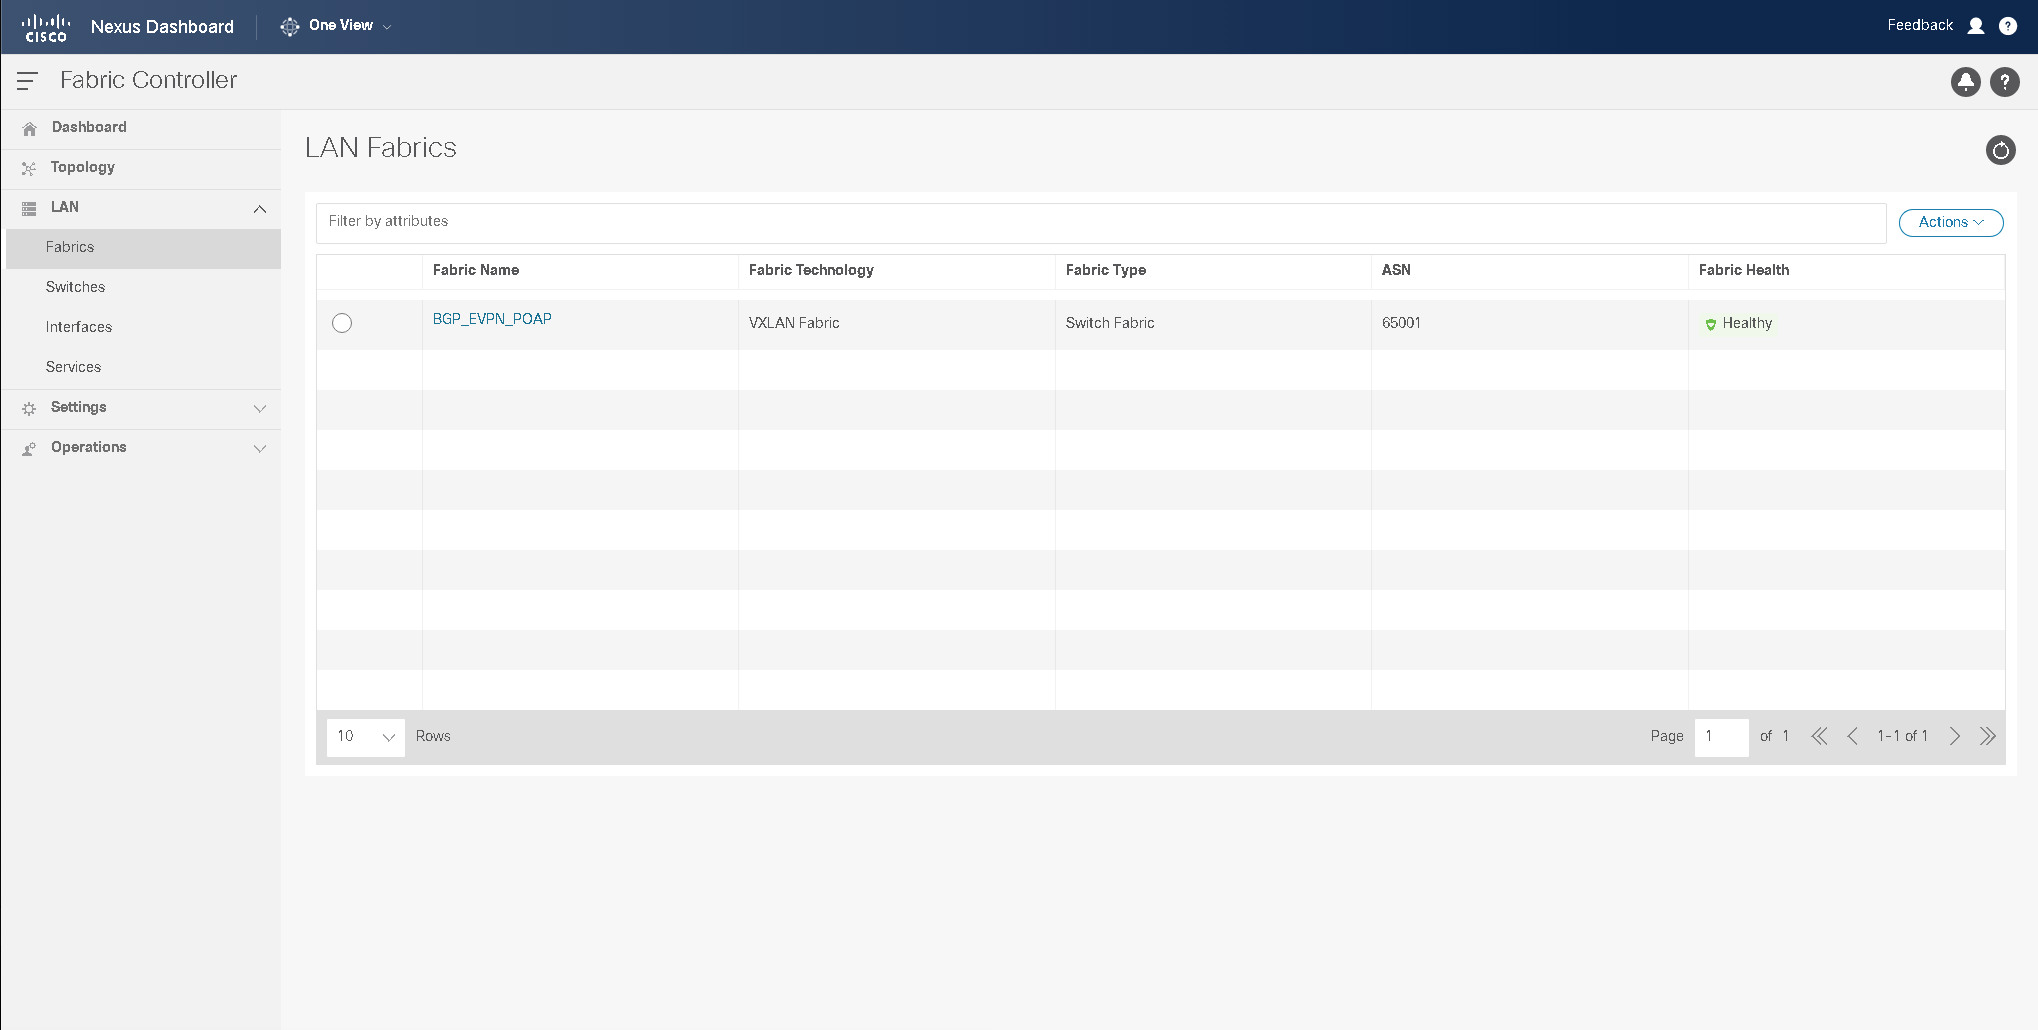
At first, the Ansible play will create the fabric:
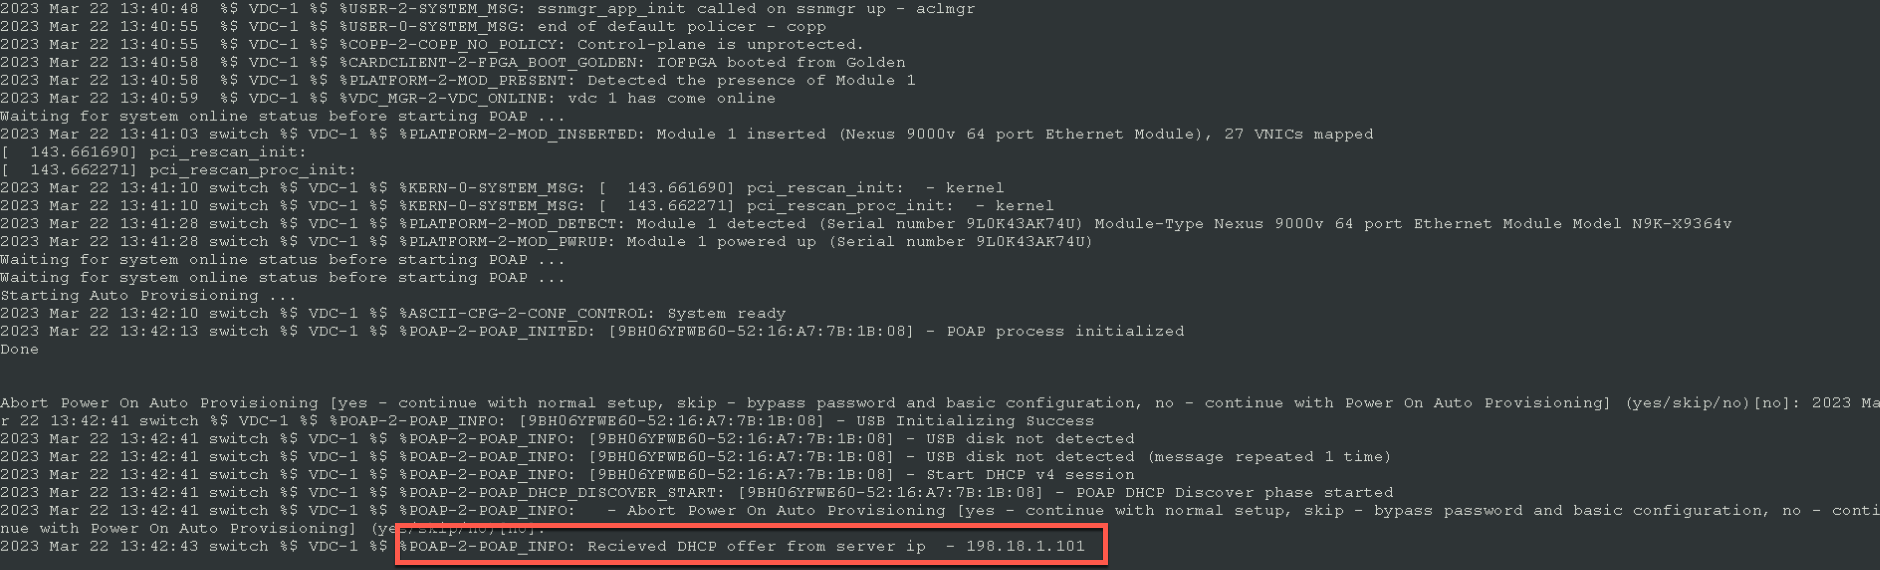
After some time once the switches booted up, it will start with the POAP process and sends out DHCP request.
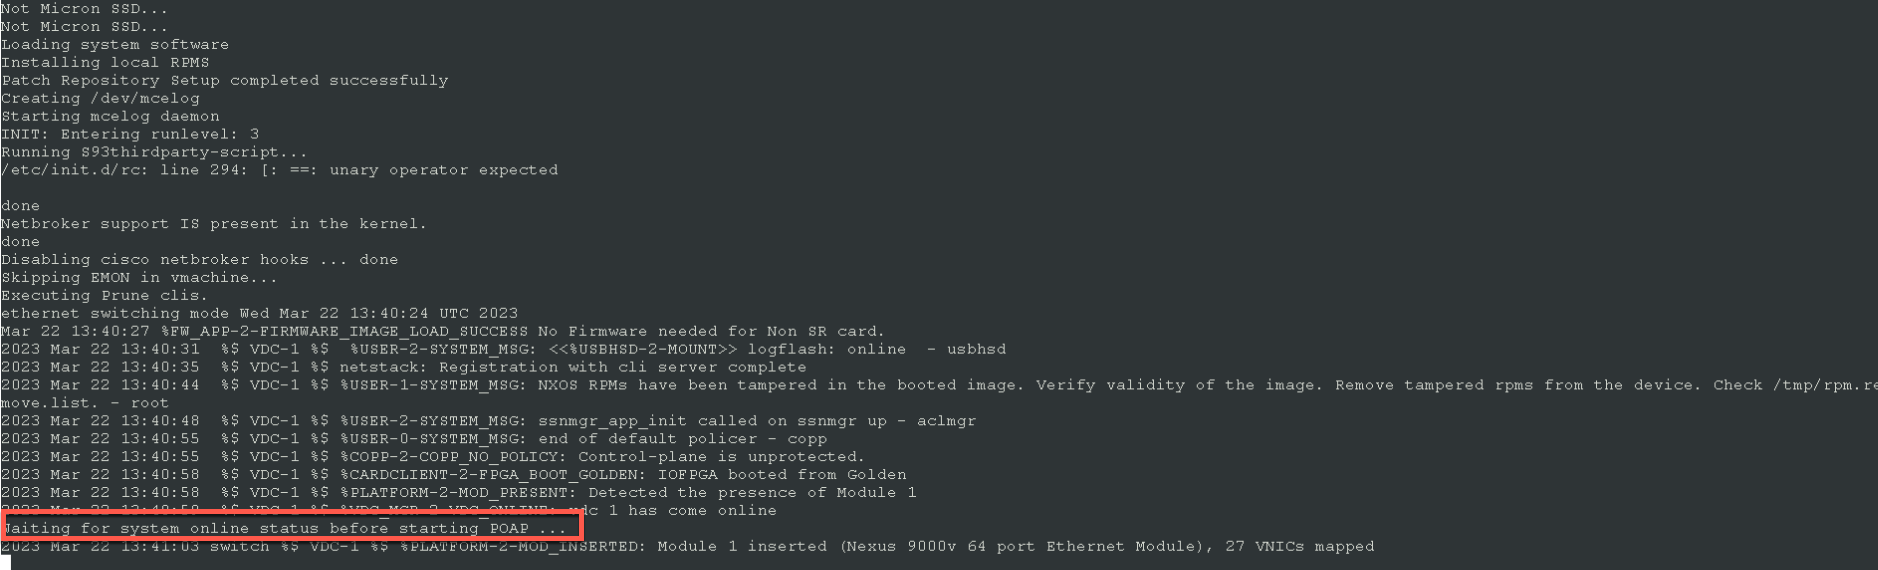
As the fabric has the DHCP server option enabled and a range is assigned, the switches will receive an IP address.
Once the switches become available, which will be after some minutes, they will be added to the fabric.
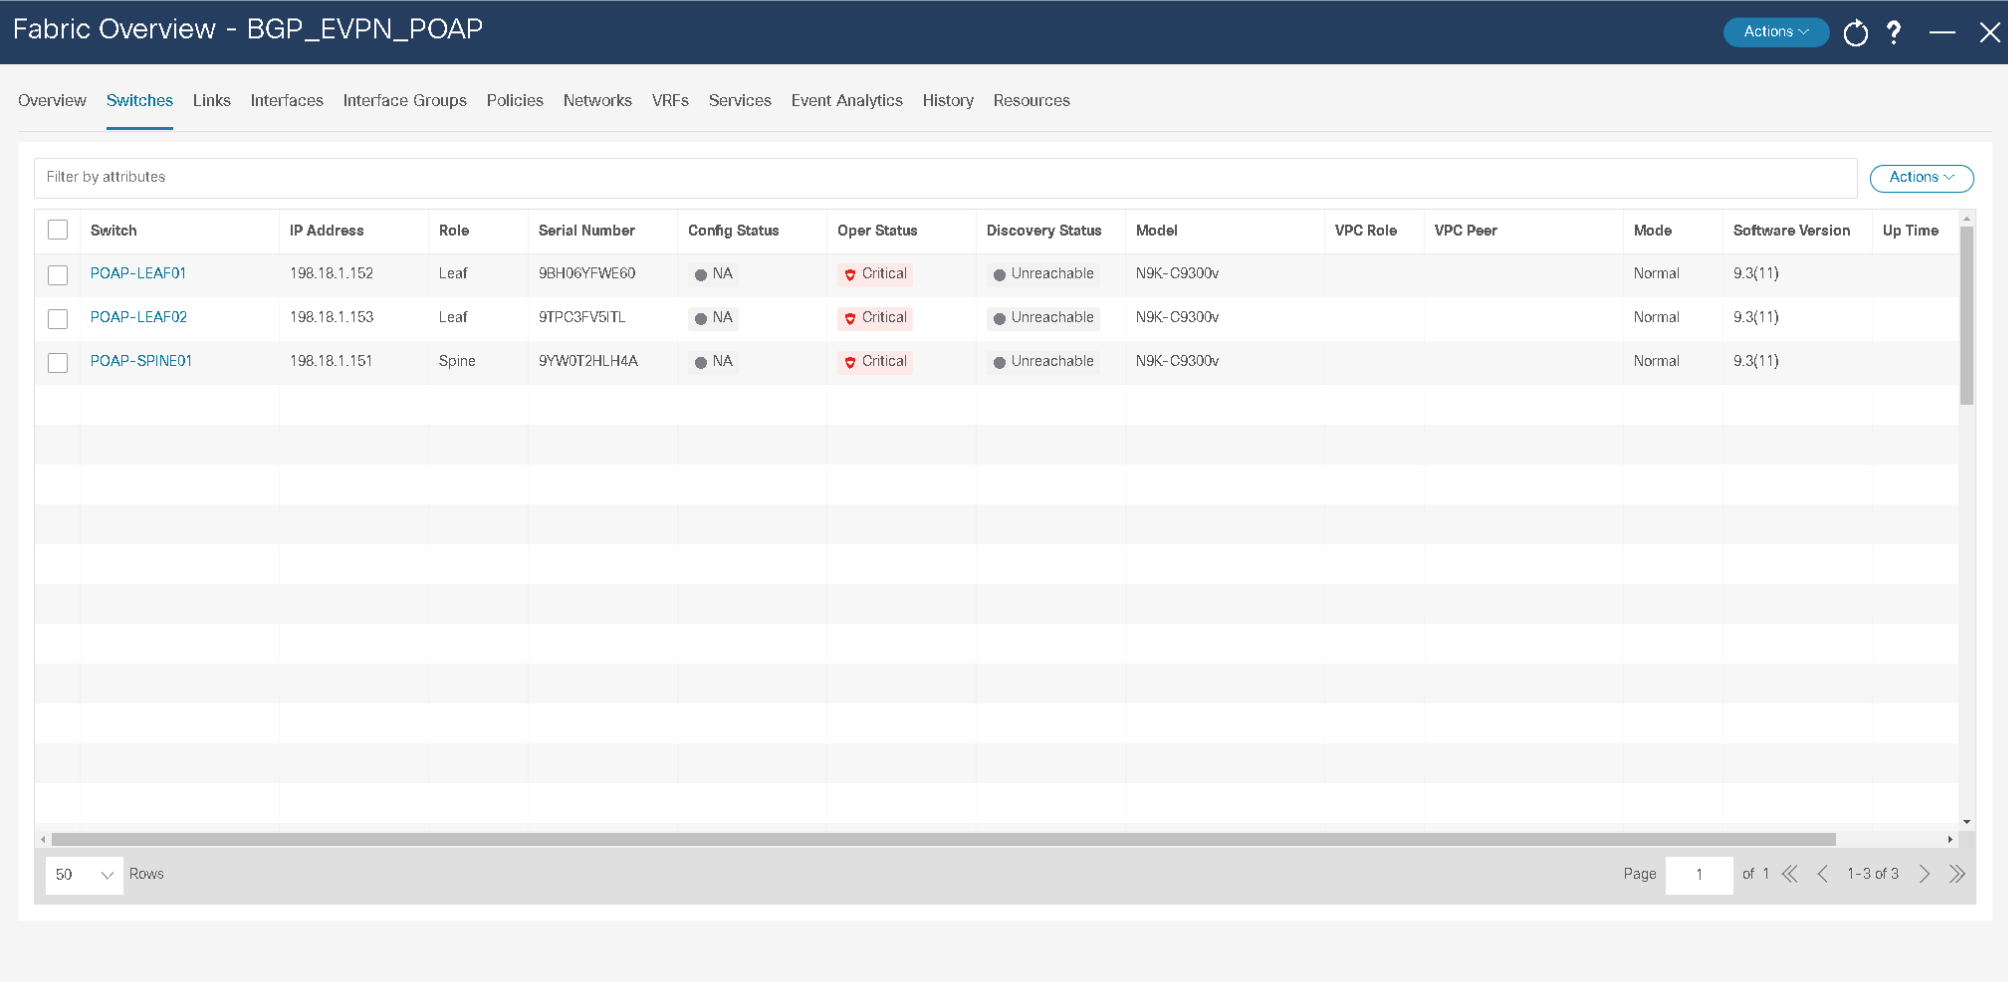
The switches will download the python script from the NDFC server, configure basic connectivity like IP address and credentials and the switch will reboot.

The Ansible tasks wait for the switches to come back online to configure the “role” (Spine/Leaf) related configurations. This process can take up to 10 – 15 minutes.

Once the switches come back online, the config state is unknown. NDFC will sync this after a while.
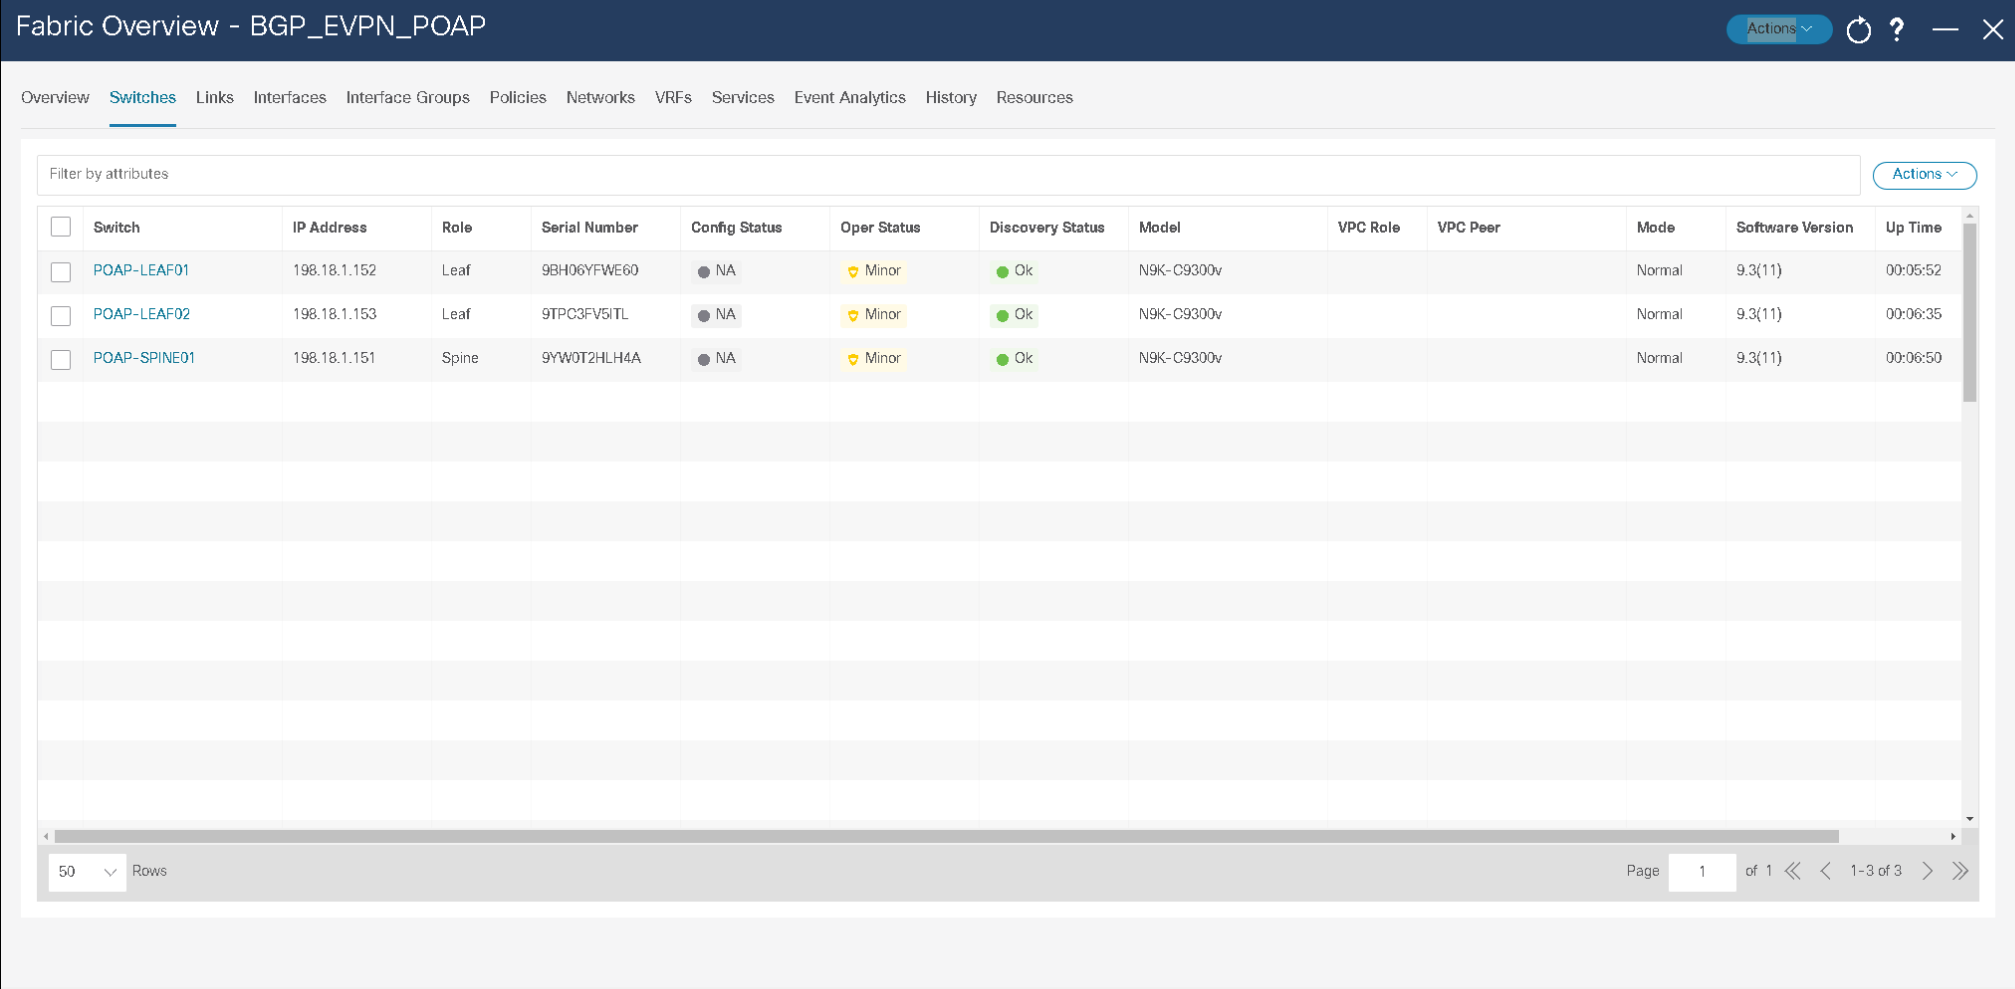
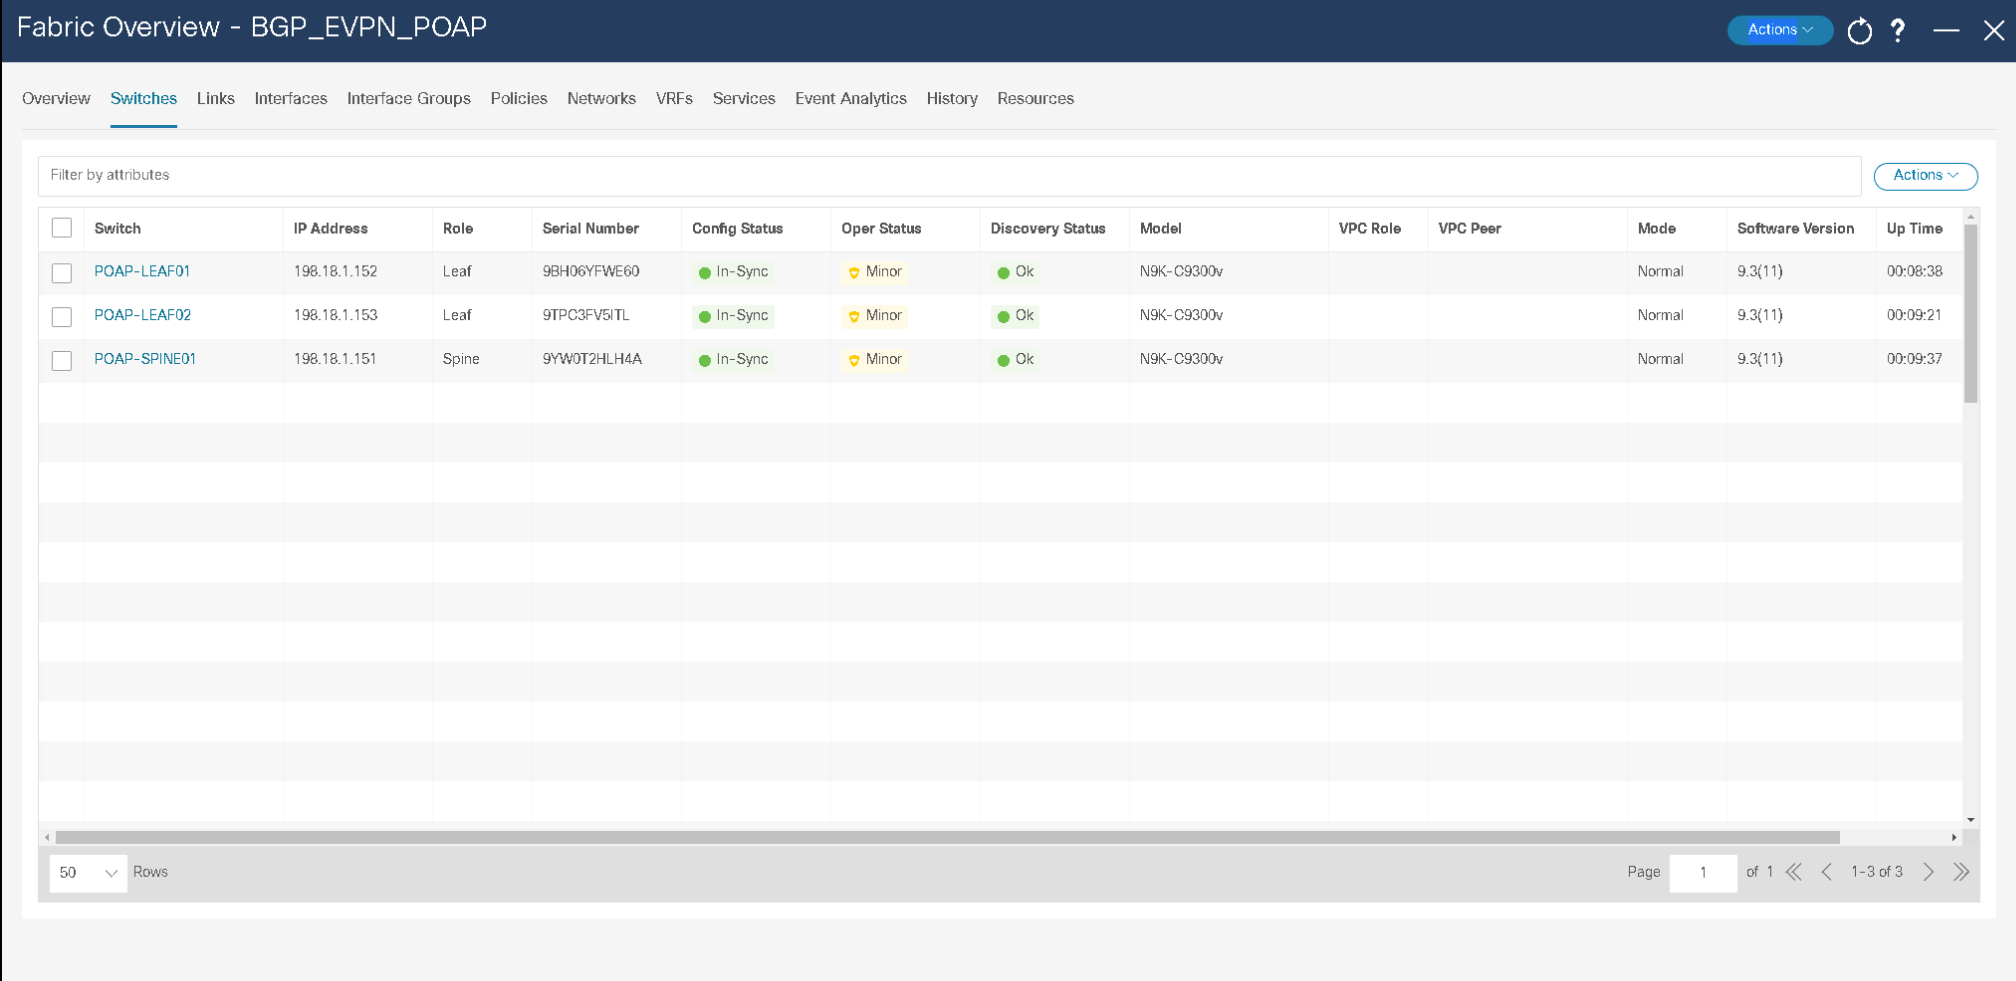
Once the config state is synced, NDFC will push the configuration to the switches.
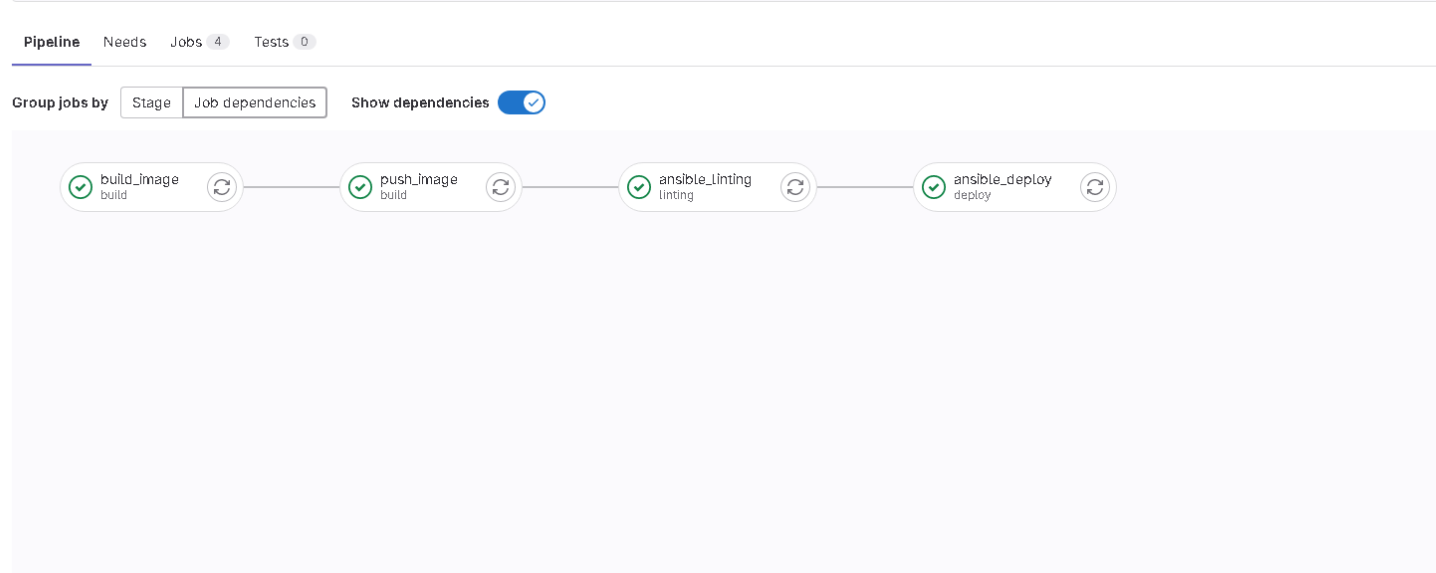
You can see the process more in detail if you go back to the pipeline status. The Ansible module will:
- Add the switches
- Wait to rediscover the devices
- Assign the role
- Saves the config
- Deploys the config to the devices

After a while, you should see that the entire pipeline was executed successfully. 😃
References
- https://www.cisco.com/c/en/us/products/collateral/cloud-systems-management/prime-data-center-network-manager/nb-06-ndfc-ds-cte-en.html
- https://www.cisco.com/site/us/en/products/networking/cloud-networking/nexus-platform/index.html
- https://github.com/CiscoDevNet/ansible-dcnm
- https://www.cisco.com/c/en/us/products/cloud-systems-management/modeling-labs/index.html