Table of Contents
Introduction
In my previous blog articles, I have been talking about how to set up:
- GITLAB AS A TERRAFORM STATE FILE BACKEND
- GITLAB CI/CD PIPELINE TO BUILD YOUR OWN DOCKER CONTAINER AND UPLOAD TO YOUR OWN REGISTRY
Make sure to check that out before reading this blog post 😉
In this blog post, I will continue the story and describe how I create a pipeline to configure an ACI environment using Terraform by leveraging GitLab as a Docker registry and Terraform state file backend.
Requirements
I assume the following prerequisite as given:
- GitLab server with SSL certificates
- A Docker and a Shell runner are deployed
- Docker containers can be uploaded to the embedded Docker registry
- Terraform state file can be stored in GitLab
- Environment and variables are configured in GitLab
- APIC simulator
I am using the following Dockerfile where Terraform will be installed:
					FROM ubuntu:22.04

RUN apt-get update && \
  apt-get install -y gnupg software-properties-common curl gcc python3.11 python3-pip git && \
  curl -fsSL https://apt.releases.hashicorp.com/gpg | apt-key add - && \
  apt-add-repository "deb [arch=amd64] https://apt.releases.hashicorp.com $(lsb_release -cs) main" && \
  apt-get update && \
  apt-get install terraform
The Dockerfile is stored in the following structure within the repository:
					docker (Folder)
├── aci (Folder)
    └── Dockerfile (File)
Set up the Terrafrom environment
Create the following folder structure under your project repository:
					terraform (Folder)
 └── data (Folder)
    └── tenant_DEV.yaml (File)
 └── defaults (Folder)
    └── defaults.yaml (File)
 └── modules (Folder)
    └── modules.yaml (File)
 └── init_file.sh (File)
 └── main.tf (File)
Copy the following content in your tenant_DEV.yaml: This file represents the configuration of the tenant dev that will be pushed to the APIC
					---
apic:
  tenants:
    - name: DEV

      vrfs:
        - name: DEV.DEV-VRF

      bridge_domains:
        - name: 10.1.200.0_24
          vrf: DEV.DEV-VRF
          subnets:
          - ip: 10.1.200.1/24

        - name: 10.1.201.0_24
          vrf: DEV.DEV-VRF
          subnets:
          - ip: 10.1.201.1/24

        - name: 10.1.202.0_24
          vrf: DEV.DEV-VRF
          subnets:
          - ip: 10.1.202.1/24

      application_profiles:
        - name: VLANS
          endpoint_groups:
            - name: VLAN200
              bridge_domain: 10.1.200.0_24

            - name: VLAN201
              bridge_domain: 10.1.201.0_24

            - name: VLAN202
              bridge_domain: 10.1.202.0_24
Copy the following content in your init_file.sh: The init_file is a shell script that sets the environment to use the “http” backend provided by GitLab to store the file. It actually defines the variables that you set before in the environment and uses the Username and API Token.
					#! /bin/bash
TF_USERNAME=${TF_USERNAME} \
TF_PASSWORD=${TF_PASSWORD} \
TF_ADDRESS="${CI_SERVER_URL}/api/v4/projects/${CI_PROJECT_ID}/terraform/state/terraform_statefile" \

terraform init \
  -backend-config=address=${TF_ADDRESS} \
  -backend-config=lock_address=${TF_ADDRESS}/lock \
  -backend-config=unlock_address=${TF_ADDRESS}/lock \
  -backend-config=username=${TF_USERNAME} \
  -backend-config=password=${TF_PASSWORD} \
  -backend-config=lock_method=POST \
  -backend-config=unlock_method=DELETE \
  -backend-config=retry_wait_min=5
Copy the following content in your main.tf: Configures the modules that we are using to configure the infrastructure.
					terraform {
  required_providers {
    aci = {
      source  = "CiscoDevNet/aci"
      version = ">= 2.6.0"
    }
    utils = {
      source  = "netascode/utils"
      version = ">= 0.2.4"
    }
  }
}

terraform {
  backend "http" {
  }
}

provider "aci" {
}

locals {
  model = yamldecode(data.utils_yaml_merge.model.output)
}

data "utils_yaml_merge" "model" {
  input = concat([for file in fileset(path.module, "data/*.yaml") : file(file)], [file("${path.module}/defaults/defaults.yaml"), file("${path.module}/modules/modules.yaml")])
}

module "tenant" {
  source  = "netascode/nac-tenant/aci"
  version = ">= 0.4.1"

  for_each    = toset([for tenant in lookup(local.model.apic, "tenants", {}) : tenant.name])
  model       = local.model
  tenant_name = each.value
}
Set up the pipeline
The following pipeline will include the following stages:
- Build (Build the Docker container and upload it to the Docker registry)
- Validate (execute terraform validate)
- Plan (execute terraform plan)
- Apply (execute terraform apply: manual)
- Destroy (execute terraform destroy: manual)
In this pipeline, caches are also used to download the Terraform modules only once and reuse them in the following stages. This will significantly reduce the time of execution per job.
A cache is one or more files a job downloads and saves. Subsequent jobs that use the same cache don’t have to download the files again, so they execute more quickly.
- Define cache per job by using the
cachekeyword. Otherwise it is disabled. - Subsequent pipelines can use the cache.
- Subsequent jobs in the same pipeline can use the cache, if the dependencies are identical.
- Different projects cannot share the cache.
Read more here: https://docs.gitlab.com/ee/ci/caching/
Overhead in your pipeline creates unwanted time to wait for the execution: Nobody wants that!
Make sure to optimize the pipeline as much as possible. 

					variables:
  IMAGE_NAME_ACI: $CI_REGISTRY_IMAGE/aci
  IMAGE_TAG_ACI: "1.0"
  TF_ROOT: ${CI_PROJECT_DIR}/terraform

.dependencies_cache:
  cache:
    key: "${TF_ROOT}"
    paths:
      - "${TF_ROOT}/.terraform"
    policy: pull

stages:
  - build
  - validate
  - plan
  - apply
  - destroy

build_image:
  stage: build
  tags:
    - shell-runner
  script:
    - docker build -t $IMAGE_NAME_ACI:$IMAGE_TAG_ACI docker/aci/.

push_image:
  stage: build
  needs:
    - build_image
  tags:
    - shell-runner
  before_script:
    - docker login -u $CI_REGISTRY_USER -p $CI_REGISTRY_PASSWORD $CI_REGISTRY
  script:
    - docker push $IMAGE_NAME_DNAC:$IMAGE_TAG_DNAC
    - docker push $IMAGE_NAME_ACI:$IMAGE_TAG_ACI

validate:
  needs:
    - push_image
  stage: validate
  image: $IMAGE_NAME_ACI:$IMAGE_TAG_ACI
  environment: ACI
  tags:
    - docker-runner
  extends: .dependencies_cache
  cache:
    policy: pull-push
  before_script:
    - cd terraform
  script:
      - chmod +x init_file.sh
      - ./init_file.sh
      - terraform validate

plan:
  needs:
    - validate
  stage: plan
  image: $IMAGE_NAME_ACI:$IMAGE_TAG_ACI
  environment: ACI
  tags:
    - docker-runner
  extends: .dependencies_cache
  before_script:
    - cd terraform
  script:
      - chmod +x init_file.sh
      - ./init_file.sh
      - terraform plan -out=./output.tfplan
      - terraform show -no-color -json output.tfplan > plan.json
  artifacts:
    paths:
      - ${TF_ROOT}/plan.json

apply:
  needs:
    - plan
  stage: apply
  image: $IMAGE_NAME_ACI:$IMAGE_TAG_ACI
  environment: ACI
  tags:
    - docker-runner
  extends: .dependencies_cache
  before_script:
    - cd terraform
  script:
      - chmod +x init_file.sh
      - ./init_file.sh
      - terraform apply
  when: manual

destroy:
  stage: destroy
  image: $IMAGE_NAME_ACI:$IMAGE_TAG_ACI
  environment: ACI
  tags:
    - docker-runner
  extends: .dependencies_cache
  before_script:
    - cd terraform
  script:
      - chmod +x init_file.sh
      - ./init_file.sh
      - terraform destroy
  when: manual
Run and validate the pipeline
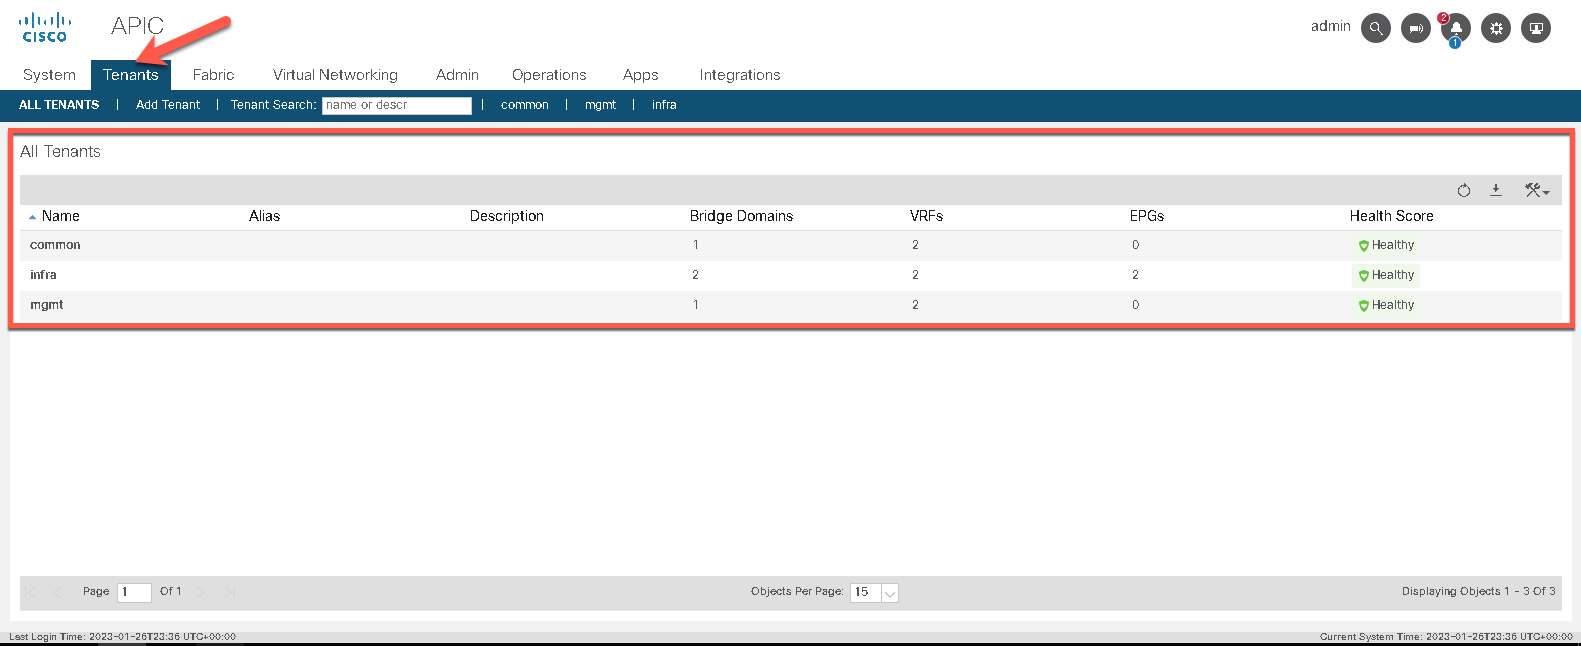
Check the config in your APIC, before you apply the changes.
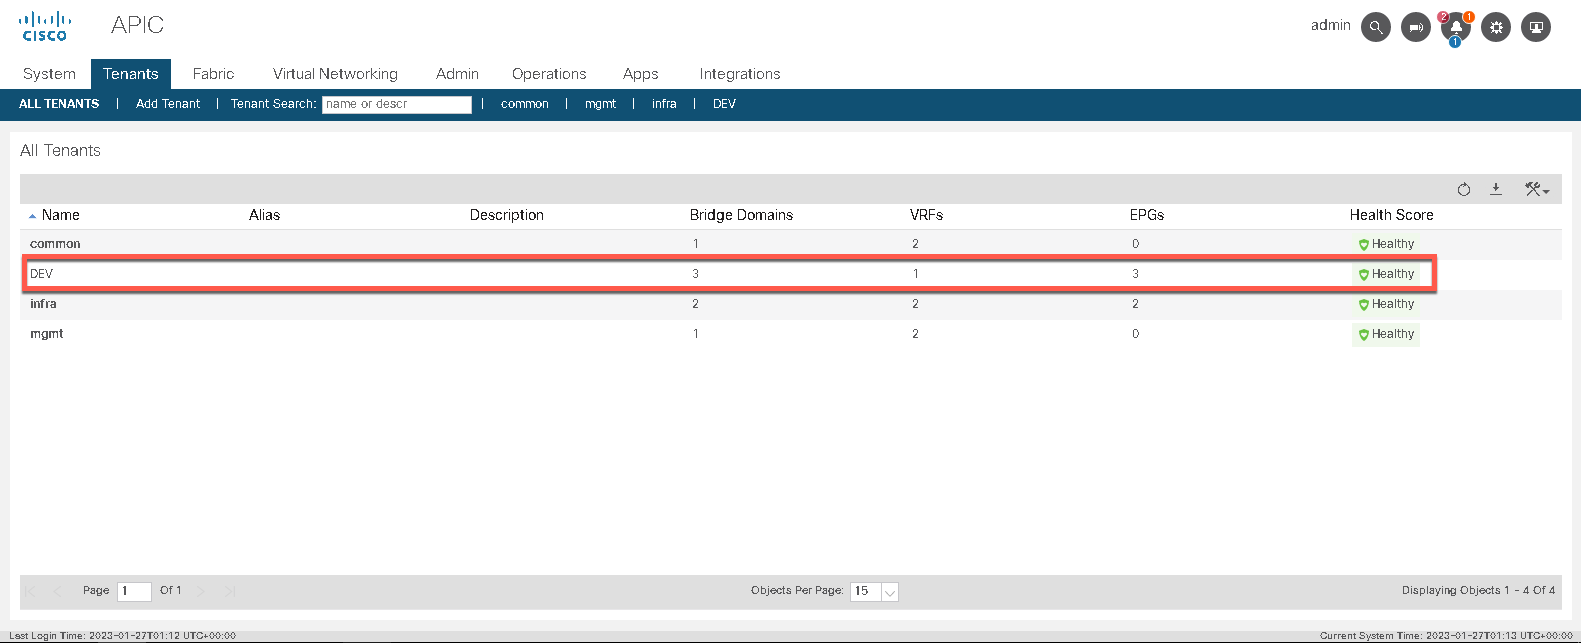
Execute the pipeline and the plan stage execution. 22 new objects will be created.

As the stage apply is set to manual, run the stage.

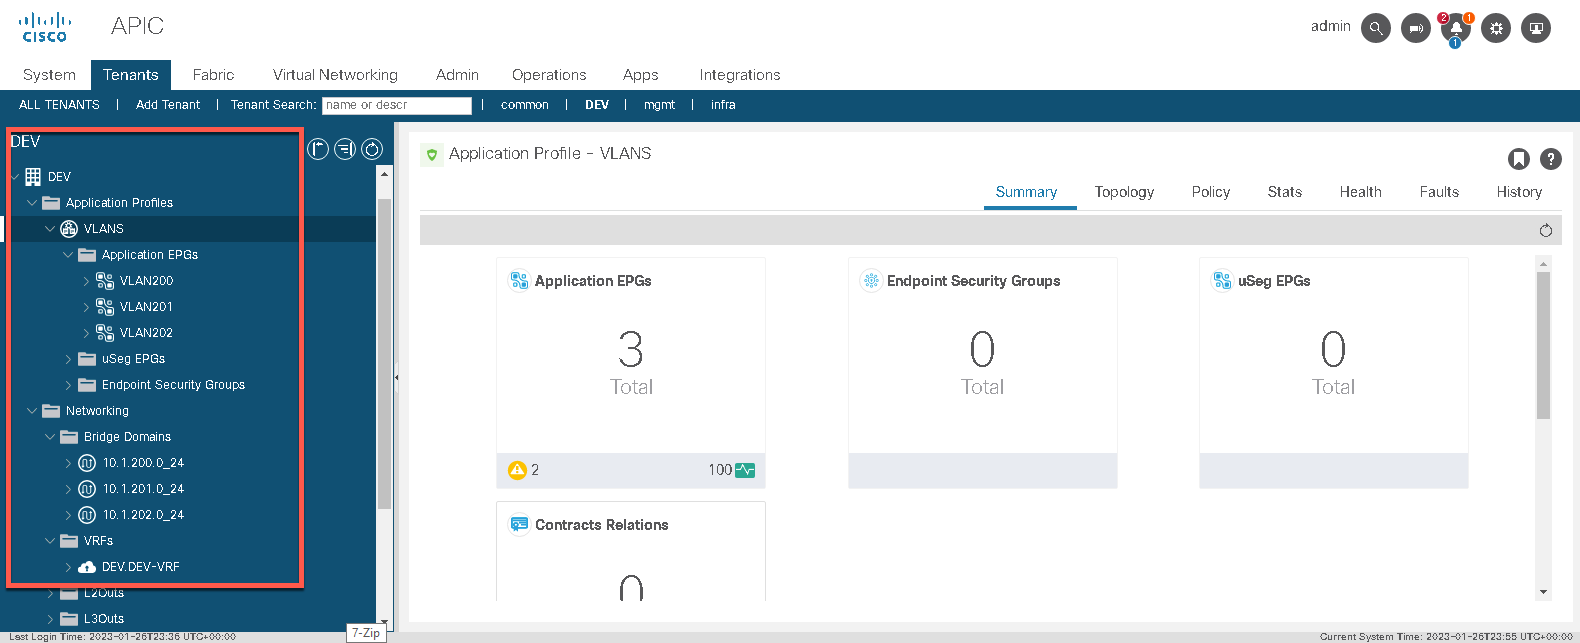
Validate if the tenant DEV has been created with all the defined objects:
If you want, execute the destroy stage in order to revert all the changes that have been previously applied.

References
This repository uses a very simple use case which I was using in the above article:
https://github.com/netascode/nac-aci-simple-example
For a more complex deployment, I highly recommend checkout the following example:
https://github.com/netascode/nac-aci-comprehensive-example
Also, check out the official documentation from Cisco:
https://developer.cisco.com/docs/nexus-as-code/#!cicd-example/introduction
Other useful links: