Table of Contents
UPDATED: 8th of May 2024
Introduction
You installed a fresh Ubuntu 22.04 VM and you quickly want to set up a TIG stack to get telemetry data from your network devices?
In this post, I will show you what needs to be done on a baremetal or a docker installation.
Setting up services is not what we usually do daily. As I needed to set up the TIG stack I tried to get all information from different sources and briefly wrote down each command which is necessary:
Option 1: Using Baremetal
TIG Stack installation commands
					sudo apt install -y ca-certificates curl gnupg lsb-release
sudo mkdir -p /etc/apt/keyrings/
wget -q -O - https://apt.grafana.com/gpg.key | gpg --dearmor | sudo tee /etc/apt/keyrings/grafana.gpg > /dev/null
echo "deb [signed-by=/etc/apt/keyrings/grafana.gpg] https://apt.grafana.com stable main" | sudo tee -a /etc/apt/sources.list.d/grafana.list
wget -q https://repos.influxdata.com/influxdata-archive_compat.key
echo '393e8779c89ac8d958f81f942f9ad7fb82a25e133faddaf92e15b16e6ac9ce4c influxdata-archive_compat.key' | sha256sum -c && cat influxdata-archive_compat.key | gpg --dearmor | sudo tee /etc/apt/trusted.gpg.d/influxdata-archive_compat.gpg > /dev/null
echo 'deb [signed-by=/etc/apt/trusted.gpg.d/influxdata-archive_compat.gpg] https://repos.influxdata.com/debian stable main' | sudo tee /etc/apt/sources.list.d/influxdata.list

sudo apt update
sudo apt install -y influxdb2 telegraf grafana net-tools
sudo systemctl enable grafana-server
sudo systemctl enable influxdb
sudo systemctl enable telegraf
sudo systemctl start grafana-server
sudo systemctl start influxdb

sudo systemctl | egrep 'telegraf|grafana-server|influxdb'
sudo netstat -tulpn | egrep 'telegraf|grafana-server|influxd'

INFLUX_DB=telegraf
INFLUX_USER=telefraf
INFLUX_PW=telegraf

influx -execute "CREATE DATABASE $INFLUX_DB"
influx -execute "CREATE USER $INFLUX_USER WITH PASSWORD '$INFLUX_PW'"
influx -execute "show databases"
influx -execute "show users"

sudo sed -i -e 's%#\[\[outputs.influxdb]]%[[outputs.influxdb]]%' \
-e '119s%.*# database = "telegraf"%database = "telegraf"%' \
-e '152s%.*# username = "telegraf"%username = "$INFLUX_USER"%' \
-e '153s%.*# password = "metricsmetricsmetricsmetrics"%password = "$INFLUX_PW"%' \
-e 's%# \[\[inputs.cisco_telemetry_mdt]]%[[inputs.cisco_telemetry_mdt]]%' \
-e '7143s%#  transport = "grpc"%transport = "grpc"%' \
-e '7146s%#  service_address = ":57000"%service_address = ":57000"%' \
/etc/telegraf/telegraf.conf

sudo systemctl restart telegraf && sudo systemctl status telegraf
TIG Stack installation commands description
- Line 1-10: Adding Grafana repository, install and start services
- Line 11-12: Getting status of running services (Telegraf, Grafana and InfluxDB) and checking the open ports
- Line 14-16: Setting variables for InfluxDB
- Line 18-21: Create InfluxDB Database and User/Password as defined
- Line 23-30: Configure Telegraf for InfluxDB and Cisco Model Driven Telemetry
- Line 32: Restart the Telegraf service and get the status
Option 2: Using docker
A Cisco colleague prepared a very nice shell script that will kick off the entire process and configure the services in a Docker environment. With just a couple of commands, everything is up and running within a couple of minutes.
For a full description of the is done, please visit his GitHub Page: https://github.com/dsx1123/telemetry_collector
He also presented on Cisco Live a very interesting session: Streaming Telemetry on Cisco NX-OS – BRKDCN-2991
If you have access to the CiscoLive OnDemand library it’s highly recommended to watch the session.
Docker installation commands
					git clone https://github.com/dsx1123/telemetry_collector.git
cd telemetry_collector
GNMI_USER=gnmiuser
GNMI_PASSWORD=gnmipassword
sudo ./build.sh start
					Usage: ./build.sh {start|stop|restart|cert|clean}
  start  :   start docker containers for telegraf/influxdb/grafana
  stop   :   stop docker containers for telegraf/influxdb/grafana
  down   :   stop and remove docker containers for telegraf/influxdb/grafana
  restart:   restart docker containers for telegraf/influxdb/grafana
  cert   :   generate certificates for telegraf plugin
  clean  :   clean the database of influxdb, volume of grafana
  reset  :   reset project to inital state
Checking the services
Open in the browser the IP of your server with port 3000: http://w.x.y.z:3000
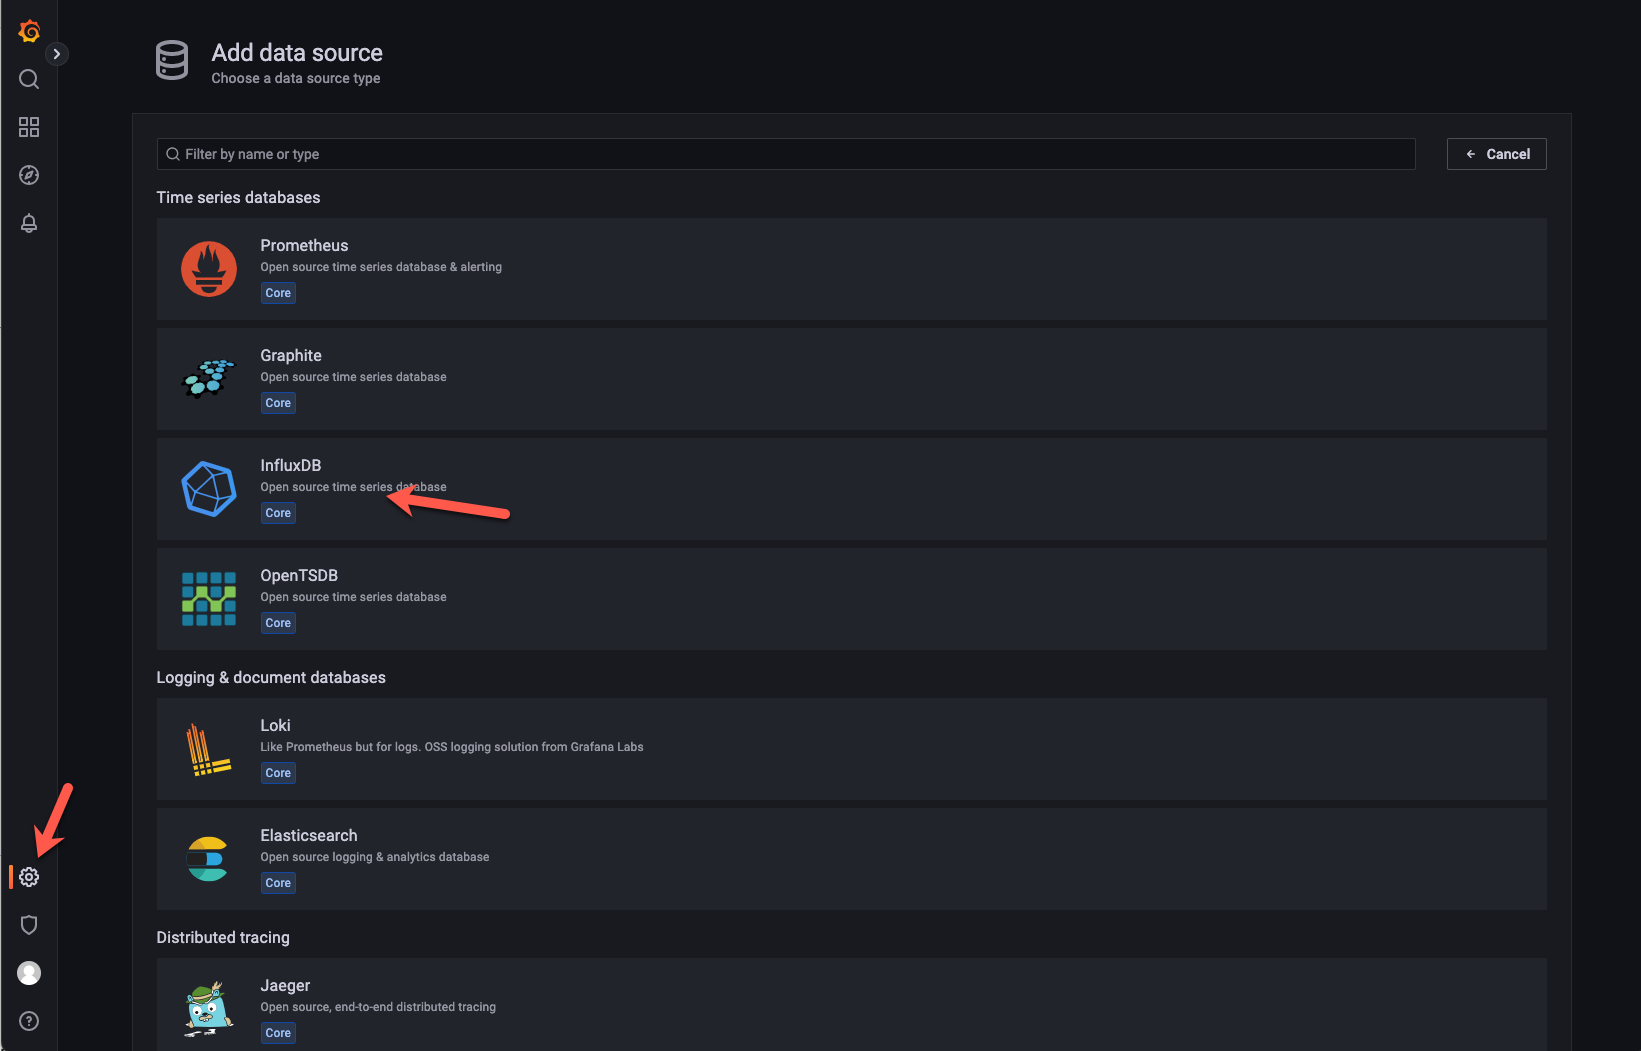
Import InfluxDB and Dashboard in Grafana
Let’s configure our InfluxDB as a source and import a dashboard that is using the Telegraf metrics to test our stack 📊 🚀
Use: http://localhost:8086 as a URL
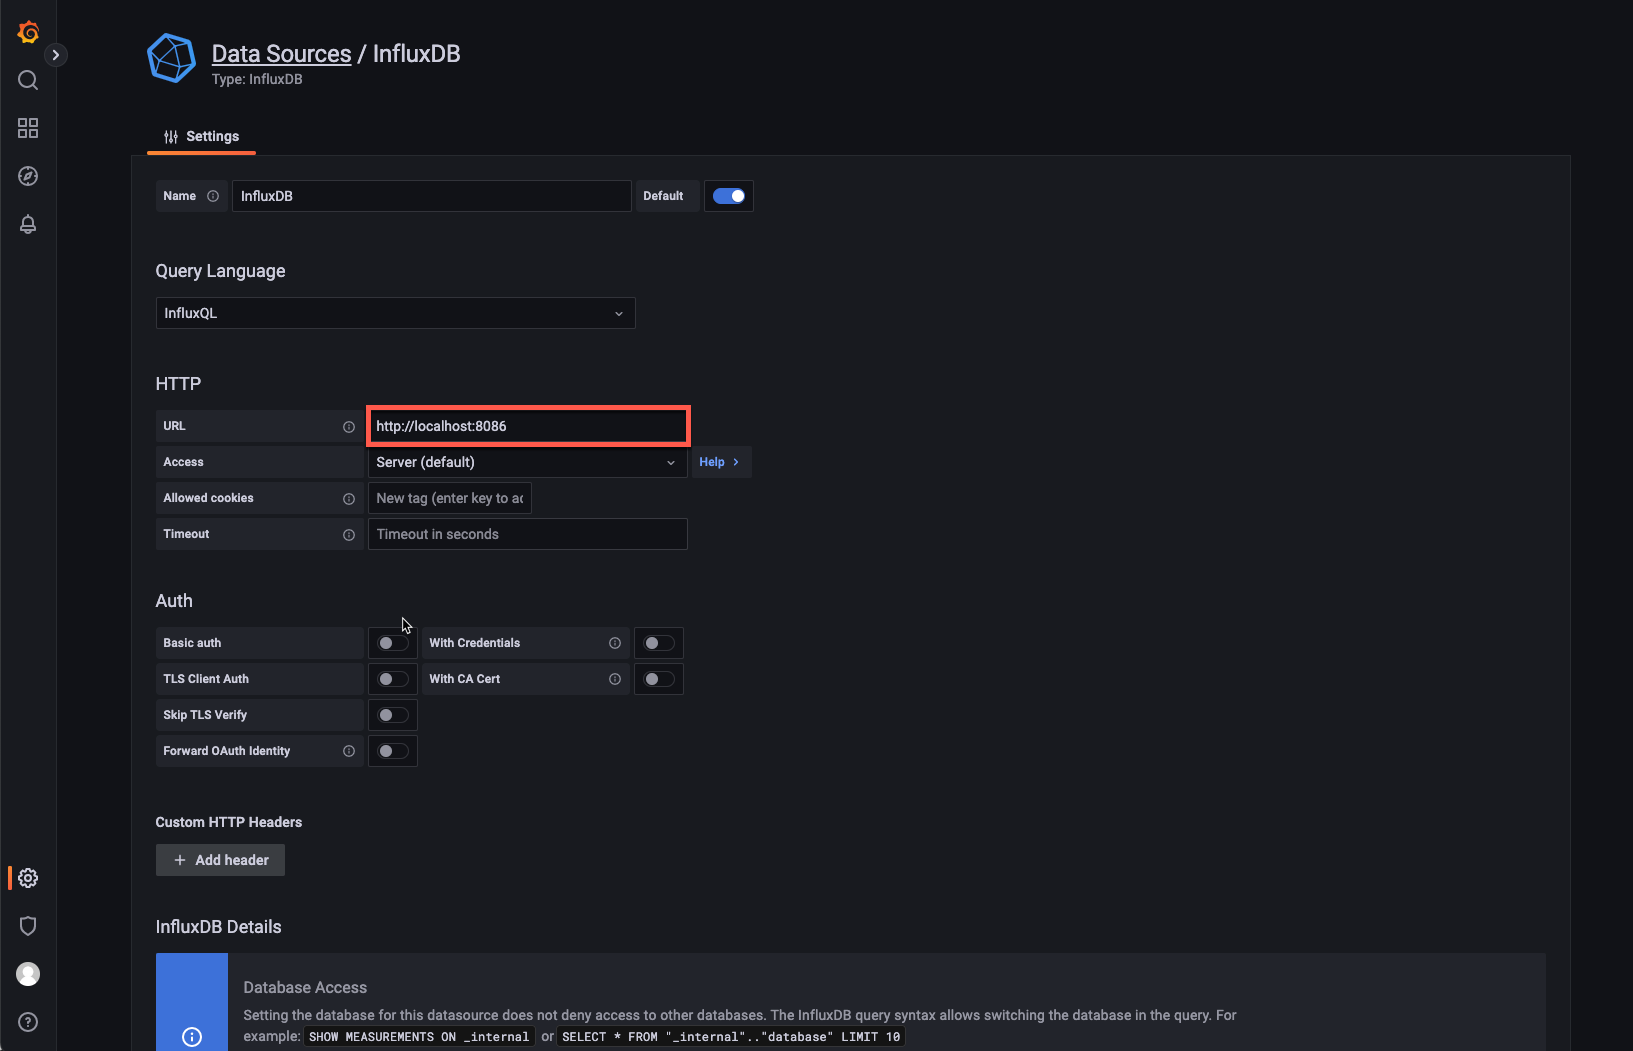
Configure your database/user & password which has been specified in during the installation. Save & Test

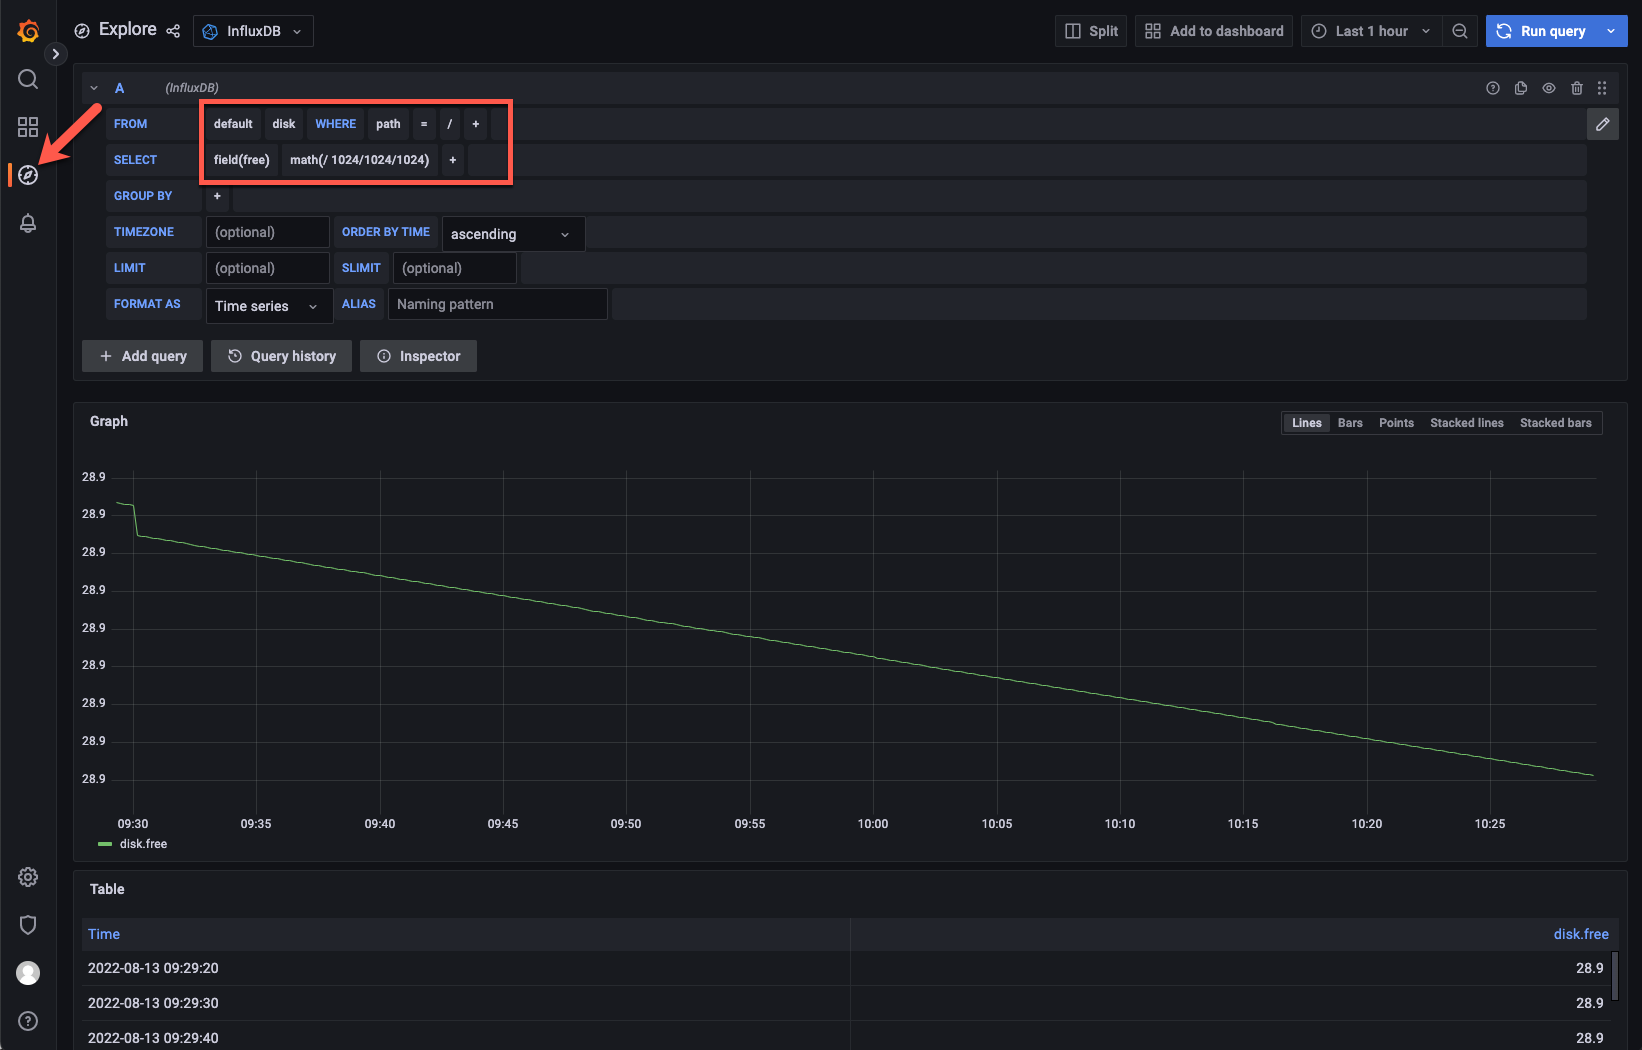
If everything is working, go to the Explore page and build your first query to retrieve data from the InfluxDB.
Let’s import a Dashboard to visualize the data from our Linux server provided by the Telegraf input plugin.
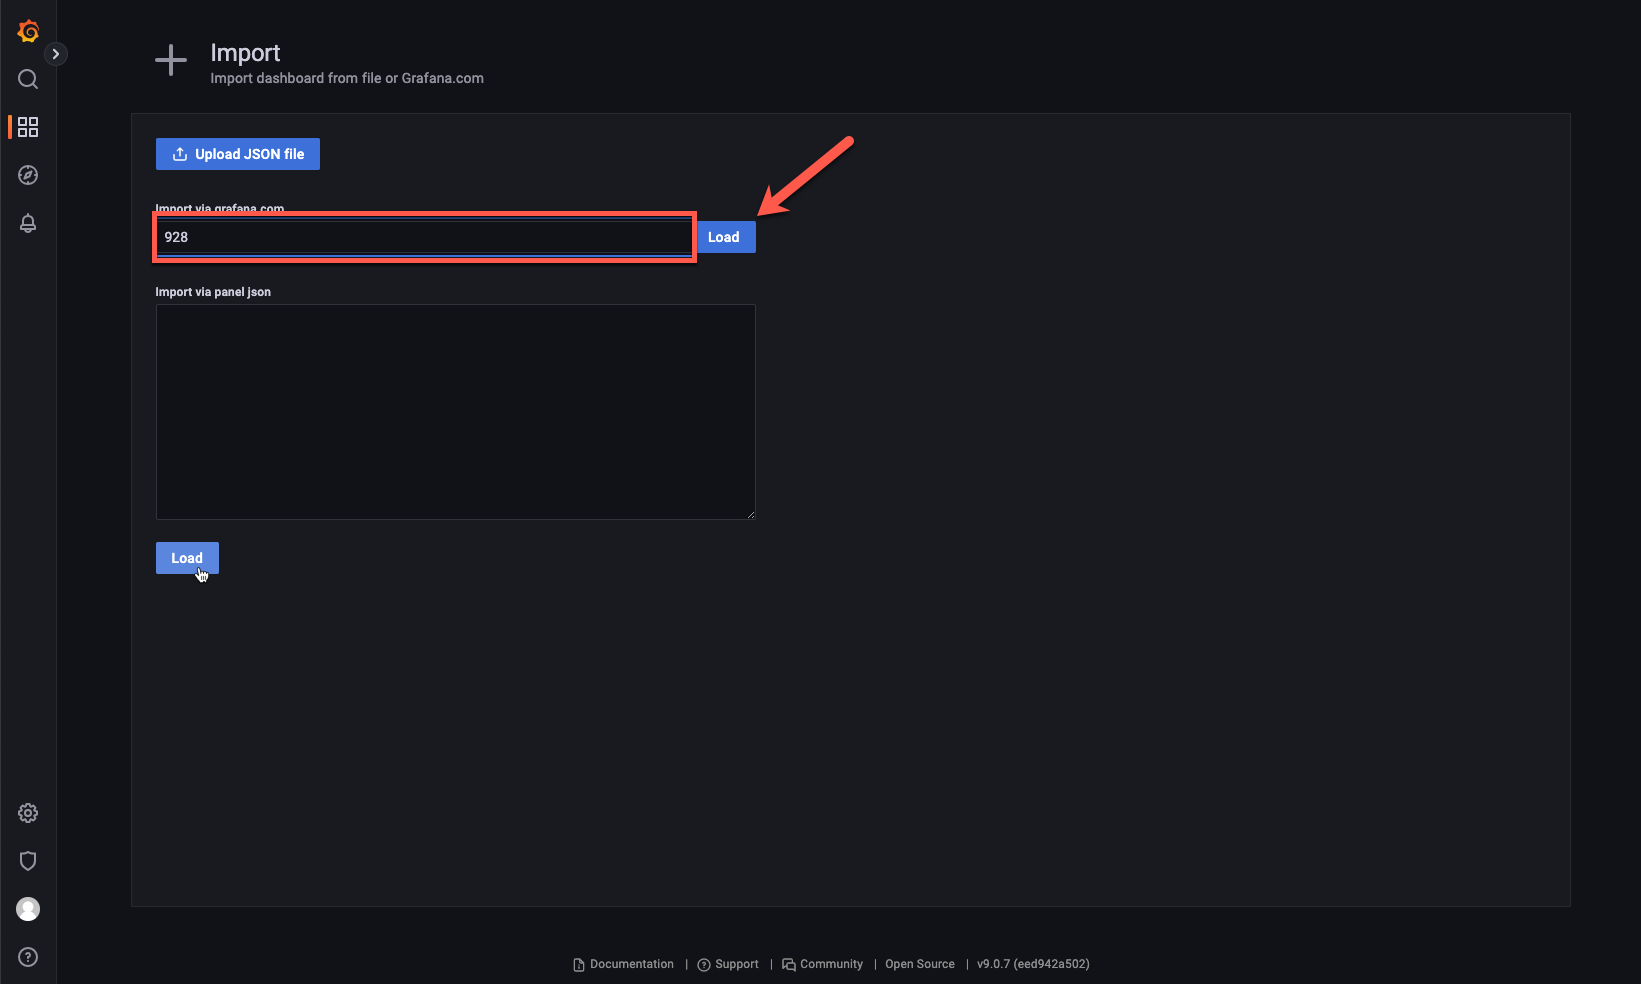
Go to Dashboard > Import

Grafana offers a lot of Dashboards ready to use.
I picked this dashboard, which looks super nice:
https://grafana.com/grafana/dashboards/928-telegraf-system-dashboard/
Click on “Copy ID to Clipboard”

Paste the ID and Load the Dashboard.
If your server sits behind a proxy just download the Json code in the previous step and import the Json.
Now you can change the name of the Dashboard and define the InfluxDB that we added in a previous step.
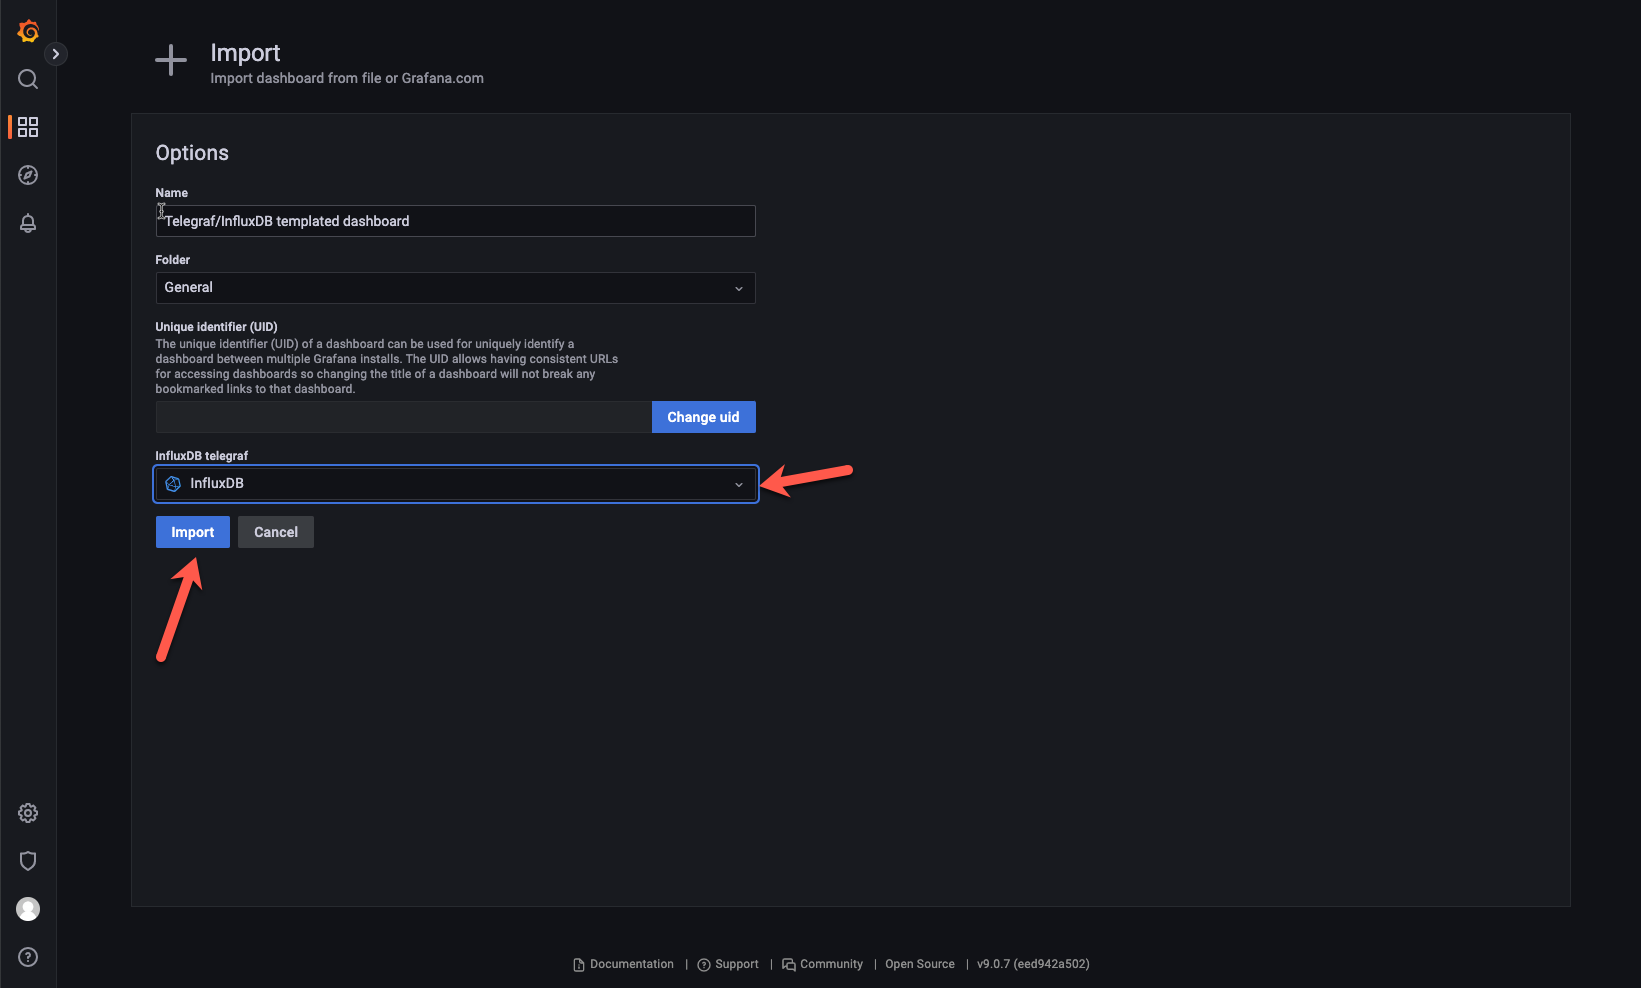
Awesome! Our dashboard is imported and what can I say, it looks beautiful! 👏