Table of Contents
Introduction
In the realm of network design and customization, the ability to adapt and tailor solutions to specific needs is crucial.
I’m currently working on a BGP EVPN project leveraging Cisco’s Network Data Platform Fabric Controller (NDFC). The core challenge? The predefined fabric templates and other out-of-the-box solutions fall short of meeting all the unique optimizations our customers desire.
This gap in capabilities has led us to explore the creation of custom templates. Custom templates stand as a vital solution for customization, allowing for precise adjustments and configurations that align with customer’s specific objectives.
In this blog post, you will explore the steps and strategies involved in deploying custom templates with NDFC, ensuring that even the customizations are met efficiently and effectively.
Creation of new custom templates
To address the customer’s requirement of tracking point-to-point links for effective troubleshooting, we need to create a new custom policy in NDFC.
This policy will enable us to tag fabric interfaces used for point-to-point links, a functionality not automatically provided by NDFC as it does for loopback interfaces in the underlay.
Let’s start with the creation of the new policy:
Fabric > Operations > Templates
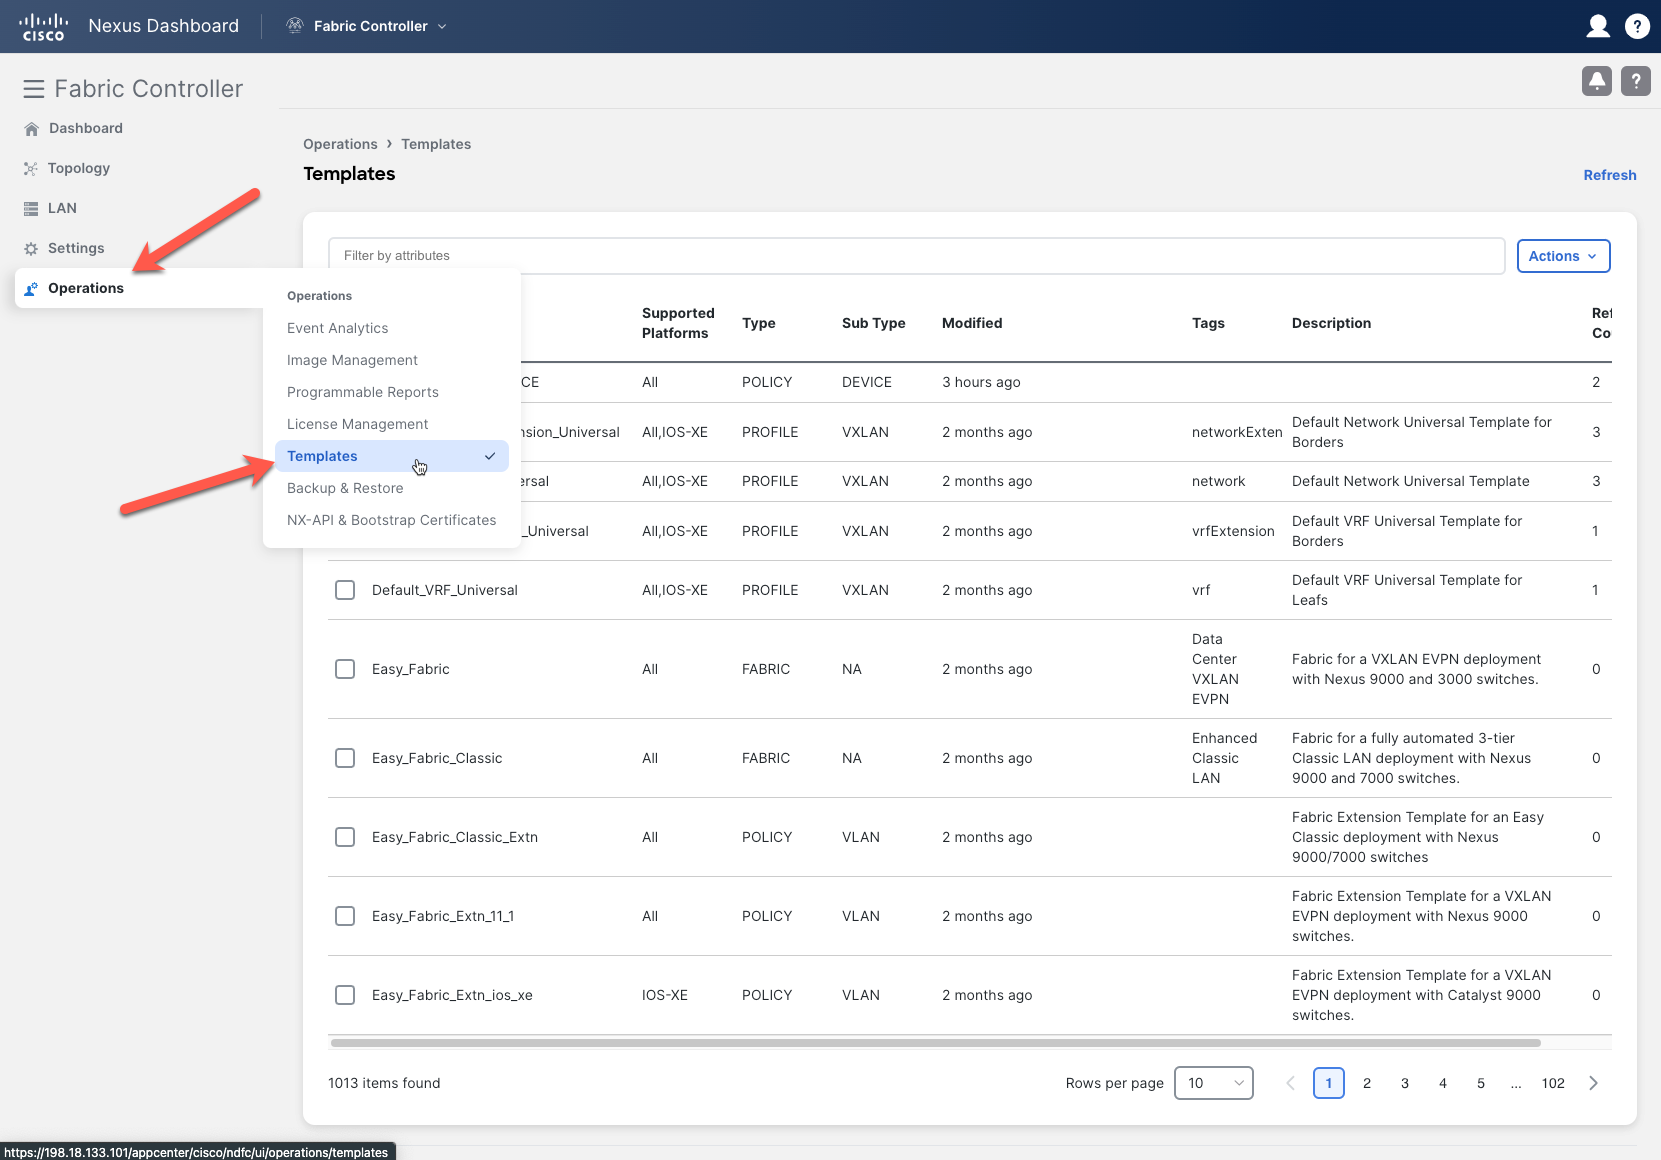
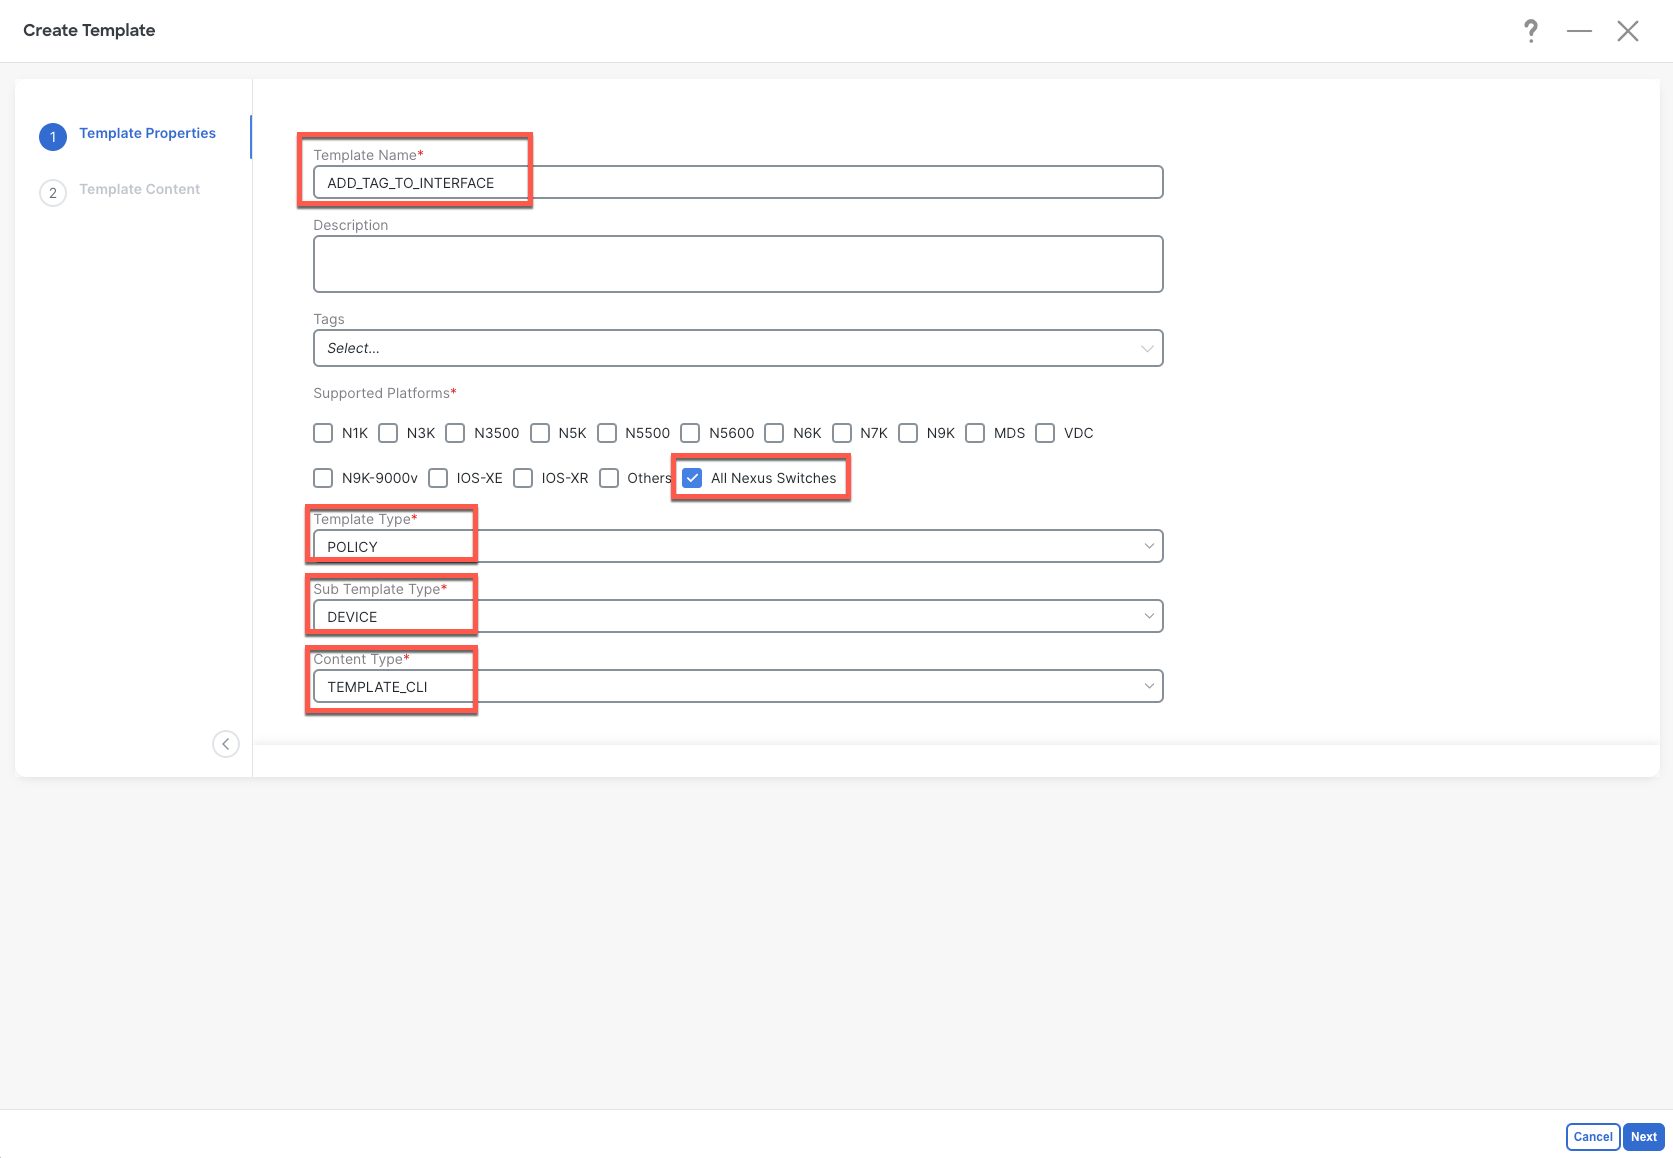
Actions > Create new template
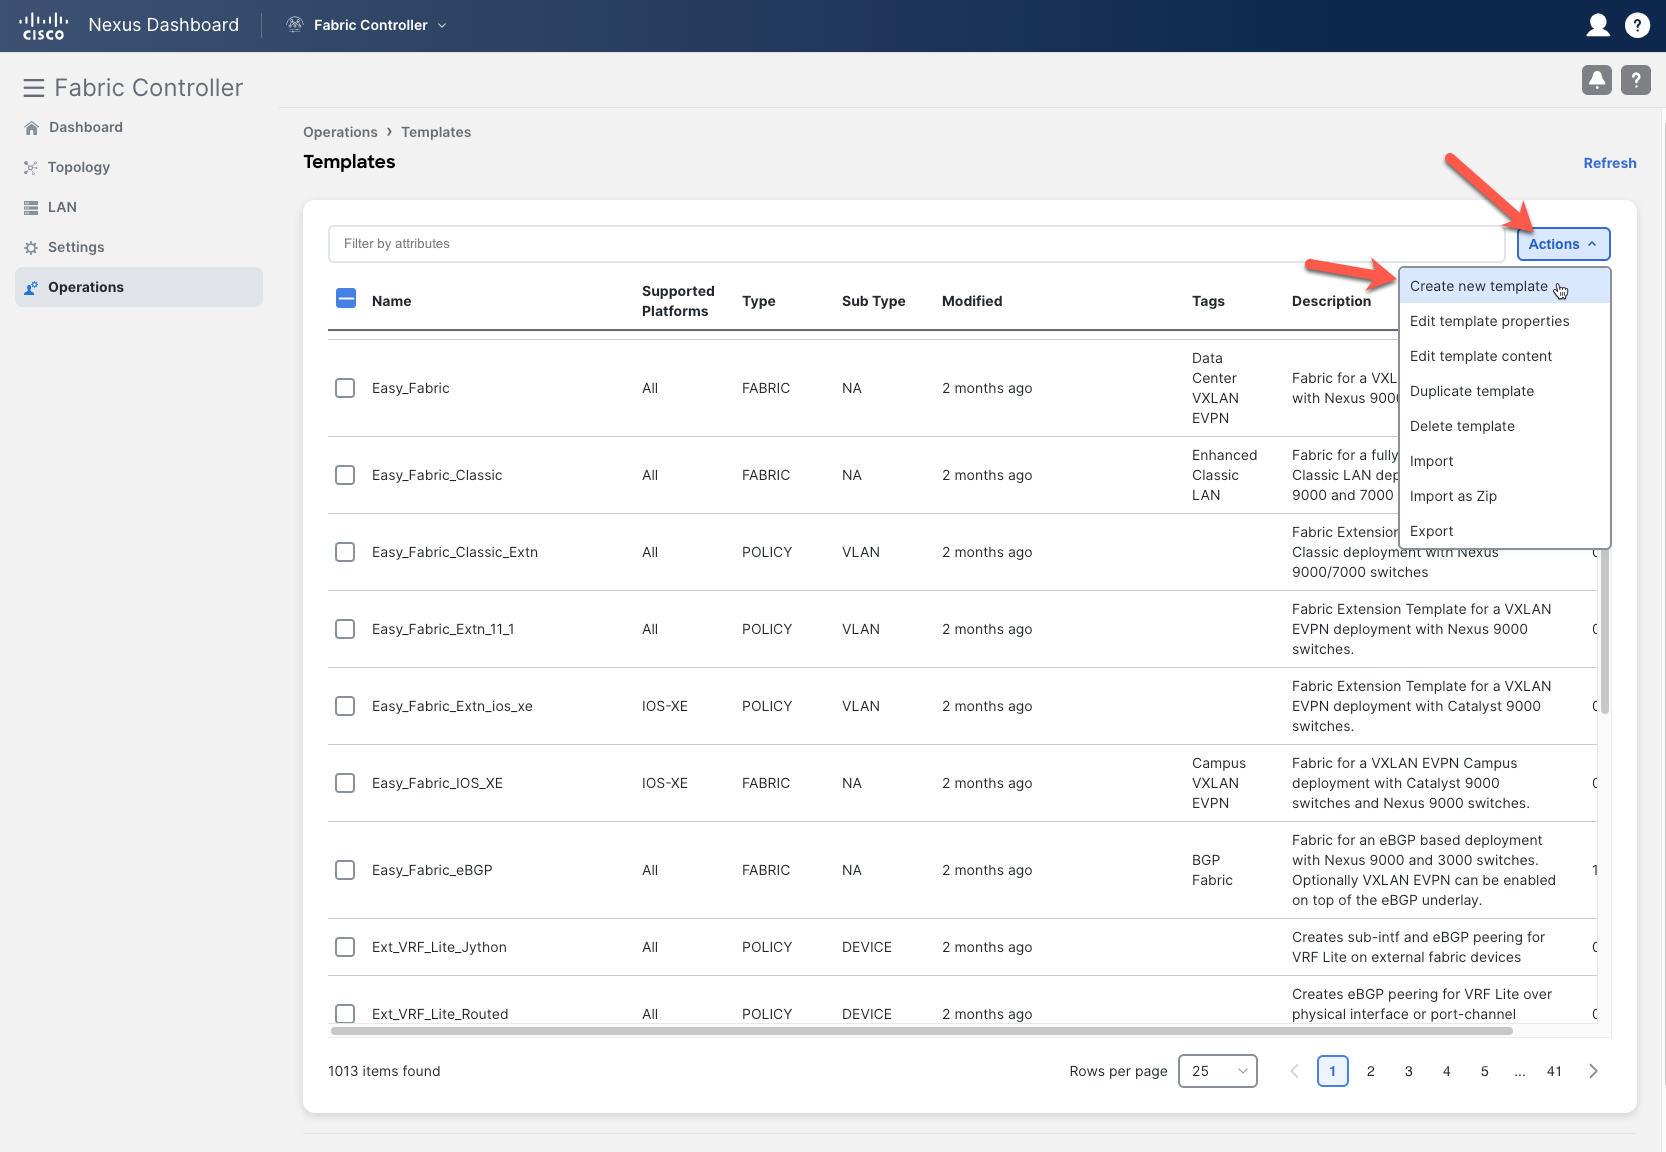
We want to create a policy that is on the device level and has CLI config as content.
To ensure the policy is reusable and user-friendly, we’ll integrate variables into the CLI commands. These variables will be presented as fields in a form, allowing the customer to effortlessly input parameters when assigning the policy to a device. The syntax is very easy to understand and adopt.
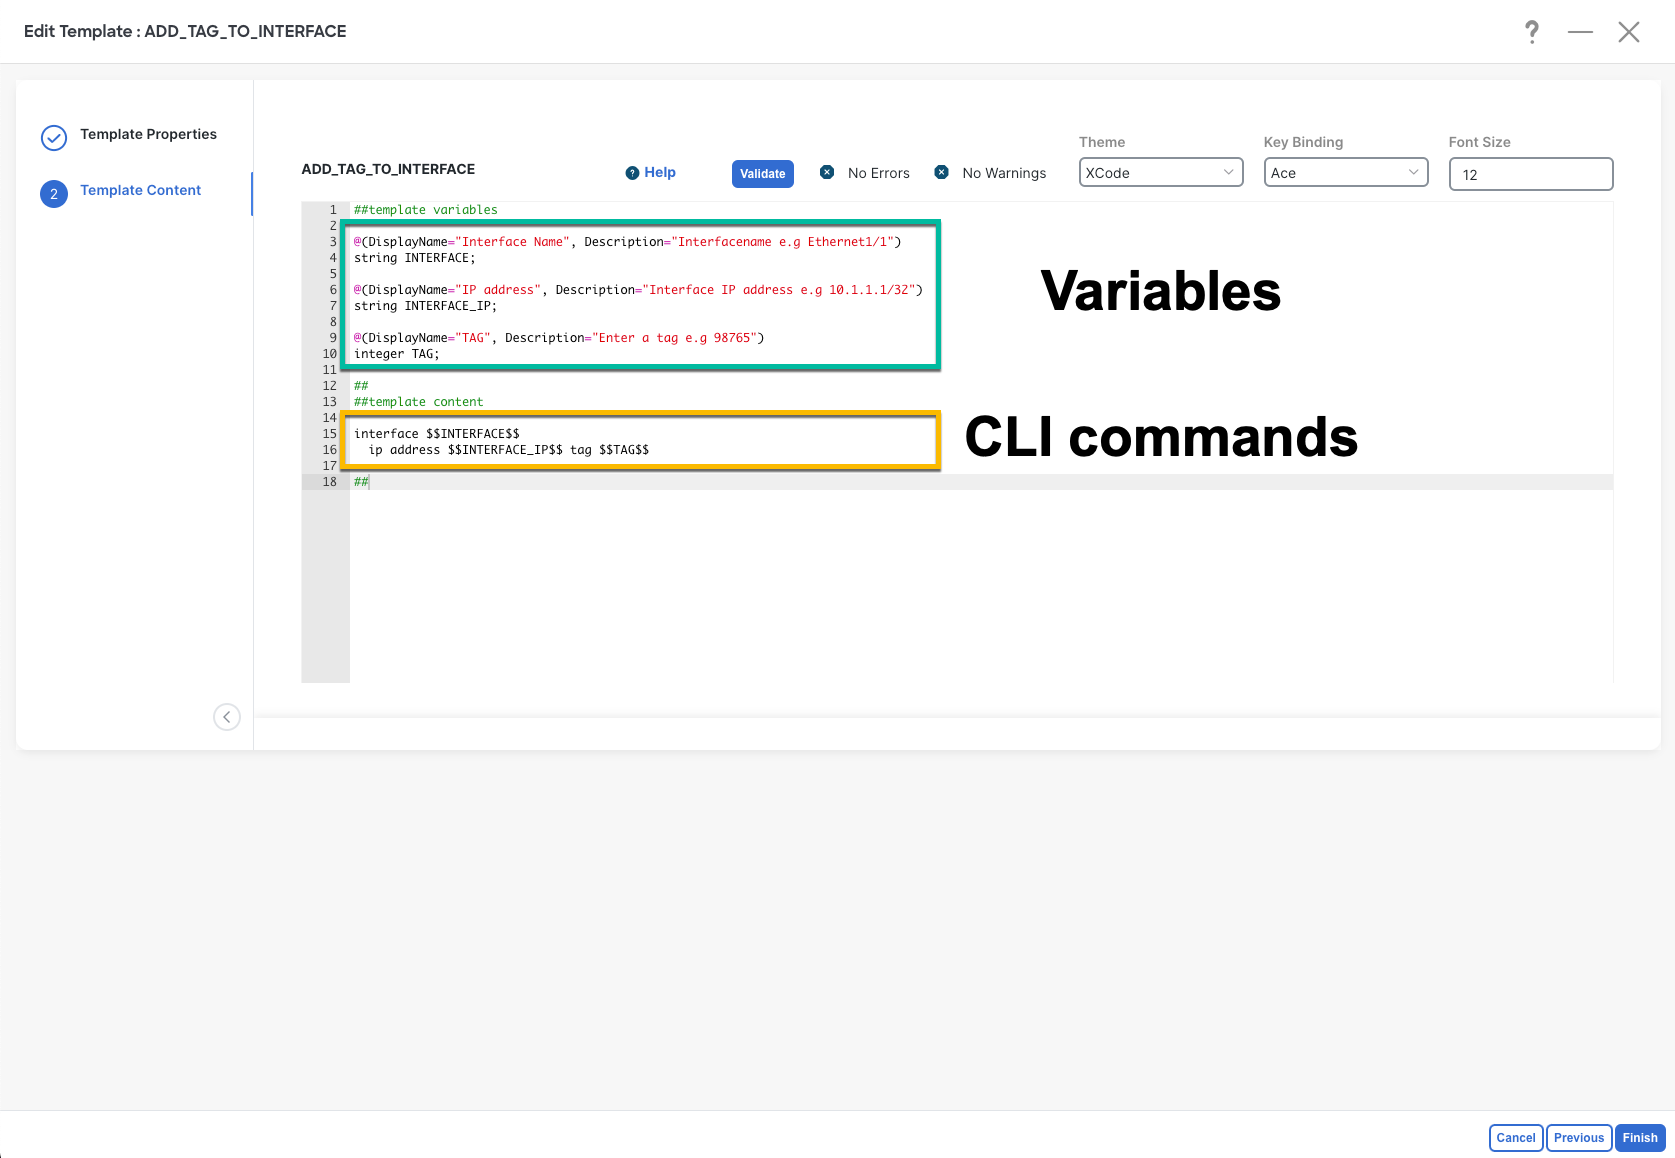
Please make sure to set the right datatype for the variables!
For more information about the possible template options, datatypes etc. , have a look at the guide from Cisco:
					##template variables

@(DisplayName="Interface Name", Description="Interfacename e.g Ethernet1/1")
string INTERFACE;

@(DisplayName="IP address", Description="Interface IP address e.g 10.1.1.1/32")
string INTERFACE_IP;

@(DisplayName="TAG", Description="Enter a tag e.g 98765")
integer TAG;

##
##template content

interface $$INTERFACE$$
  ip address $$INTERFACE_IP$$ tag $$TAG$$

##
Deployment of new custom templates via UI
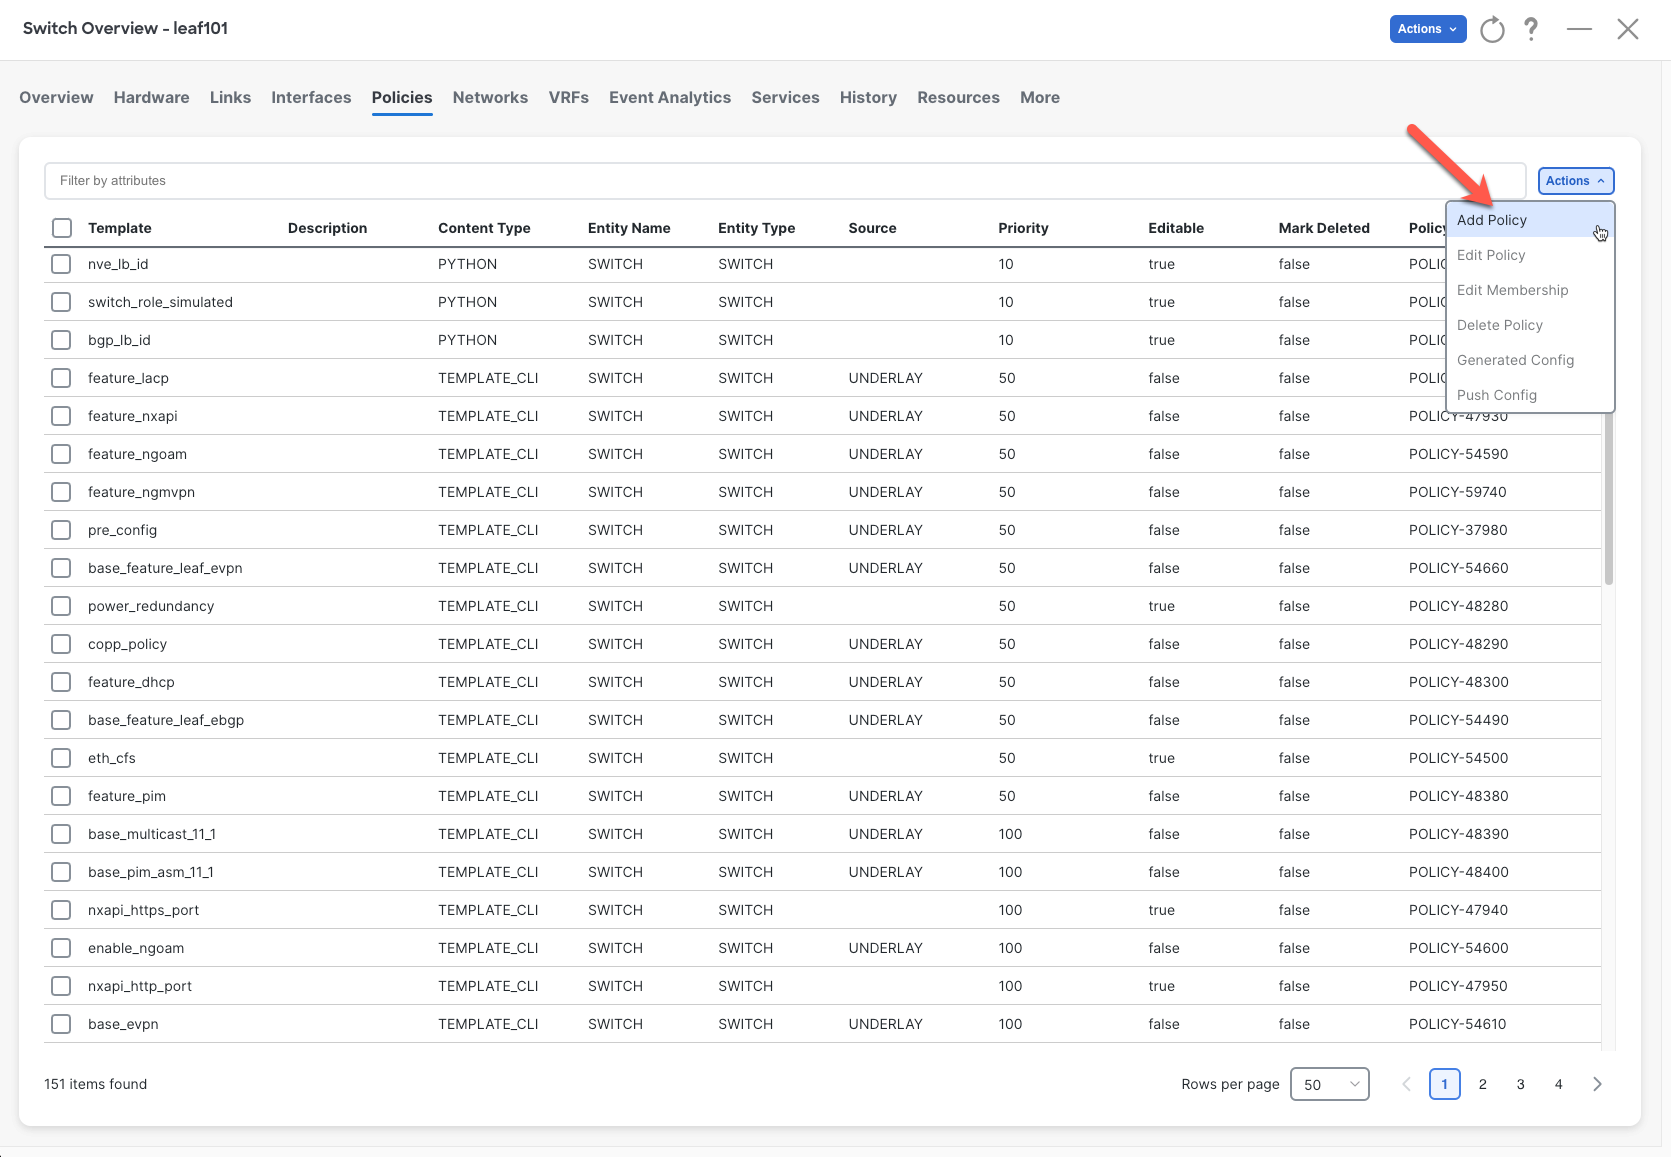
After the creation of the template, it is time to assign the policy to a switch and deploy it. Select the switch and go to Policies. Next, go to Actions > Add Policy
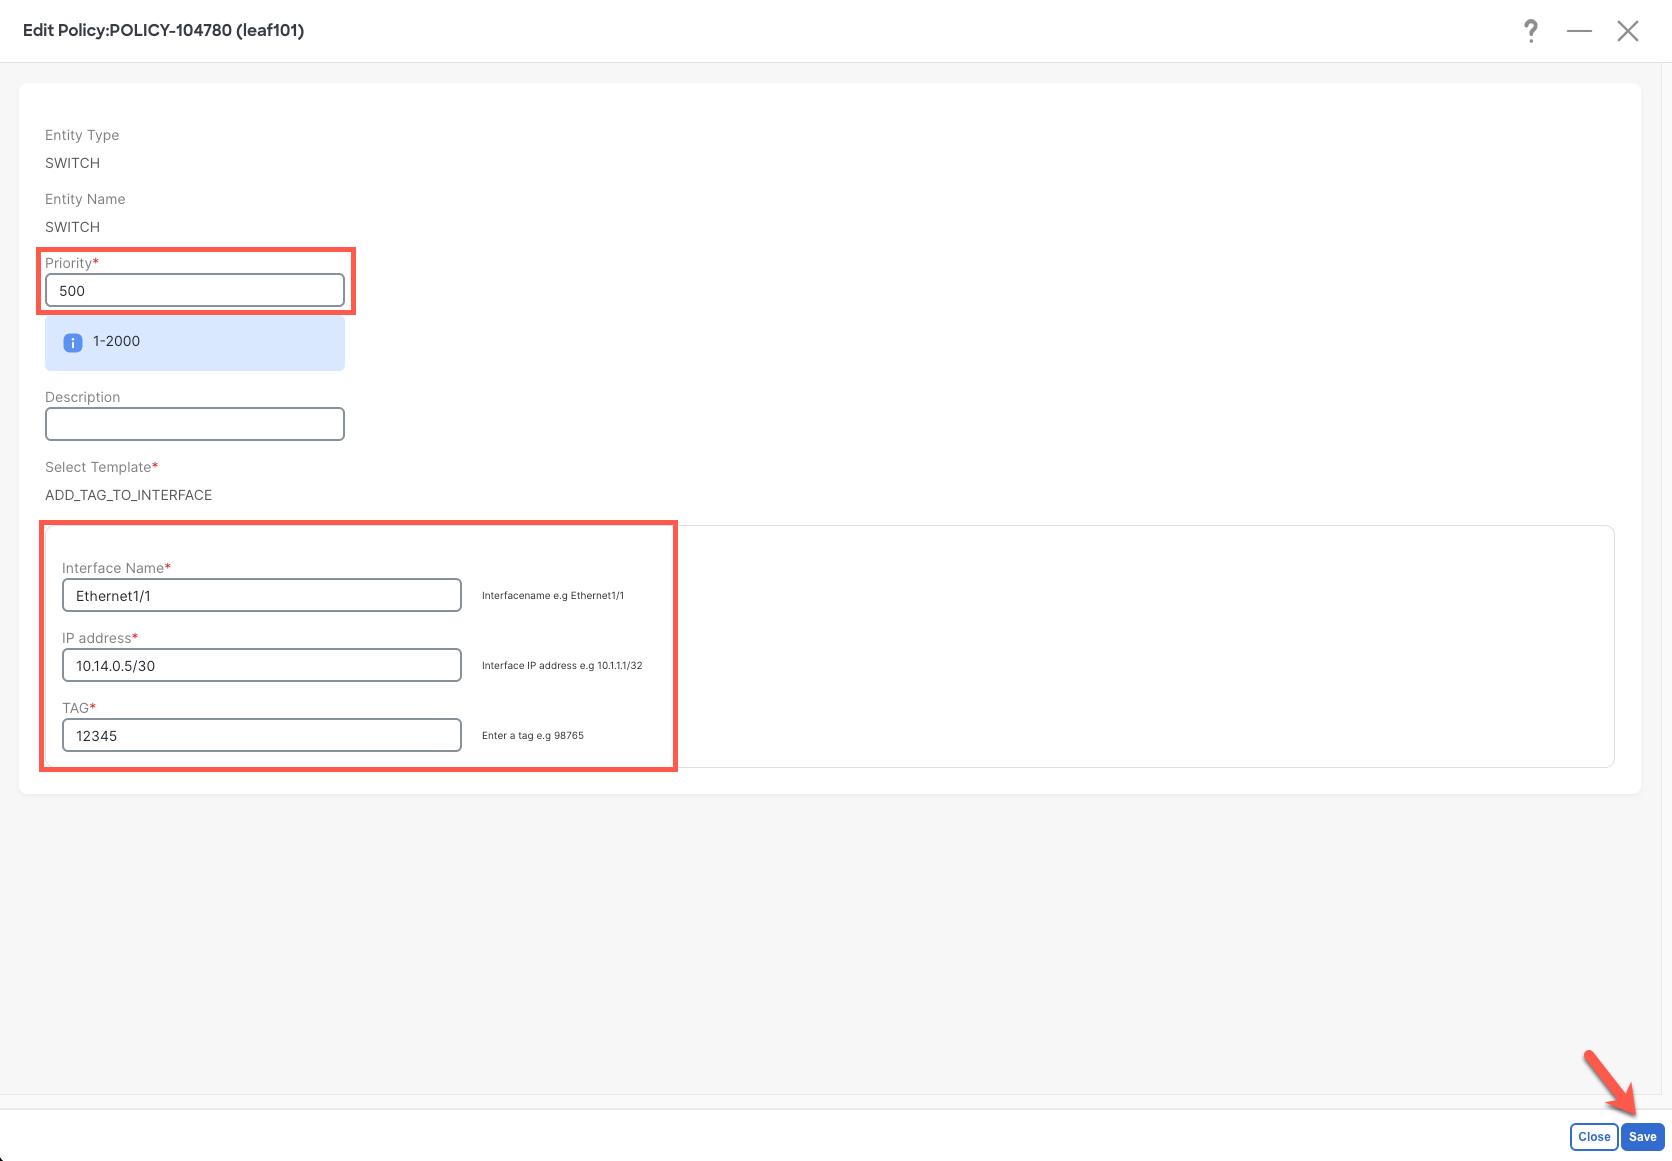
Select the new created policy ADD_TAG_TO_INTERFACE

It’s important to note that we want to override the existing config by adding the tag. Therefore, priority is crucial. In this case, a high priority means that the config will be deployed last. 500 is a good choice as most of the NDFC-generated config is between 10 – 450.
The next three important fields are the one that we defined in the template and these needs to be filled out.
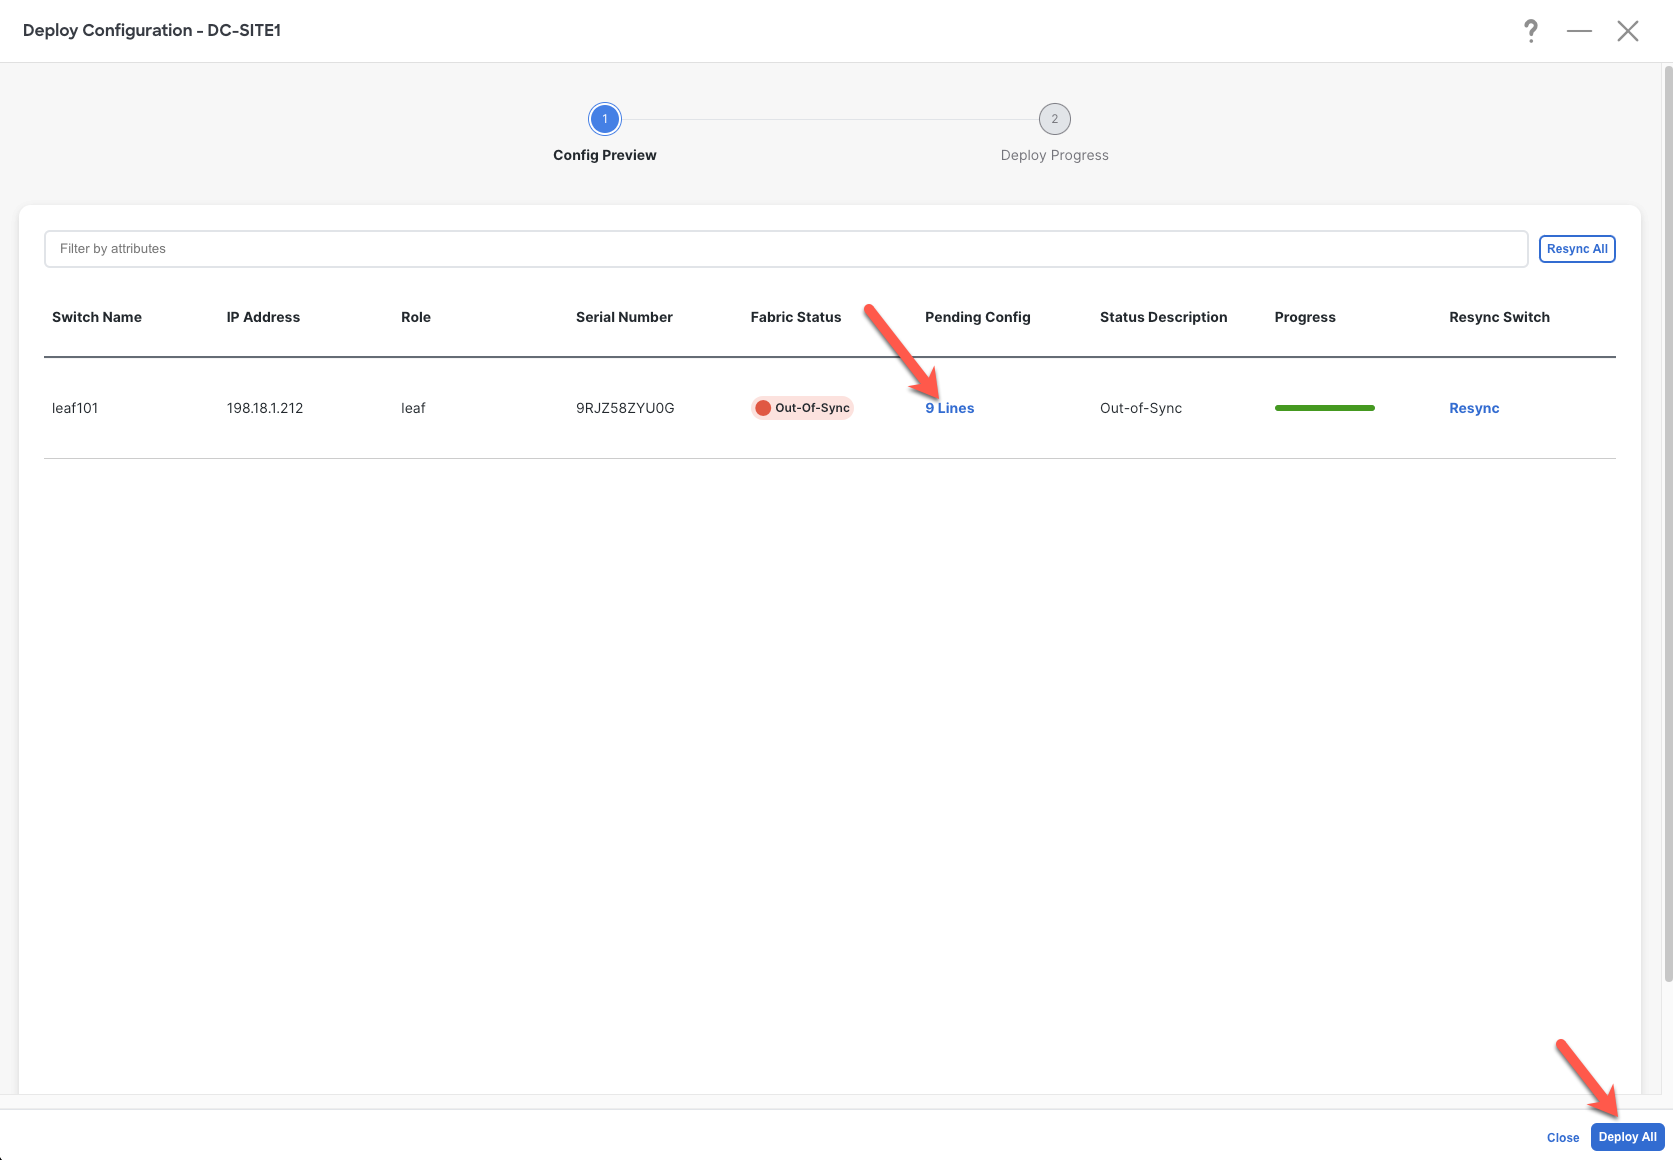
Deploy the config via Actions > Deploy
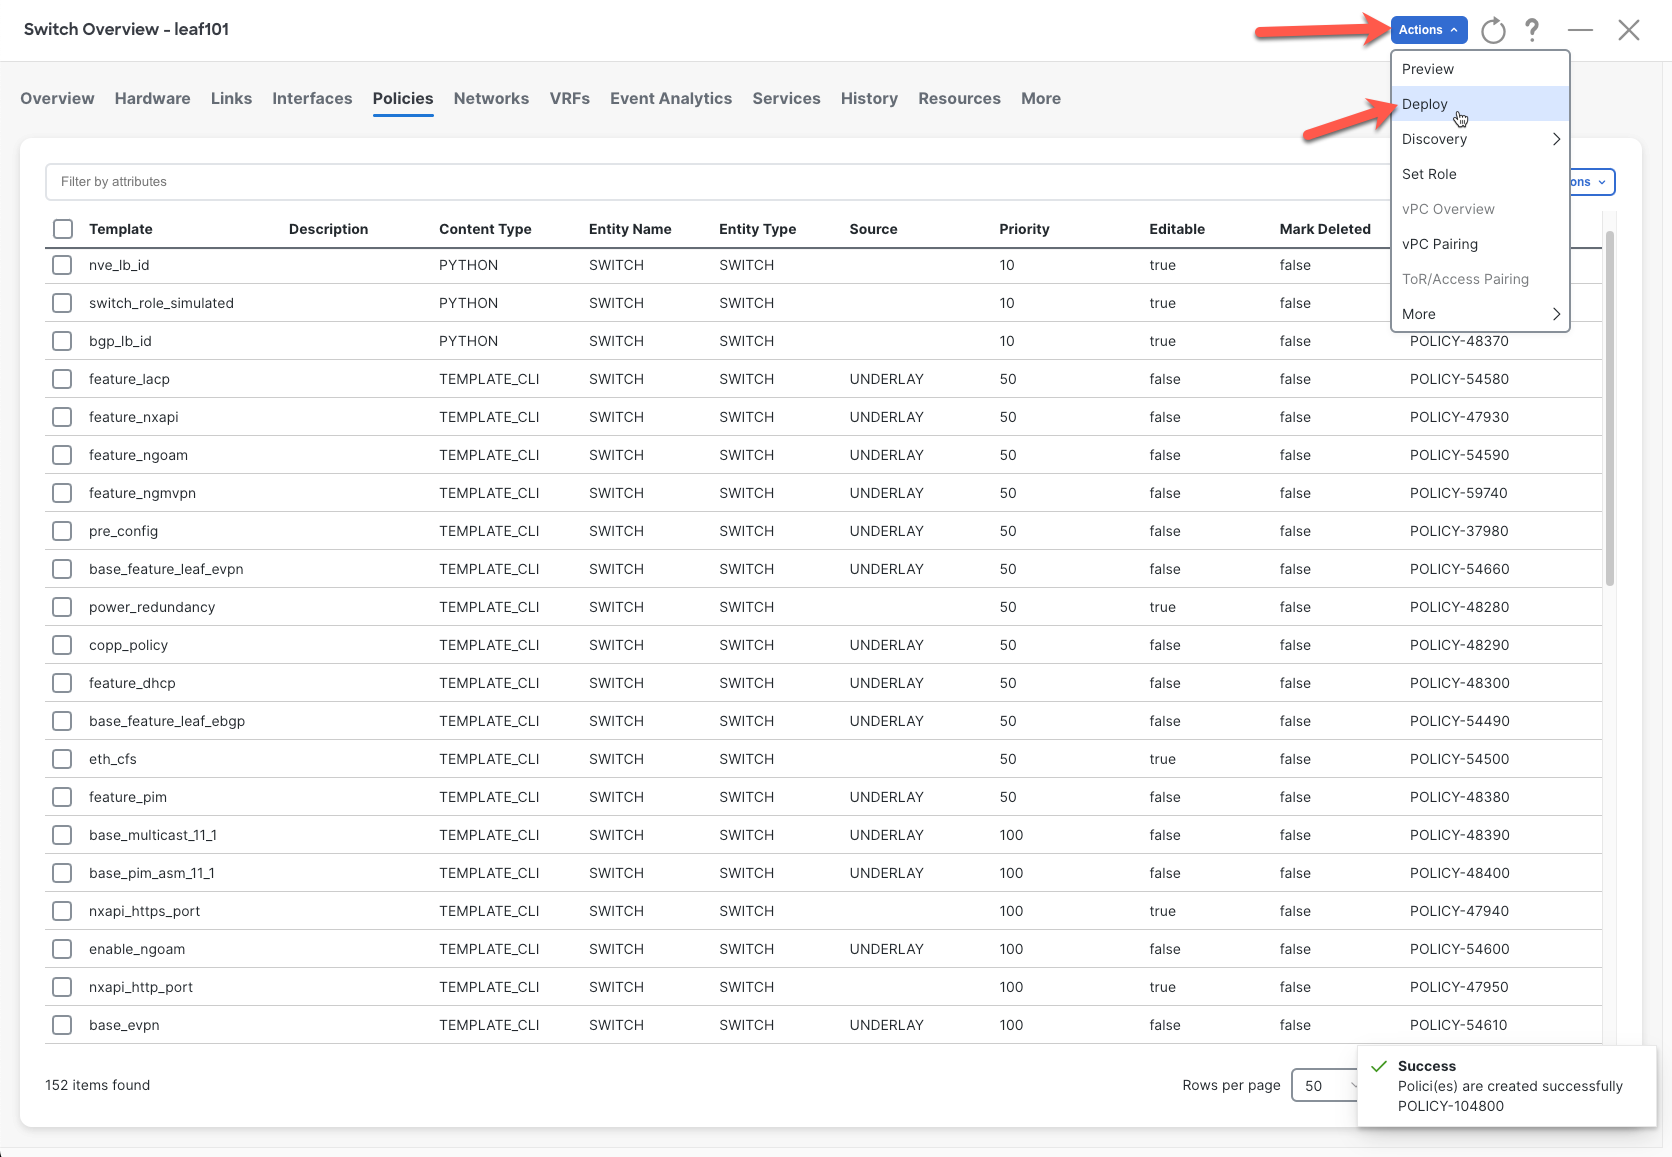
Make sure that the changes are correct by reviewing the 9 changed lines.
Here you can see that the order is crucial and is applied correctly. The IP address statement will be added at the end with the tag and will override the previous one.
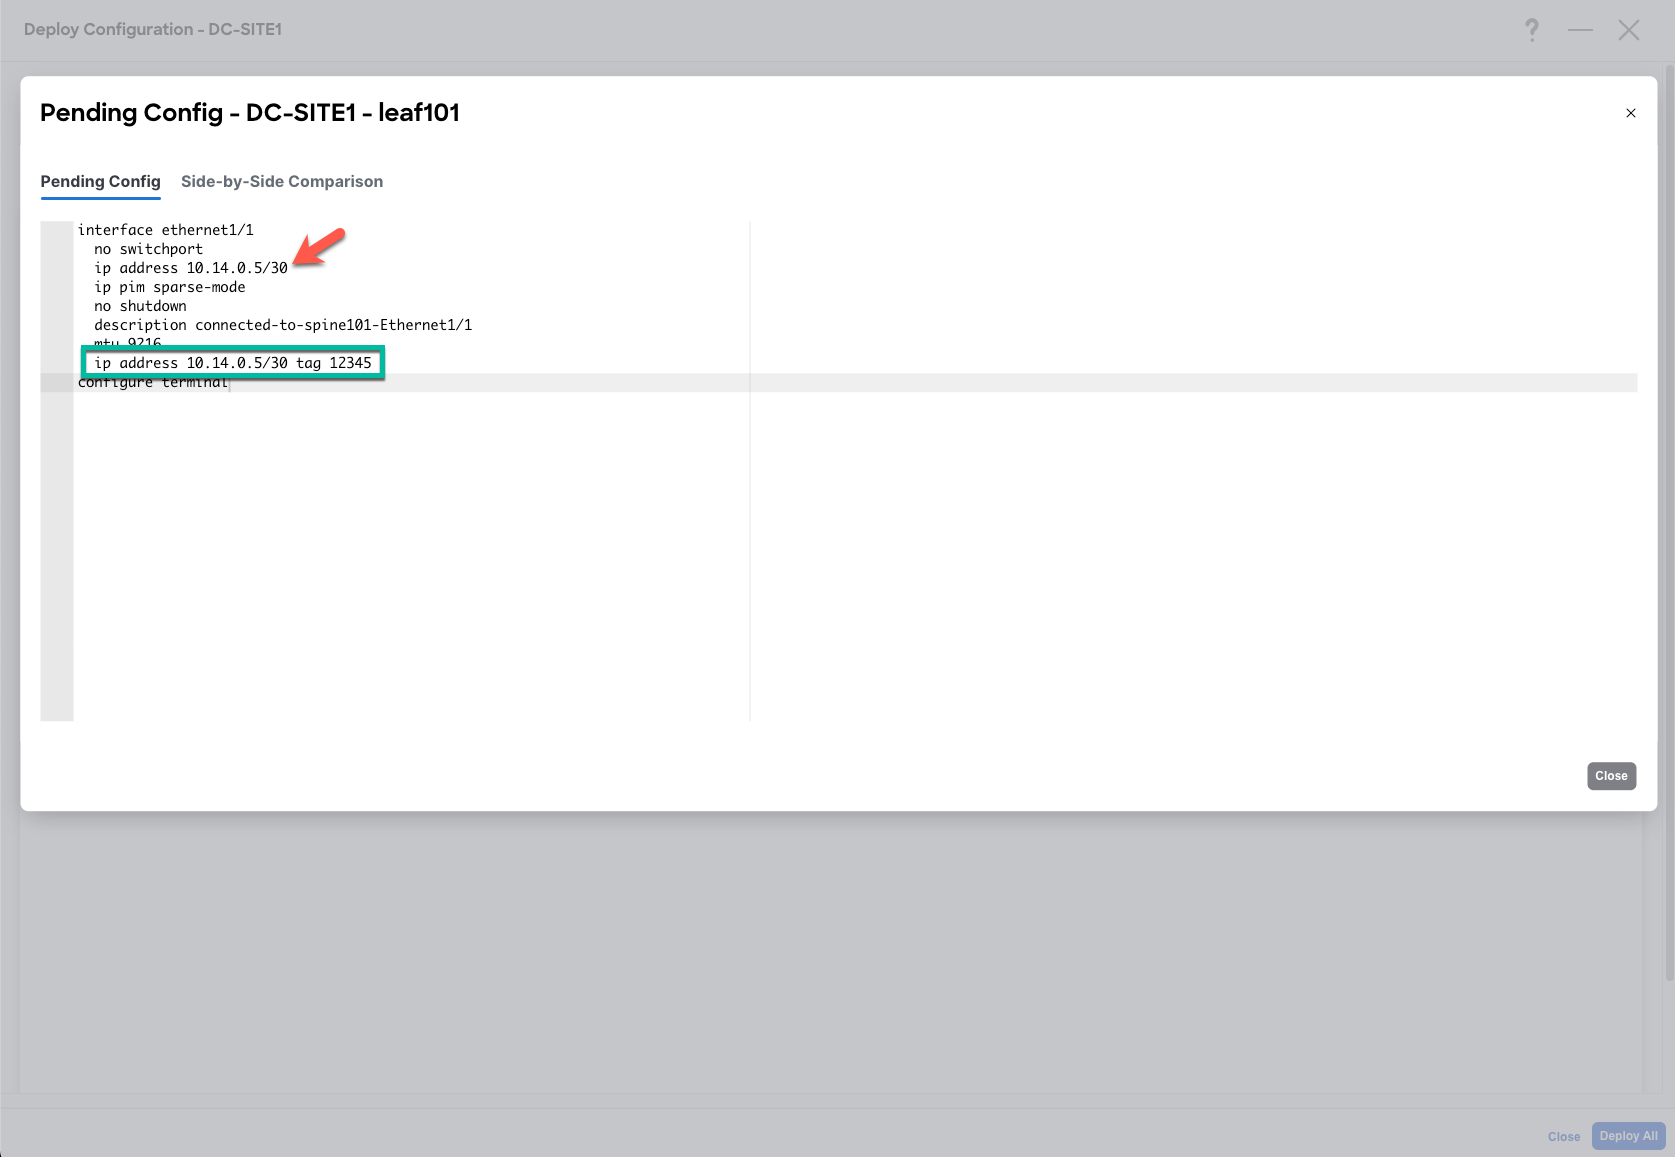
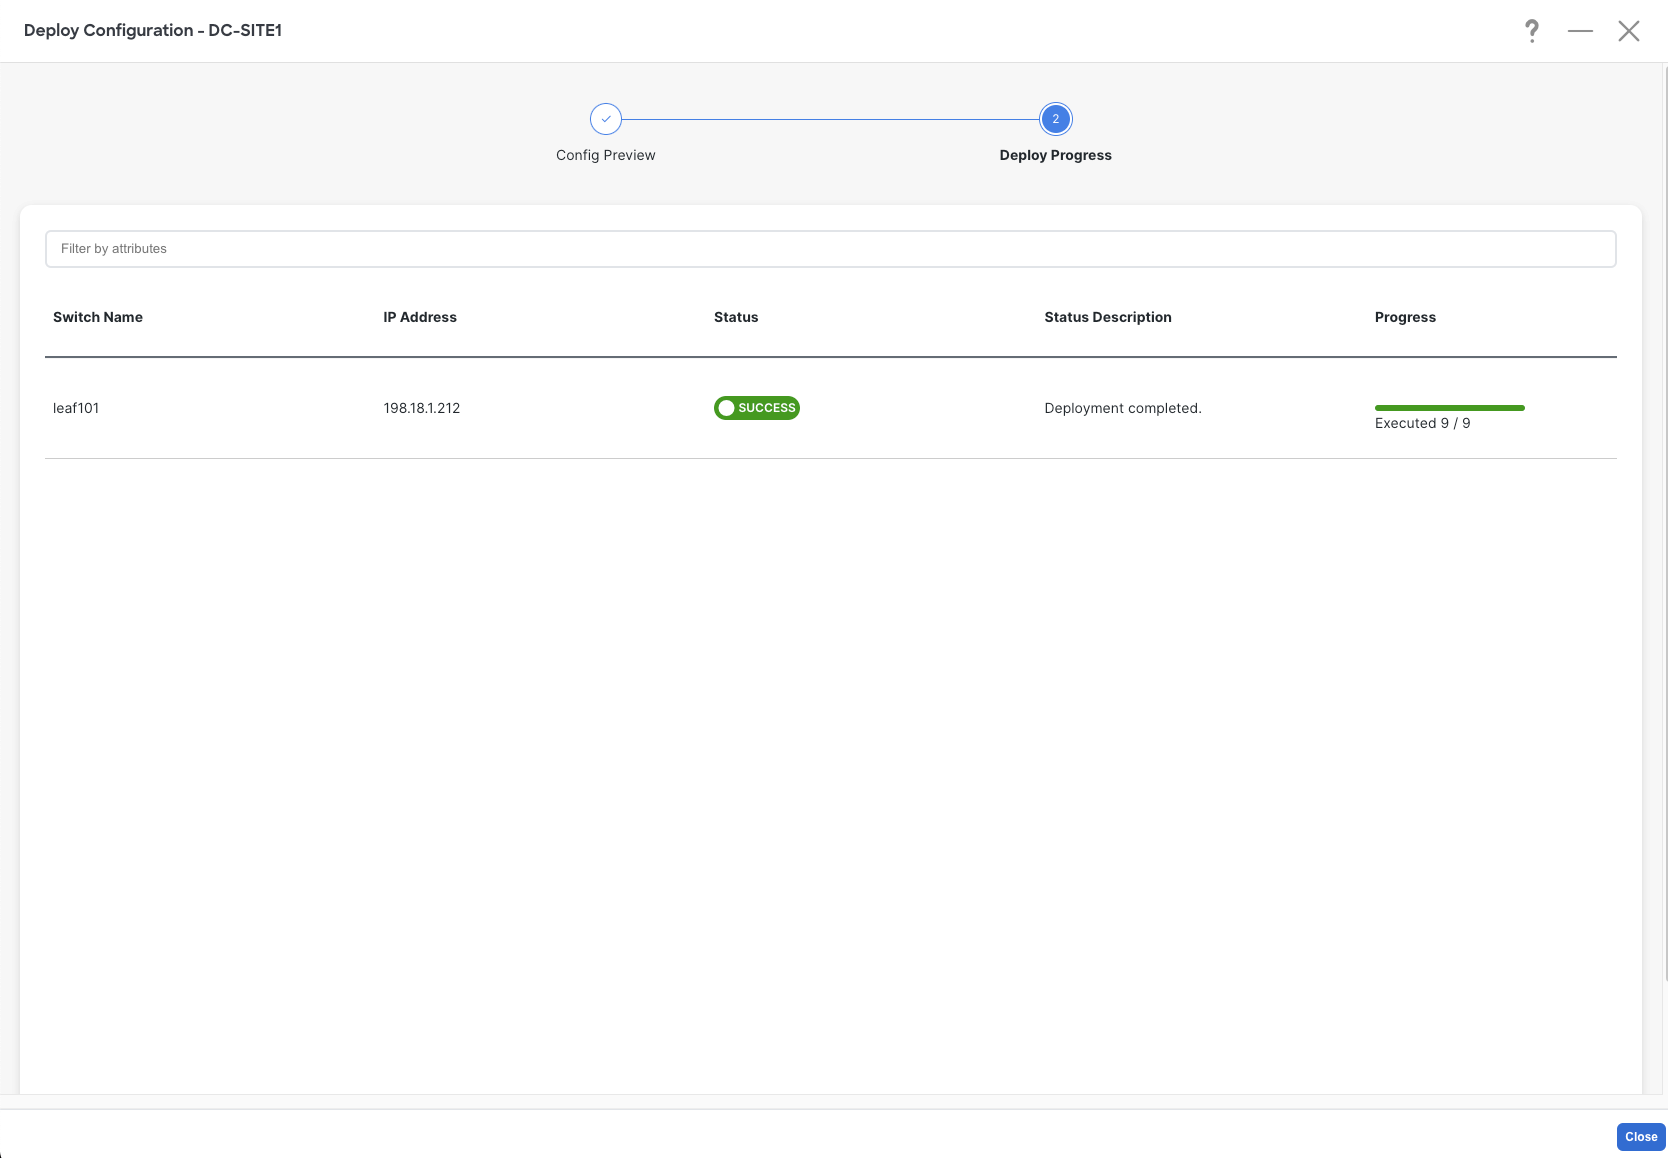
Deploy the config. 🚀
Deployment of new custom templates via Ansible
It’s not all about clicking and dragging in the UI world, right? 😜
Here’s how we can use an Ansible module to deploy the template with variables:
					- name: Create policy including required variables
  cisco.dcnm.dcnm_policy:
    fabric: "{{ ansible_fabric }}"
    config:
      - name: ADD_TAG_TO_INTERFACE       # This must be a valid template name
        create_additional_policy: false  # Do not create a policy if it already exists
        priority: 500
        policy_vars:
          INTERFACE: Ethernet1/1
          INTERFACE_IP: 10.14.0.5/30
          TAG: 12345

      - switch:
          - ip: "{{ ansible_switch }}"
You can find more documentation about the Ansible module on the following page:
https://github.com/CiscoDevNet/ansible-dcnm/blob/main/docs/cisco.dcnm.dcnm_policy_module.rst
Deployment of new custom templates via API
Do you like more API calls? No problem I have that ready as well:
POST: https://{{NDFC-IP}}/appcenter/cisco/ndfc/api/v1/lan-fabric/rest/control/policies/bulk-create
JSON payload:
					{
    "nvPairs": {
        "INTERFACE": "Ethernet1/1",
        "INTERFACE_IP": "10.14.0.5/30",
        "TAG": "12345"
    },
    "entityName": "SWITCH",
    "entityType": "SWITCH",
    "source": "",
    "priority": 500,
    "description": "",
    "templateName": "ADD_TAG_TO_INTERFACE",
    "serialNumber": "{{serialNumber}}"
}
Conclusion
In conclusion, navigating the intricate world of NDFC to tailor network configurations for specific needs can be both challenging and rewarding.
We’ve explored the importance of creating custom templates. By incorporating variables into CLI commands and utilizing forms for easy input, we’ve made these templates both reusable and user-friendly.
Diving into the Ansible playbook adds another layer of efficiency and customization, showcasing how automation can simplify complex tasks.
Remember, the network world is not just about predefined paths; it’s about carving out your own route with the right tools and a dash of creativity.
Stay curious, keep experimenting, and never hesitate to tailor your approach to meet those unique network challenges! 🚀